Google Search Console (or Google Webmaster) is designed for website owners. It has a number of useful features, so adding a site there can be considered a must. Tools in Google Webmaster will allow you to get a large amount of information about the status of your site, and it will also notify you in case of any problems.
How to add a site to Google Webmaster?
You can add a site using the link https://www.google.com/webmasters/tools/home?hl=ru, there you need to click the "Add resource" button. The link will be available only to those who have a Google account, if not, you will need to create it. You will be immediately offered the recommended way to verify the rights to the site:
I think no one will have any difficulties with this. If necessary, you can use alternative methods where there are:
- Adding a meta tag to the main page code;
- Using your Google Analytics account;
- Using Google Tag Manager;
- Using a domain name registrar (the most dreary way, especially for Russian registrars - I don't recommend it to anyone).
Site data in Google Webmaster
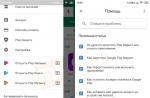
The first page is the toolbar. There the basic and most important information about your site:

In the section "Messages" you will receive notifications from Google. There they can notify about the unavailability of the site as a whole, about individual urls, phishing, about sanctions and other important events. By default, notifications will be duplicated to mail.
Search view
There are as many as six items in the "View in Search" section. The first one reports structured data (if any). "Advanced Cards" allows you to create cards with data about products, offers and events, which are then sent to Google search. "Marker" allows you to improve the display of the site in the search, there you will find a video tutorial on how to do this. Overall, the tool is useful.
"HTML Optimization" is a very useful item that shows information about problems with code or metadata:

There are also six points in the "Search traffic" section, the section is useful and necessary. Search Query Analysis allows you to find out the number of clicks, CTR, position and number of impressions.

For each request, you can see the dynamics of changes in its position and other indicators. The tool as a whole is very functional and well suited for analyzing your site's position on Google. Although, unlike specialized services for checking positions, there is a delay of 2-3 days.
"Links to Your Site" will show you the domains and pages that link to you, the pages on your site that are linked most often, and the link anchors. "Internal links" allows you to see which pages on your site link to a specific page, that is, to see the internal linking. The tool is not the most convenient, it is far from https://www.page-weight.ru.
"Manual Action" will notify you of sanctions that may be imposed on your site. It is good when there is no information at all in this section. "Targeting by countries and languages" allows you to see which country your domain is tied to, as well as set language settings using the hreflang attributes (you can read more in the section itself).
"Mobile Viewing Convenience" in Google Webmaster will notify you of possible problems displaying the site on mobile devices... If there are any comments, they need to be addressed, as they are almost certainly due to them that Google has already downgraded your site in the mobile search results.

Indexing Status will show the indexing data of your site. There they will show not only the history of indexing and the number of pages in the index, but also those blocked in robots.txt (helps to find those mistakenly blocked), as well as deleted ones.
"Keywords in content" will show not only the keywords themselves, but also their importance from the point of view of Google. Sometimes there you can see something that should not be (like the words that are not overwritten in the screenshot below), so you should definitely look into this section.

Blocked Resources will display what Google has seen, but it is prohibited from indexing. Remove URLs allows you to exclude certain pages on your site from search (not from index). Sometimes this feature can be useful.
Google Webmaster's section dedicated to your site's crawl data. Allows you to find crawl errors, find out statistics, look at the page as a Google bot, check robots.txt, specify the path to the sitemap, configure URL parameters for more efficient crawling.

The last item on the Google Webmaster menu is "Security Issues". It's okay if there is no information at all. Alerts about serious issues that can directly affect the performance and ranking of the site.
Add a site to Google Webmaster or not? In my opinion, the answer is obvious, especially if you are interested in promotion, including in this search engine, which accounts for more than 40% of the requests of Russian-speaking users.
Good day to all, readers and guests of the blog. Surely many have paid attention, while reading news sites, to a very interesting option for posting similar articles with an image inside the message. On large information sites, such design of articles is often used. With a short announcement - link or title. The post is updated and amended.
I really like this solution. You read and be sure to pay attention to the image.
Implementing this on a blog is quite simple. We will need the code that was suggested in the post for styling the blog post. Who missed this cheat sheet, you can immediately follow the link under the picture on the right. This is how the result of what is being discussed today will look like.
How to implement it.
Let's take the same code and analyze the rest.
Here is the announcement or post title
What about the picture and the link? In the place where you intend to set the picture with the title, go to the HTML mode in the message editor. We install this code and then just write our message. We load the picture in the usual way and then move it to the resulting block. I offer a screenshot using this post as an example.

If you can't do this, read the other option in the cheat sheet mentioned above.
In the line highlighted in blue, enter the title of the post or article announcement that you want to draw the attention of visitors. And then everything is as usual. Set the text color, font size. style. And use the link function in the editor.

We do the same on the left side.
Replace the value from right to left.
Then I just removed the frame border-top: 3px solid # 000; border-bottom: 3px solid # 000;
Already a completely different look. With such simple actions, we draw up messages and let readers immediately follow the link to articles on the topic.
Of course, it's not worth sculpting a lot of this. Still, these are superfluous images and links. 2-3 blocks, I think it will be enough. One way or another, in this way we also do internal linking. And in this version, they added a visual effect.
Hope this is useful to you. If you have any questions, ask in the comments. Let's figure it out.
Good day, friends. An interesting solution for clicking on an icon that will not annoy visitors. In it you can place either important announcements or other necessary information. It will appear only when the user clicks on the icon (in my case, the android icon).

The code is absolutely not complicated, without any libraries and heavy scripts. And it is installed in an elementary way into an HTML / JavaScript gadget. The picture itself and the "close" button in svg format... You can clearly see this "construction" on the test blog in the upper right corner.
DemonstrationThe whole code
Copy the finished code in its entirety, install it in the HTML / JavaScript gadget anywhere on the blog layout. The icon will be positioned exactly as intended. The grayed out line contains a semi-transparent background image of the popup itself. If unnecessary, you can remove from the code and set the preferred main background to your taste by changing the background value: #fff to what you want.
Thank you all for your attention. See you.
subscribe to new cheat sheets
Hello friends. I want to show you how easy it is to change the overall background of the entire blog. Although the background itself can be easily customized in the Theme section. There you can choose ready-made backgrounds or fill in your picture and make the appropriate settings. However, I decided to offer you an easier option, in my opinion. Here we ourselves can adjust the size of the background image. Rather, its width.
Let's get down to business. My test blog originally looked like this. I marked the space (or background of the entire canvas) that was set in the theme settings.

Now we will change it to such a picture.

To get something like this

Here I want to draw your attention. The width of the blog in my case is 1200 px. The dimensions of the background image are 1450 by 950 px. The picture completely filled the entire space.
If the size of the background image is less than the size of the entire blog canvas, then it will not cover the entire space and will look like a border. See the difference

It seems to be quite acceptable too. Some people decorate their websites in this way for the holidays. In any case, consider both options. With a correctly selected background or created in any editor, both options can be adjusted.
You don't need special skills.
1. Select the desired picture and copy its address.
2.Copy the code below and set the address of your picture
3. Go to the Theme tab - Change HTML we find]]>and install the finished code above this line.
The result will be visible when viewing the topic. If you are satisfied with it, feel free to press save and admire the new template.
Again, I will repeat myself. In case the picture turned out to be less than the size of the blog's width or even hidden out of sight, you need to set the width value in the code. Add just one line and it looked like this
body (
background: url (http://www.clipartbest.com/cliparts/9iz/EnR/9izEnR56T.png)
no-repeat top fixed;
background-size: 100%;
}
With background-size value: 100%; you can play around by changing it to a smaller one until you achieve what you want.
With such simple manipulations, you can create different backgrounds for different holidays, seasons or your mood.
You may have missed
All good and see you.
Hello everybody. Today I will offer you a code when a picture appears when you hover over a link. There are a lot of options for designing links. But this one will be an original solution for thematic blogs. Or for a separate message. You can always choose a picture for the desired theme and design.

You can see the live demo immediately below. I gave links to some pages of my blog for clarity. You will, of course, change them to the addresses of your pages. Pictures and text - respectively.
Here is the code itself.
Dear readers http: //www.site/ ">" link text ", Happy New Year 2020 http://www..html "> link text. Let it begin with a new takeoff To better life heights AND a good bank account http: //www..htm l "> link text Will bring agreement in business, In personal life - a lot of happiness !."
Copy the entire code, make the necessary settings and install it in the post editor in HTML mode in the desired place. The example contains 3 links. In any case, you can remove or add a line like this
">" link text ")
And with all my heart I would like to wish you all a very happy New Year. Smiles, joy, health, well-being to family and friends. Goodness and peace to your home !!!
HAPPY NEW YEAR 2020, EVERYONE !!!
Hello everyone. Navigation in standard templates Blogger doesn't get any attention at all. Not everyone will notice a barely noticeable panel at the end of the page. Therefore, any new visitor may not see the link to previous or next blog posts.
There are a lot of navigation styles. But this is not the first time that many of them have been "ordered to live long." And site navigation is perhaps the most basic element. Therefore, I will give links to articles where I have already published options for the design of navigation and I will offer another working code. This is how it will look under the blog posts.
Today's version looks quite elegant. Displays a numbered list of pages in the pane and displays the previous and next pages correctly.
To install, you first need to copy this code
In the code, I highlighted the number of posts displayed on one page (3). You can change to the number you want. Well, the text, if you like. For example - "forward - backward" or "tudy - syudy" etc.
Now go to the tab THEME - Change HTML ... Using the hotkeys Ctrl + F (read), we find the closing tag


 New interface
  Old interface


 Old site indexing report
  Old site error report
 Indexing URLs for the site as a whole