In this article, we will show you an easy way to remotely update group policies on clients (computers and servers) in an Active Directory domain, without having to access the console on the remote machine and without using the gpupdate command.
One of the toughest challenges in AD Group Policy management is testing policies on the fly, without rebooting the computer or accessing the local computer and running a command.
Remote Group Policy Update provides the ability to use a single GPO Management Console (GPMC.msc) to both create, modify, and apply and test Group Policy.
The functionality of remote updating of group policies first appeared in Microsoft Windows Server 2012, in all subsequent versions (Windows Server 2016, Microsoft Windows 10), this functionality and its stability have gradually improved.
Requirements for Remote Group Policy Update to work:
Server environment requirements:
- Windows Server 2012 and higher
- Or Windows 10 with RSAT (Management tools) installed
Requirements for clients:
- Windows 7 and higher
Requirements for network communication (firewalls) between server and clients
- TCP Port 135 must be open
- Windows Management Instrumentation service is enabled
- Task Scheduler Service (Task Scheduler Service)
If your environment meets these requirements, open the Group Policy Management Console (GPMC.msc), select the OU (container) that contains the target computers on which you want to force the GPO update.
Right-click on the desired container and select Group Policy Update.

In the window that opens, information about the number of objects in this OU will appear on which the GPO will be updated. To confirm the action, click on the "Yes" button.

In the Remote Group Policy update results window, you will see the status of the policy update, as well as the status of this operation (success / error, error code). Naturally, if a computer is turned off, or access to it is restricted by a firewall, a corresponding error will appear.

Configuring Windows 10 Update Policy is configuring how Windows 10 receives updates. In Windows 10, Update settings have been moved from Control Panel to System Settings. Windows 10 does not have the same settings as there were in the Control Panel, and therefore it became impossible to disable updates or choose how to receive them. However, you can use the Registry Editor and Local Group Policy Editor to disable the updates and set how they are received.
Configuring Updates Using the Local Group Policy Editor
Launch the Local Group Policy Editor by pressing two keys on the keyboard at once WIN + R gpedit.msc and click OK.
Windows 10 Upgrade Group Policy
Computer Configuration - Administrative Templates - Windows Components - Windows Update... Click on the last item Windows Update and then on the right side find the item Configuring Automatic Updates and change its settings.
 Configuring Windows 10 Updates Group Policy
 To do this, in the window that opens, you need to put a dot at the top at the Enabled item, and then set the update settings below. Click OK. Then, to make the settings you have made work, open System Settings - Update & Security - Windows Update and press the button Checking for Updates.
 Once you're done configuring Windows 10 policies, run the update
 After that, the settings you made in the Local Group Policy Editor will take effect.
Configuring Updates Using Registry Editor
Launch the Registry Editor by pressing two keys on the keyboard at once WIN + R... The Run window will open in which you enter the command regedit and click OK.
 Open Registry Editor and create four settings there to manage Windows 10 updates
 In the left part of the editor window that opens, open HKEY_LOCAL_MACHINE - SOFTWARE - Policies - Microsoft - Windows... Hover over the last Windows item and right-click. In the context menu that opens, select Create - Section... Name the new section WindowsUpdate.
Then hover over the newly created WindowsUpdate section and again create a section called AU.
Then hover over the newly created AU section and right-click and select New - DWORD Parameter (32-bit)... The newly created parameter will appear on the right side of the window, name it AUOptions... In the same way, hovering over the AU section, create three more parameters and name the first NoAutoUpdate, second ScheduledInstallDay and the third ScheduledInstallTime(optional NoAutoRebootWithLoggedOnUsers). Now these four new parameters need to change the value.
For the AUOptions parameter
- 2 - Get notified before installing and downloading any updates.
- 3 - Automatically receive updates and notifications about their preparation for installation.
- 4 - Automatically receive and install updates on a specified schedule.
- 5 - Allow local administrators to choose the update mode and notifications.
For the NoAutoUpdate parameter
- 0 - Enabled automatic installation of updates that will be downloaded and installed depending on the settings made in the AUOptions parameter.
- 1 - Automatic installation of updates is disabled.
For the ScheduledInstallDay parameter
- 0 - updates will be installed daily with a value of 4 for the AUOptions parameter.
- 1 - updates will be installed every Monday with a value of 4 for the AUOptions parameter.
- 2 - updates will be installed every Tuesday with a value of 4 for the AUOptions parameter.
- 3 - updates will be installed every Wednesday with a value of 4 for the AUOptions parameter.
- 4 - updates will be installed every Thursday with a value of 4 for the AUOptions parameter.
- 5 - updates will be installed every Friday with a value of 4 for the AUOptions parameter.
- 6 - updates will be installed every Saturday with a value of 4 for the AUOptions parameter.
- 7 - updates will be installed every Sunday with a value of 4 for the AUOptions parameter.
For the ScheduledInstallTime parameter
From 0 to 23, updates will be installed at that number of hours, depending on the set parameter and when the AUOptions parameter is set to 4.
For the NoAutoRebootWithLoggedOnUsers parameter
- 0 - After the installation of updates is completed, the computer will automatically reboot, it works with a value of 4 for the AUOptions parameter.
- 1 - After the installation of updates is completed, the computer will not automatically restart, it works with a value of 4 for the AUOptions parameter.
I decided that I needed to write a short article that could and should be referred to quite often. And the topic for this article is how to update Group Policy.
Why do I need to manually update the policy?
When can this come in handy? Almost always when you change a parameter in a policy. No, don't assume that policy should only be updated manually. In fact, it updates automatically. Once every hour and a half! Imagine you changed some policy and wait an hour and a half to check if it works exactly the way you wanted. Brad, isn't it?
Naturally, nonsense. Therefore, there is a way to force the computer to update Group Policy manually. And before that, a little theory. As you know, politicians are divided into two large groups:
- computer policies
- user policies
The policies from the first group apply to all users of the computer, while the policies from the second group apply only to individual users. So, when the computer boots, the group policies are loaded immediately. Moreover, all policies are read from scratch, which ensures that the latest changes are applied. User policies, on the other hand, are checked and loaded when the user logs on to the system.
Knowing these facts, here's a solution for you. For user policy changes to take effect - log out and log back in. If you need to update computer policies, restart your computer. Joke.
Command to update local group policy
The described methods will certainly lead to the desired result, but they are pretty stupid. After all, there is one great command line utility called gpupdate. In general, the command is enough to update the group policy:
Gpupdate / force
With such a simple action, you can quickly update computer policies.
Summary: Microsoft Scripting Guy, Ed Wilson shows you how to trigger a Group Policy update using PowerShell.
Updating Group Policy on the Domain
Sometimes I make changes to Group Policy on the network and I need to apply the changes to all computers. And sometimes I need to update the local group policy on my computer.
To update the Group Policy settings, I use the utility GPUpdate... It has some parameters. By default, the utility updates the policy of both the computer and the user. But this can be controlled using the parameter / target... For example, if I am bored to update only the computer policy, I will specify / target: computer... To update only user policy - / target: user.
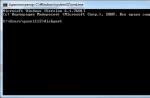
PS C: \> gpupdate / target: computer
Updating policy ...
Default GPUpdate applies only updated Group Policy settings. To apply all settings, use the parameter / force... The command below updates all Group Policy settings (regardless of whether they have been changed) for the computer and the user.
PS C: \> gpupdate / force
Updating policy ...
Computer Policy update has completed successfully.
User Policy update has completed successfully.
First, we get a list of computers in the domain
The first thing I need to do is get a list of all computers in the domain. For this I use the cmdlet Get-ADComputer included in the Active Directory module.
Note: The Active Directory module is part of RSAT.
I store the resulting computer objects in the $ cn variable.
$ cn = Get-ADComputer -filt *
Second, we create remote sessions
The next thing I need to do is create remote sessions with all computers. To do this, I need to provide credentials to connect to computers, as well as create the sessions themselves using the cmdlet New-PSSession.
First, I'll use the cmdlet Get-Credentials and store the returned object in the $ cred variable.
$ cred = Get-Credential iammred \ administrator
$ session = New-PSSession -cn $ cn.name -cred $ cred
Please be aware that the domain may have shutdown computers, so the command may return errors. Nevertheless, despite the errors, Windows PowerShell creates sessions with work computers.
The presence of a large number of errors can inspire some concern. Since the session objects are stored in the $ sessions variable, I can easily verify that they are created.

Now let's run the command on all remote machines
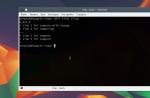
To run the command GPUpdate on all remote machines i use the cmdlet Invoke-Command... It uses the sessions we saved in the $ sessions variable. Alias for cmdlet Invoke-Command – icm.
icm -Session $ session -ScriptBlock (gpupdate / force)
After running the command, the results are displayed in the Windows PowerShell console.

Verifying Group Policy Updates
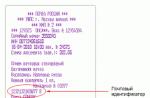
When the Group Policy settings are successfully updated on the workstation, event ID 1502 is written to the System log. I can use the cmdlet Invoke-Command for this information.
icm -Session $ session -ScriptBlock (Get-EventLog -LogName system -InstanceId 1502 -Newest 1)
The command and its results are shown in the figure below.

Another cool thing about Group Policy
Sometimes I have to call tech support and they ask to update the Group Policy on my local computer. This is not a problem as I can run GPUpdate straight from PowerShell. The difficulty arises when they ask me to update Group Policy 5 times with an interval of 5 minutes. But this can be solved with a single line of code.
1..5 | % ("Refreshing GP $ (Get-Date)"; gpupdate / force; sleep 300)

Ed Wilson, Microsoft Scripting Guy
Original:
· No comments
Updating Microsoft Windows Group Policy settings on a local machine is not very difficult to do with a tool like Gpupdate, but updating these policies on remote computers in a domain cannot be done using Microsoft Management Console (MMC) or any Microsoft products available today. In this article, I'll walk you through various tricks, scripts, and free tools that allow you to update Group Policy settings on remote computers in a domain.
Introduction
Most administrators are aware of the problem of applying group policies to remote computers. After configuring some important policy, sometimes we would like this GP group policy to appear on client computers immediately. But the problem is that by default, the so-called background processing occurs only in the interval from 90 to 120 minutes (randomly) - if we want to speed up the update process, then here we are on our own. Of course, there is a reason why the policies simply don't update every five minutes or even in real time. The load on the domain controllers and the network in most environments will be too heavy to handle. But if it becomes necessary to quickly apply a very important security setting for a large number of clients, then it would be a good idea to prepare for such a situation.
What we really need is to enable the administrator to update policies on computers Computer1, Computer2 and / or Computer3 - as well as policies for users A, B and C from a centralized point - the administrator's workstation, in case the administrator deems it necessary. ... Take a look at Figure 1.
Figure 1: Scenario
We have a great tool called Gpupdate that is built into Microsoft Windows XP and newer operating systems - and we also have a tool called Secedit for Windows 2000 - but unfortunately the Gpresult command for the Gpupdate and Secedit tools can handle only on local computers. Of course, we already have a configured installation system, like Microsoft Systems Management Server (SMS), we can use this system to send small scripts that will run the required command for a group of users or computers.
If your network does not have such a system, then you should try more creative approaches. the alternative is to go to all the computers you need with a tool like Remote Assistance, or send out an email to all users asking them to run the Gpupdate command ... So be more creative.
Problems
Before diving into the details, I want to mention the common problems people face when trying to use the methods mentioned in this article.
Firewall issues:
As with other connections initiated on the network, packets that try to update policy settings on remote computers will not be able to traverse the local firewall on remote computers (such as the firewall that is built into the Windows operating system, starting with Windows XP Service Pack 2 or later) if the firewall is not configured to allow such inbound traffic (from the selected subnet, IP, or similar). The built-in firewall in Windows must be configured to allow inbound traffic that we generate using a Group Policy Object, so as ironic as it sounds, this policy is the only one that we cannot use for remote computers with firewall enabled.
The policy settings that must be set for all methods mentioned in this article are as follows:
Computer Settings | Administrative Templates | Network | Network Connections | Windows Firewall | Domain Profile | “Windows Firewall: Allow remote administration exception”.
Other devices that act as firewalls between the central computer and the remote computers must also respect the above settings (see Help test for the mentioned policy in GPEDIT.MSC).
Administrator rights:
The user who initiates the process on the remote computer must have local administrator rights on it - otherwise, everything will not work as you expect.
After you've taken care of all of this, let's go over the methods themselves.
Scripting
The scripts are free and widely distributed to information technology professionals on the Internet - they are really “Open Source”. Microsoft has provided us with several built-in capabilities to extend the capabilities of the operating system and environment - in this article, we'll show you how you can use these capabilities to update GP policies remotely.
Gpupdate & secedit
We must first mention the Gpupdate and Secedit tools, without these tools, none of the following would be possible. The scripts and tools that are mentioned here all assume that one of these tools is installed on the remote client, depending on the version of the operating system. As mentioned above, the Secedit tool is included with the Windows 2000 operating system, and the Gpupdate tool was taken from the Windows XP operating system and up, it is even present in the Longhorn operating system as it is now. In the following scripts, I'll focus on Gpupdate - we can check the operating system version before running Gpupdate or Secedit, but this check can be added later without too much difficulty.
The Gpupdate.exe file is by default located in the “% windir% \ system32” folder, so we don't need to know the absolute path to its location on the remote machine. The tool can be called with a set of different keys:
Syntax: Gpupdate
In our do-it-yourself scripts for HTML Application (HTA) and Windows Management Instrumentations (WMI), we will focus on running Gpupdate without keys - either with “/ Taget: Computer” (to update computer-specific policies) or “/ Target: User ”(to update user-specific policies). Other options can be enabled with a little work - but do we really need “/ Logoff” or “/ Boot”? This means that users can log off when needed (installing software, changing folders, etc.) or even requiring a computer restart while the user is logged on. Is this really what we need? Anyway, we can also use a tool like Shutdown.exe for this purpose - so my opinion is not going to be too popular.
PsExec
The first method I want to talk about is very easy to use and requires little or no programming skill. Why come up with something that has already been invented, right? The tool, called PsExec, was developed by Mark Russinovich, the former owner of Sysinternals, which was acquired by Microsoft in July 2006. Version 1.73 is now available and can be downloaded from the Microsoft Technet website.
PsExec is great when it comes to remote execution, mainly because it doesn't require agents to be installed on the remote machine. You just need to specify the name of the computer and the command that you need to run along with the switches in the command line - and that's it!
A little trick is to put the PsExec.exe file in the "% windir%" directory because in this case, we do not need to specify the full path to this file when running it from the command line.
In order to update group policies on a remote machine, all we need to do is set ‘Computername’ (computer name) in the following command: “PsExec \\ Computername Gpupdate”. The user who is working on the remote machine will not even know what happened, but in the background the Gpupdate command will update the policies for the user and for the computer and apply any lost settings. You might think that the PsExec command needs to be run with the -i switch to update the user-specific policies for remote users, but testing shows that this is not necessary.
FLEX COMMAND Script
So, the method mentioned above allows you to update policies for a single user or computer, but what about updating an entire Organizational Unit (OU) by using PsExec and Gpupdate together? For this purpose, I created a demo script to show some of the possibilities that we can take advantage of through scripting. The script is called FLEX COMMAND and can be downloaded from here. You can easily open the HTA file with a text editor like Notepad and see the code, no hidden magic.
When FLEX COMMAND starts, it connects to the Active Directory AD-domain of the computer on which it is running. Therefore, it must be executed on a computer that is a member of the domain, otherwise the OU will not be found.
Select OU, the tool should be processed on machines that are "alive" (responding to WMI requests). The last thing to do is insert the command line that we want to run on the local machine for each object located in the selected OU. The text line “(C)” must be left as it is. it will be replaced with the name of the computer when the script is running.

Figure 2: FLEX COMMAND in action
Let's assume that the OU named “MyComputers” contains only 3 computers: Computer1, Computer2, and Computer3. The command we typed “psexec \\ (C) gpupdate” then translates into 3 following commands: “psexec \\ computer1 gpupdate”, “psexec \\ computer2 gpupdate”, “psexec \\ computer3 gpupdate” - all commands will be sequential executed (if the computers are "alive") and the deleted policies will be updated.
The tool can be modified so that the list of computers will come from a file (txt, csv, xls, etc.), a database, a special security group in AD, using manual selection from the list. The way the script is run can also be changed, it is just a demo script, the main purpose of which is to show the capabilities we have.
The script is distributed free of charge, and you can test, use and modify it at your discretion - details.
Windows Management Instrumentation (WMI)
Ok, the PsExec tool is really great, but are there any manual methods that I can use to better customize the solution for my environment? Yes, in fact there is! WMI is very powerful and easy to use after a few hours of study. If you own WMI and you are ok with firewall permissions and administrator rights, then you can do almost anything in the Windows environment - even shutting down your computer remotely, rebooting, and executing remote commands.
I created another script for demo purposes called OU GPUPDATE. This HTA script uses several different techniques — it is actually a small modification of the FLEX COMMAND script. First, it parses the structure of the OU in AD (top drop-down list), gives users the ability to select computers from the OU, run Gpupdate with / Target: User or / Target: Computer or no parameters at all. Only live computers (which respond to WMI requests) will be affected by default.

Figure 3: Select what needs to be updated - User Settings, Computer Settings, or both
This script is free and you can test, use and modify it as you see fit from here.
Remote scripting
In addition to WMI, we have the ability to use conventional remote scripting (VBScript). This can be enabled by setting just one value in the HKLM part of the computer registry, and the scripting engine must support remote scripting, and from that point on, everything else becomes fairly obvious. The procedure is to copy the script file to the remote computer (this script must use Gpupdate) and then send a VBScript command that runs the script remotely.
RGPREFRESH
RGPREFRESH is a tool developed by Daren Mar-El. Its tool uses WMI and runs either Secedit or Gpupdate depending on the operating system on the remote machine, with keys selected by the user. These keys provide you with the same capabilities as when using this tool locally.
This tool processes one machine at a time, but together with a tool called FLEX COMMAND (as a shell), this tool can be used for an entire OU with just a few clicks ... Both RGPREFRESH and PsExec can also be used with DSQUERY , FOR and other command line utilities on more than one computer at a time.

Figure 4: Parameters for RGPREFRESH
This tool can be downloaded for free from this page.
Specops Gpupdate
Special Operations Software, Specops, an international software company, offers Active Directory management products based on group policy technology. The company has released its own solution for remote policy updates, and the best part is that it is completely free. The current version of Specops Gpupdate is 1.0.2.13 (2006-10-25) and the utility itself can be downloaded from here. This tool not only has the functionality that we developed in the scenarios mentioned above, but it also adds several control capabilities. Let's take a look at this great utility ...
Installing Specops Gpupdate
Installing an MSI application is very easy - all it needs is Active Directory Users & Computers (ADUC) MMC users and computers, as well as Microsoft .NET Framework version 2.0.

Figure 5: The installation process is as simple as installing MSI packages (click on next, next, next)
After installing the MSI file in the GUI, nothing changes the GUI, and only with the help of “Add / Remove Programs” you can find out that Specops is installed on our machine. Therefore, we have to do additional work for the magical transformation ...
Extension for Active Directory User & Computers
After installing Specops Gpupdate in the AD Forest, you need to run a special command
“% CommonProgramFiles% \ Specopssoft \ Specops ADUC Extension \ SpecopsAducMenuExtensionInstaller.exe” / add
This is not a schema update, although you must have corporate administrator rights to run this command. This command is completely reversible, just run it again with the “/ remove” switch. All it does is register so-called “Display Specifiers” to enhance the view with ADUC.
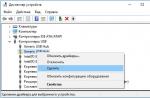
Then right-click on the OU or Computer object and you will see four new commands appear: Gpupdate, Restart, Shut down, and Start. It is possible to make a selection of several computers and OUs by holding down the key and pressing the right mouse button on the necessary objects.

Figure 6: ADUC MMC expanded
If you, like me, have a question whether the changes can also be applied to non-DC domain controllers, then the answer is yes! After installing the Windows Server 2003 Admin Pack Service Pack 1 Administration Tools Pack on the Windows XP Professional client, .NET Framework 2.0, and Specops Gpupdate, the administration console looks the same as on a DC, and has the same capabilities.
Gpupdate options
The first parameter we have allows us to run the Gpupdate command remotely on selected computers. After selecting Gpupdate, we must confirm the selection, as shown in Figure 7, and check the use force option if we want to use the gain setting.

Figure 7
After clicking on the OK button, a dynamic graph will appear, see Figure 8, as well as a report on the status of the update progress.

Figure 8
Restart and Shutdown options
The next two parameters, 'Restart' and 'Shutdown', are very important to control, so we need them right in ADUC. We can run the restart or shutdown command, and also set the time interval in seconds that is given to the user to close all running applications. Writing a script that does all the same is not very difficult using WMI or using the Shutdown.exe command with the correct keys, but thanks to Specops Gpupdate, we get this functionality completely free of charge, no time or effort.

Figure 9: Reboot Message Dialog Box
Start Parameter The last of the four parameters is called 'Start' and is actually the Wake on LAN or WOL functionality built into the ADUC. After selecting and confirming this option, see Figure 10, the so-called Magic packets will be sent to the MAC addresses of the client computers, and they will start downloading. For WOL to work, the corresponding functionality must be supported by the BIOS of the computers. Specops Gpupdate interacts with Microsoft DHCP servers in the corporation to find the information needed to start this process, so it is possible to wake up DHCP clients and only on a network with Microsoft DHCP servers installed.

Figure 10: Confirm Start Remote WOL
By the way, you can also use scripts for WOL, examples of such code are beyond the scope of this article.
Conclusion
We looked at several ways in which you can apply group policies to remote computers. Which method is best for you depends on your environment. Personally, I love scripting, but why work hard on what other people have already created? I have two answers to this question. First, while writing such scenarios, we learn, and the second - special conditions or custom-made. Scripting improves our skills as IT professionals and also allows us to customize out-of-the-box solutions to better suit specific conditions.
Specops has developed a very good free utility that does the basic function of updating policies on network clients. I recommend you try it!
Source www.windowsecurity.com