On some android phones, there is no possibility to transfer applications, various files, personal data, memory card games.
If your device got into this list, then I recommend downloading the file transfer program to the memory card in the Android phone.
There are many such, but the best program for transferring applications and everything else to the Android memory card as for me APMGR III (App 2 SD).
It works great on both the old versions of Android and on the latter: Android 6.0 Android 7.0.
Download the program for transferring files to the SD card "APPMGR III" can be on the playing market or right here on this page (download link at the end of the record).
You can upgrade it to the version of Pro, but I personally do not see in this reason. The tools of the free version is quite enough.
How to use the data transfer program on an SD card
Immediately after downloading and set the process of scanning the contents of your phone, on the subject of programs, files, data ....
Then click on three strips on the left above.

The menu opens. Select Move Applications.

A section will open in which it will be shown which applications can be moved to a memory card.

This is the ability to disable and hide applications that do not use. To do this, go back to the menu, but now select: "Hide Applications".

The hide procedure is very simple and no sense to describe it, but AppMGR III (App 2 SD) can still do something.
It is to clean the cache in one click, delete applications even with a package, sort files, configure sound, vibration and notification backlight.
Other programs for transferring applications or games on the CD card
If, due to any circumstances, AppMGR III (App 2 SD) does not suit you, that is, other similar programs.
For example: LINR2SD, Files to SD Card, SD MAID, App2SD tool, Install Apps on, App2SD & APPM and others. Download You can freely access Play Market.
Developer:
http://android.a0soft.com.
Operations:
Android
Interface:
Russian
Today, applications for smartphones are becoming more and more voluminous. But for Android users it is not a problem, because the programs can be installed on the memory card. It is not difficult. But here's what to do if you need not to install the application from scratch, and transfer it from the internal memory of the smartphone on an SD card? Let's deal with.
Naturally, after installing the card to the smartphone, it will offer you format it into a suitable format. We would not sharpen on this attention if it were not for one "but": the smartphone not only formats the card, but also encrypts it. So other devices (smartphones or PCs) will simply do not read it. Well, we figured out. Go to how to move applications to a memory card on different versions of Android OS.
Android 9.
In this version of the OS, you can quickly and easily transfer applications to an SD card. Single restriction: You cannot transfer preset programs from Google to the map. However, it applies to all versions of Android. In order to transfer the program from internal memory to an SD card, go to the "Settings" section - "Applications and Notifications" section - "Annex Information".
Find the application you want to move in the list and touch it. Select "Storage" and click "Edit". After that, choose your memory card in the window that appears. Reverse transfer is carried out in exactly the same way.
Android 8.
In general, the process of moving the application on an SD card on Android 8.0 is approximately the same as in the later version. You need to proceed to "Settings" - "Applications and Notifications" - "Annex Information". Next, select the application, press "Change" and choose a new storage location. However, it is worth noting that some programs do not support the ability to save on a memory card in the Android 8.0 version. That is, the conditional application x can easily allow you to save yourself on an SD card if you have Android 9.0 installed, but it will not allow you to do it on the eighth version of the green robot.
Android 7 and earlier versions
In these versions of the OS, the process of transferring the application to the memory card looks a little different. Go to "Settings" - "Applications", then click on the desired application and click Edit. Here you can choose where the program should be saved. Only here for obvious reasons this option in old versions of the OS is supported by even fewer programs.
How to move applications on an SD card using Link2SD

Link2SD allows you to transfer several applications to the memory card at once and provides a lot of useful information.
If your phone does not support the movement of applications on an SD card, but you still want to do this, there is a program that can help you. It is called Link2SD. And it will be useful not only in the situation described above, but in the event that you want to move several applications at a time, and not do it for each program manually.


Apps2SD: All in One Tool This application that can not only transfer applications data to an SD card, but also "all in one", which includes many interesting features. It is the only one of its kind.
To work apps2SD, it is important to know about the need that:
- on the device must be obtained and they must be issued apps 2sd
- you must have 2 partitions on the SD card (the application provides the ability to create two sections)
- must be installed Busybox. (In no absence, it will be proposed to download)
- must be installed Chainfire Supersu. When using Android 5 (Lollipop) or higher, if you want to use the folder mounting ability (Folder Mount), as well as link OBB and EXTERNAL DATA on an SD card. But Apps2SD also works fine with other root-rights management applications.
Features apps2sd.:
- Reference APK, Odex, Dex, Lib, Internal Data, External Data and OBB Folders of Custom / System Applications on an SD card.
- terminal Emulator (Terminal Emulator)
- mounting and reference folders (Mount Folder, Link Folder)
- clearing the traces of broken applications (delete unused files and troubleshoot download errors / installations in Google Play)
- hiding applications and games (it is possible to create access with password)
- create / Restore Application Backup / Games / SD Cards
- additional reboot options
- record from Screen (for Android Kitkat or Above users)
- task Manager (Task Manager) (Cleansing RAM by stopping running processes)
- app Manager Manager (Enable / Disable Services / Activity / Receivers / Content Providers)
- podchock Manager: Accelerator RAM (Creating / Managing Partitions / Podchock Files)
- sD card accelerator (increase the speed of the internal / external SD card)
- sD Card Speed \u200b\u200bTest (read / write speed testing your SD card)
- tools for working with sections (ability to create up to 3 sections on your SD card)
- hibernation of applications (hibernation of user / system applications when the screen is turned off)
- script Manager (Create / Start Castom "Linux Scripts. Creating shortcuts on the home screen, for quick access to scripts)
- cPU frequency switch (switch the CPU frequency to extend the battery life (charge level) when the screen is turned off)
- log log (view / save / send logs of your device)
- fix SD card (Fix Rights to an external SD card)
- deleting system applications (including software containing viruses)
- application transfer to an SD card using a standard App2SD method (forced movement in case the transfer is not supported by the application)
- enable and disable applications
- reference, Returns Reference, Enable, Disable, Convert, Integration, Data / Cache Cleaning, Transferring to an SD card, Transfer to the device and many other functions
- automatic reference of just installed applications (optional)
- support 32/64-bit devices
How it works:
References Apps and Games (Link2SD)
Apps2SD moves APK, Odex, Dalvik-Cache, Lib and Internal Data files in the second partition on your card, which OS mounts when booting and creates an identifier link in the original location. This allows you to transfer most of the data (while the entire structure of files and folders is saved), while the system continues to think that the data is still in the device's memory.
Reference OBB and EXTERNAL DATA (OBB2SD)
On devices that have an emulated (inner) SD card, OBB and EXTERNAL DATA files are actually located in the internal storage, not on the external (real) SD card. This method allows you to move these files to the first / second section of your external SD card with optional command binding for mounting / removing the hierarchy of the files.
Download Application data transfer program to SD card - Apps2SD for Android You can link below.
Developer: Vicky Bonick
Platform: Android 2.3 and above
Interface language: Russian (RUS)
Condition: Full (full version)
Root: Need
By default, all applications loaded on the smartphone are installed in the internal memory. Each device has a storage capacity limited, which leads to a shortage of free space to download a new game or program. For this reason, almost every user tried to move the software to the memory card. As practice shows, it is almost impossible to do this on modern phones. On the Internet there are many articles describing this procedure, but often it is about the way with root-rights. We suggest to consider how to transfer applications to the android memory card through the computer, and completely without the superuser's right.
What you need for successful transfer
To properly transfer the application from internal memory on an SD card you need to know some features. If you ignore the requirements written below, that is, the risk of turning the smartphone in the "brick".

The phone should be installed android version 6.0. You can find out the operating system on the smartphone through the settings:
- Go to the " About the phone" or " About device».
- Scroll down to the point " VersionAndroid».
- To check the relevance, you can click on this line several times.
An animation appears on the screen corresponding to the operating system versions.
Android 6, 7, 8, 9 and above is suitable for this method.

Before starting the procedure, it is advisable to install the Activity Launcher application on the phone. You can find software on Google Play, for this:
- Open Play Market.
- In the search, enter a request " Activity Launcher.».
- Go to the page with the official utility.
- Click on the button " Set"And wait for the end of the download.
The downloaded utility should appear on the desktop titled "Activation of the application".
SD card 10 class and above
To work correctly, it is recommended to purchase a new memory card, and it should be 10 grade and above. Any versions of the external drive are suitable, be it 8, 16, 32 or 64 gigabytes. You can find out the SD card on its packaging, which is often indicated as "Class 10".
Aftiss archive
You must download the Aftiss_b2.rar archive to the computer. It is with his help that the memory card will be transformed into the internal storage device. You can download the archive on Windows XP, 7, 8, Vista and 10.
Instructions for transferring applications on an SD card on the phone android
Having understood with all the subtleties, we turn directly to the instructions itself. We recommend to carefully perform each stage to avoid failures and unforeseen errors.

For you need to do the following:
- Open the smartphone settings.
- Go to the " About the phone" or " About device».
- Quickly click on the point " Firmware version" The system will notice how many presses are left to obtain the rights of the developer.
- Then go to the section " Additional functions" or " Advanced settings».
- Here go to the tab " For developers».
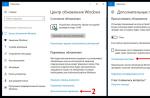
- Among the plurality of items, find the line " Transfill byUSB"And activate the transition function to the right.
Now the USB tab is enabled, as evidenced by the color indicator of the slider.

For a regular USB cable used to charge the machine. After connecting, open the notification cortex and click on the line " ChargingUSB" Change this parameter to " File transfer"Or another similar mode.
You must install the drivers for a specific device model. If the PC works on Windows 10, then they will be loaded automatically. For earlier versions, it is possible to handle the manual installation. Find drivers does not constitute problems - just in the browser specify the exact model of the smartphone.
In the downloaded archive you need to find and launch the script " aftiss. cmd.».

After starting, a command line with some text appears on the screen.
Now you need to decide on how the amount of memory card becomes an internal drive. Let's consider all possible options:
- 1 - 20% of the volume of the SD drive becomes the phone memory;
- 2 - 50% of the SD volume becomes the memory of the device;
- 3 - 85% of the SD volume becomes the memory of the device;
- 4 - your percentage;

Decide with the transfer type you need yourself, but we recommend repelled from the amount of memory card. That is, if it is 32 gigabytes, it will be reasonable to choose the second transfer option (50:50). After that, enter the desired command to the appropriate field.

Check the correctness of the entered data and click " ENTER».

The system will launch a number of processes, with successful execution of which the inscription will appear on the display. Done».

After the procedure is completed, it is advisable to make sure that the redistribution of memory is correct. To do this, open the settings on the phone, then:
- Go to the " Memory" or " Storage" Names depend on the model of the smartphone and the firmware installed on it.
- Scroll down to subparagraph " SD.-map».
Depending on the option used, the available amount will be different. For example, if a flash drive was 32 gigabytes, then with the second option will be available about 15 gigabytes. It is also worth noting that after this procedure, all programs will be installed by defaultSD..

Now open the newly loaded program "Activity Launcher". When you first start on the screen, the "Disclaimer" window will appear, in which you need to click " OK" Next, click on the top menu " Recent Actions"And choose" All actions».

After the download is completed, we will do the following:
- Leaf down to item " Settings».
- Here click on the line " All applications" Please note that the desired tab is located above the item without icons.
After clicking, an automatic transition to a page with all installed software should occur.

To transfer some application on a SD card is now not difficult. For this:
- Find it in the list that opens.
- Go to the page with the utility.
- Click on the line " Storage».
- Next click " Change».
- From the opening list, choose " SD.-map».

Return a memory card in the former look much easier than turning it into the internal memory of the smartphone. First of all, transfer applications from a flash drive back to the device store. If this is not done, then after formatting the program will not start. After rebooting the device, then:
- Go to the "Storage" section.
- Click on the point " ClearSD.-Carta" or " ClearUSB-storage device».
- Confirm the procedure with the button " Clear and format».
Formatting speed directly depends on the volume and class of the memory card.
Video instruction
Answers to popular questions
If you cannot perform this manual through the transfer settings, this instruction is created.
As you can see, carry out the transfer of the application to the memory card android can be completely without root rights. Of course, this will require a computer, but it is almost every modern user.
Instructions How to transfer applications to the memory card
The possibility of transferring applications to the memory card has appeared even in an unforgettable Android 2.2, but it worked out of the hands badly. However, the users are thin poorly managed to free the internal drive of the device. In Android 4.4, this option was deleted. Probably considered that smartphones have no too many internal memory. So it lasted before the release of the version 6 version. In it, the possibility of transfer appeared again. In a somewhat modified form. However, even after that, the possibility of transferring applications to the external drive is not on all firmware. Even modern Android versions on some devices do not always have such a useful option. But it already depends on the manufacturer. Now let's talk about ways, with which you can transfer applications to an external drive.
Methods for transferring applications
See also: Google Account Contacts: How to Find, Save, Move, Delete, Restore, Synchronize + Reviews
It is worth noting that to transfer applications to the flash drive, a memory card with a fairly high data exchange rate will be required. It is best if the drive corresponds to Class 10. Otherwise, the programs will be launched for a very long time. And there will be almost no sense from such a transfer.
They are not so much. And the choice of a particular method is entirely dependent on the firmware, which is currently installed on the user's smartphone. The whole question is that it supports such an option or not.
- Transfer by regular meansAndroid.This option is good only if the firmware of the a priori supports such a function. In this case, it is better to use the OS funds, as the system itself knows how and what is better to do
- Transfer using applications. This option for those who have a firmware for one or another reasons cannot carry the application data (and the programs themselves) to the external drive. But third-party utilities with this can well handle
So, we have two ways to transfer. Now you need to consider them in more detail, since the process itself is quite complicated and requires preliminary training. Let's start with the simplest and obvious: transfer with OS.
It is worth noting that some applications will not be able to move. Such things like alarm clocks, widgets, live wallpapers and all system applications are not transferred. And even even try, then they will not work for sure. So such a fint must be made only with third-party applications.
We use regular Android tools
See also: How to remove virus from Android (Android) on the phone: Instruction 2019
This is the first and most correct way. Mobile OS itself knows how to properly transfer application data to the USB flash drive and save their performance. Yes, it is done much easier than using third-party programs.
If the firmware on your smartphone really supports such an option, then there will be no problems with the transfer. The system will do everything yourself. From the user you will need to perform only a few steps.
More than anything from the user is not required.
First we tap the settings icon on the desktop of the gadget, then move to the item "Applications", choose the desired and click on it. In the list of options there will be a button "Move on the SD card". It must be pressed.
Transfer will start automatically. However, on its completion, the system will give the appropriate warning. By the way, the OS does not know how to move open applications. So first you have to close the program.
However, as mentioned above, this method is not suitable for everyone. If your firmware does not support such a transfer option, it is worth considering other methods. And this is what we will now go.
It is worth noting that after updating the version of the OS (for example, by air), all settings may be knocked out. Including applications that are located on an external drive. So after each update it is extremely desirable to check the location of those programs that you have previously transferred. In case of failure, you will have to repeat the procedure.
Using third-party programs
See also: Top 15 best free browsers for Android devices: overview of the fastest and secure surfing programs | 2019.
Third-party applications are able to transfer the installed programs to an external memory card. However, work with them is quite complex. In some cases, it is necessary to even prepare a memory card. And we will talk about it about everyone now.
Move to SD Card
See also: Top 12 best memory cards for smartphone, camera and video recorder | Overview of popular models + reviews
This is a small utility that can be easily downloaded on Google Play. It has a very compact size and is able to work with internal and external drives even without superuser rights.
However, it is this program that is not particularly reliable. Sometimes she does not cope with their work. But in some cases, even this application is quite capable of helping. And working with the program is very simple.
First you need to download the application from Google Play and install it. Then you need to start the program, open the menu (simple swipe right) and tap on item "Move to the memory card."
All the rest of the program will make it myself
All application data will be moved. Including the program itself. With system utilities, the program does not work. After transfer, it is recommended to restart the device.
If this application has not coped with the task, it is worth trying another. Some necessarily fit. By the way, using this program you can also manage APK format files and delete them.
APPMGR III
See also:
Nothing from the user is not required
The rest of the app will make automatically. Naturally, after performing all operations, it is advisable to restart the smartphone. Then all changes will be applied.
Also, this application can clean the cache, freeze programs and delete them without confirmation. But the last actions require the root and the rights of the superuser. So on the usual apparatus they will not use.
Link2sd.
See also: Connecting flash drive to smartphone: four ways (plus bonus)
And this is already severe artillery. This free utility is capable of much. But requires the presence of the root and the rights of the superuser. But the application works amazingly. It will postpone all programs for an external drive with a 100% guarantee.
However, to work with this utility, the flash drive must be prepared accordingly. It should create a special hidden partition that will be used as a memory for applications. Create such a partition using Recovery.
Turn off your smartphone and then turn it on with clamping volume buttons. In different recovery devices can be launched in different ways. First, find out how it starts on your smartphone. Then we will get to the main menu of the recovery. Here you need to choose the item "Advanced".
Then tapam on item PARTITION SD Card.
Now you need to select the type of file system (it is best to use EXT3), select the size of the partition itself, the paging partition (SWAP) and move the slider to create the appropriate partitions on the accumulator.
Now it will remain just waiting for the completion of the process and then restart the smartphone. And only then can be accepted for transferring data to the drive.