Apple released for developers iOS 10 preview at WWDC and many enthusiasts have already installed and tested the new version of the operating system on their devices. However first beta always has a certain degree of risk, and probably your Apple device will not work correctly.
So, those of you who downloaded iOS 10 beta 1 and experience serious problems with him, you you can always come back to the stable version 9.3.2. We have collected a few simple steps to do it for all those devices that are compatible with iOS 10.
How to get back from iOS 10 to iOS 9.3.2?
- First, back up all your data from devices on which you are going to downgrade.
- Download iOS 9.3.2 ISPW for your computer. to download it... This is essentially system recovery program.
- On the site, select version 9.3.2, it will be highlighted in green. E it means that this the only version on which you you can come back.
- Version 9.3.2 weighs almost 2 gigabytes so make sure you have free space on your hard disk.
- On your Mac or Window computer must beiTunes is installed.
- Connect device to computer and start iTunes if she is not yet started automatically.
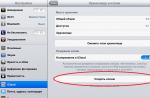
- Now you will see that in the upper rectangular block in iTunes window, there is two options to choose from - update or restore iPod / iPad / etc.
- Mac users must hold option (Alt) and then click on check for updates. Windows users need to hold down the Shift key and click on update check.
- A window will appear among which last option in most cases there will be firmware version 9.3. x; Click on it.
- You will see a message: "iTunes will update your iPod / iPhone or iPad to iOS 9.3.2 and check with Apple for the update."
- Click the refresh button to start the process
- E tap your device will turn black when will the update process startand then turns white with apple logo. After that, wait for the device to update. Important! you cannot use the device at this stage, also do not disconnect the USB cable, otherwise you will have to start all over again.
- Like after others updates your the device will reboot.
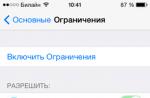
- To check if the rollback has passedsuccessfully go to Settings.

How to Downgrade 64-bit iDevice to iOS 12.0-12.1.2 with SHSH2 Using 3uTools
A new version is out and 3uTools finally released with the long-awaited downgrading feature, downgrade 64-bit iDevices with SHSH2. This tutorial will guide you how to downgrade step by step.
Important Notes:
1. This feature is only available on iOS 11 to 12.1.2 iDevices.
2. The downgrading operation will not save any data, please back up your device in advance.
3. There are risks to downgrade with SHSH2, so this downgrading feature is recommended for experienced users.
Compatible iDevices
- iPhone X
- iPhone 8/8 Plus
- iPhone 7/7 Plus
- iPhone 6s / 6s Plus
- iPhone SE
- iPad 12.9-inch iPad pro 2nd generation
- iPad 12.9-inch iPad pro 1st generation
- 10.5-inch iPad pro
- 9.7-inch iPad Pro
- iPad 6th generation
- iPad 5th generation
- iPad Air 2
- iPod touch 6th generation
Pre-Requisites:
1. Download the SHSH2 (of the iOS version you want to downgrade) you saved before on 3uTools or another tool.
3. Download the iOS firmware you want to downgrade on https://ipsw.me
- If you saved SHSH2 file saved on 3uTools server:
If you never uninstall 3uTools, you could find the SHSH2 files in 3uTools ’cache folder.
Right-click 3uTools icon → click “Open file location”, and open "Cache" folder, scroll down to find the right SHSH2 files of iOS version you want to downgrade.
- If you saved SHSH2 file saved on Tsssaver server:
Set generator nonce with NonceReboot12XX ipa
Step 1 Install ipa with latest version of Cydia Impactor. Go to Settings > General > Device Management, and open the just installed profile, and trust the developer.
Step 2Enable Airplane mode on your iDevice, close Siri and reboot your iDevice.
Step 3 Open shshe2 file using any text viewer (eg. Notepad)
Step 4 Search for
Step 5 Tap NonceReboot12XX on your device, and enter the above key code, and tap return to start set generator.

Step 6 Rename the SHSH2 file to .shsh from .plist.
Downgrade with SHSH2 using 3uTools
Step 1 Connect your iDevice to 3uTools and go to Flash & JB → Advanced, and click 64-bit iDevice.
Step 2 Read the popup carefully and click Select IPSW → Select SHSH, and double check the generator nonce you just entered.
Step 3Select SHSH2 file, double check the generator nonce you just entered and click “Yes” to start downgrading.
Step 4Confirm the connection between iDevice and PC, patiently wait for 20 to 40 minutes... Your iDevice will be restored to unsigned iOS 12.0 - 12.1.2 then.
Restore or Downgrade iOS12.0 - 12.1.2 with 3utools
This article is intended for those who use devices with an A4 processor (iPhone 4, iPhone 3GS, iPod touch 4G), but want to downgrade (downgrade the firmware) to iOS 5.1.1 and get. To do this, you need firmware 5.1.1 (we remind you that Apple has already stopped signing iOS 5.1.1).
In addition, you will need the latest public version of the tool. RedSn0w... In this utility, we will use the so-called "Stitching" option, which will bind your certificate to the required firmware.
So, what steps must be taken to downgrade from iOS 6 to iOS 5.1.1:
5. Check for the SHSH certificate you saved (). If you have saved SHSH to Cydia, then just skip this step. If SHSH is saved on your computer, then place it in the same folder with iOS 5.1.1 firmware.

6. Connect the device to USB and transfer it (hold down the screen off button for 3 seconds, then, while holding the screen off button, hold down the Home button for 10 seconds; after that continue to hold the Home button, but release the screen off button).
7. Run RedSn0w 0.9.14b2, go to Extras -\u003e SHSH blobs -\u003e Stitch.
 8.
Select item IPSW and specify the path to firmware 5.1.1 for your device.
8.
Select item IPSW and specify the path to firmware 5.1.1 for your device.
 9.
If you saved SHSH via Cydia, then in the section Blobs select item Cydia... If you have saved SHSH on your computer, then select Local and provide the path to the file.
9.
If you saved SHSH via Cydia, then in the section Blobs select item Cydia... If you have saved SHSH on your computer, then select Local and provide the path to the file.
10. Once the firmware file and SHSH are selected, RedSn0w will start glueing them together to create the final version of the firmware that can be used even though Apple has already stopped signing iOS 5.1.1.
 11.
In RedSn0w go back a couple of pages and select Pwned DFU - this will put your phone in Pwned DFU mode. Thanks to this, you will be able to restore to the firmware obtained in step 10 through iTunes. Otherwise, .
11.
In RedSn0w go back a couple of pages and select Pwned DFU - this will put your phone in Pwned DFU mode. Thanks to this, you will be able to restore to the firmware obtained in step 10 through iTunes. Otherwise, .
12. Open iTunes. The program should automatically detect that your device is in recovery mode. Hold down the Option button (in the case of Mac) or Shift (in the case of Windows) and click in iTunes on the button Restore... In the window that appears, select the firmware you created in RedSn0w.
13. Wait for iTunes to finish restoring the firmware. During this process, a "-1" error may appear in iTunes. If this happened - open RedSn0w, select the item Extras -\u003e Recovery fix... Put the device in DFU mode.

14. After the completion of the Recovery fix process, your device will be fully restored to iOS 5.1.1. Congratulations!
If you strictly followed all the instructions, then the firmware downgrade should be successful. Please be aware that this guide is only applicable to certain devices (iPhone 4, iPhone 3GS, and iPod touch 4G).
- Prefix Sony Playstation 3 with official software 3.55 or the version below. Firmware 3.56 and higher are not yet supported.
- A flash drive or USB hard drive formatted with the FAT32 file system.
Preparing for PS3 firmware
Check the software version of the set-top box at the moment. You can do this as follows: go to the PS3 menu in the section "Settings" - "System settings" - "System information"... The screen will indicate the current software version of your STB.
1. Installing the official software update version 3.55.
If you already have firmware 3.55 installed, then proceed to installation (as I wrote above, set-top boxes with software version 3.56 or higher are not yet flashed).
Make sure that the file system of the media used (USB HDD or flash drive) is FAT32, if your console "sees" its contents, then the flash drive is already formatted in FAT32. Create a folder in the root of your USB drive with the name "PS3" and the subfolder "UPDATE" (observing the specified case). Download the archive with the official software update to 3.55, unzip it and copy the official firmware file "PS3UPDAT.PUP" to the previously created PS3 / UPDATE directory. Connect the flash drive to the Playstation 3 console and select from the menu System update - Update from storage media... The STB will update. After the installation is complete the PS3 will shut down, now turn it on and check the software version is 3.55.
2. Installing custom firmware 3.55 kmeaw.
Download custom firmware 3.55 kmeaw and run it. Specify the path to the flash drive, the installation will be performed on it. Connect the USB flash drive to the console. Now you need to completely de-energize the Playstation 3 (switch the toggle switch on the back - FAT models, to pull out the power cord - Slim models). Power on the set-top box again. Press and hold the power button of the set-top box until it turns on and turns off by itself (about 30 seconds). Press the button again and hold it until the attachment emits a short beep twice. After the beep, release the button. The Playstation will boot into recovery mode.
Connect the joystick with a wire, press the "PS" button and select "System Update". The Playstation 3 will begin installing the kmeaw custom firmware.
After the console completes the update and reboots, two new items should appear in the "Game" menu: "Install package files" and "/ App_home / PS3_GAME".
Installing multiMAN manager to run games on custom firmware.
multiMAN is considered the best manager for running games on custom firmware.
Download multiMAN 2.03.00 and BDEMU Blu-ray drive emulator, copy the files to the root of your flash drive and connect it to Playstation 3. Via the menu "Games" - "Install Package Files" on the set-top box, set the joystick button "X" first multiMAN, then BDEMU. A drive emulator is necessary, because in the latest version the developer has removed the ability to run backups.
Burn games that you will download from torrents to an external drive or USB flash drive. On the external drive, at the root, create a folder "GAMEZ", and inside it folders with the game code.
Attention! To avoid errors at launch, check the correct sequence of folders, as adding sub-directories to the game path will not start the game.
How to run a game on custom firmware
Go to the multiMAN manager and press the "X" button on the game - the game image will be mounted and a new icon will appear in the "Game" menu: if any Blu-Ray disc is inserted into the set-top box drive - the game will appear in the disc section, if there is no disc in the drive - in / app_home / ps3_game).
Attention! Not all games come without a disc, some require any Blu-ray disc in the console drive.
Downgrade on PS3 consoles with firmware 3.56 - 4.46 (firmware rollback)
Downgrade (from English - downgrade) is the use of the old software of the device. Downgrade, as an operation with a device, is used to rollback the firmware due to the greater stability of the early firmware or to obtain the possibility of any manipulations with the device. Owners of the PS3 console with firmware 3.56-4.46 can use a special device - E3 Flasher, which can downgrade the console firmware, that is, downgrade. E3 Flasher is a special chip that is installed inside the console to be able to rollback to an earlier version of the firmware, respectively, to install a custom one.
Downgrade, as a rule, is done to custom firmware 3.55, since this particular firmware is completely hacked. After rolling back to an earlier firmware version, you can install custom Rogero 3.55 v.3.7 or (or Kmeaw 3.55 - instructions in this article).
Conditions under which PS3 downgrade is possible:
- The Date Code of the prefix must be no higher than 1B (this means that the prefix must be produced no later than Q2 2011). You can view the Date Code on the back of the console. Let's say 9D and 0C are suitable, since the set-top boxes were released in Q4 2009 and Q3 2010, respectively. 1C, 1D - no longer fit (3, 4 quarters of 2011). Also, your PS3 memory must be NOR type, as indicated by the following model numbers: CECHH, CECHJ, CECHK, CECHL, CECHM, CECHP, CECHQ
- Your console's factory firmware must be below 3.60.
- Slim models with model number 3000 cannot be downgraded.