In this article, we will analyze the settings of the iThemes Security plugin, which provides comprehensive protection for your WordPress site. The plugin takes into account pretty much everything you need to keep your WordPress site secure. IThemes Security plugin provides a range of services that include WordPress hacking protection, WordPress admin protection and site bots protection. iThemes Security is the best free WordPress security plugin. With it, your site will be fairly well protected from various viruses and hacker attacks.
If the site suddenly stopped working, do not be alarmed, you will need to connect via FTP to the site, or open the file manager in the hosting control panel and rename or delete the folder with the plugin. This is an extreme measure if suddenly iThemes Security blocked the admin panel or after enabling any option in iThemes Security the site is unavailable or freezes. Most likely, the site will recover. If not, restore the site from a backup.
Let's take a look at the parameters that need to be set to ensure comprehensive and complete WordPress security. To get to the plugin settings, go to the admin panel “WordPress” ⇒ “Security” ⇒ “Settings”. Hope you have already backed up your site. First tab "Security Check", click "Configure Settings":  Next, the settings window will open. If we click on "Secure Site", the plugin will install the recommended security settings:
  Basically, these are the basic settings of iThemes Security. You can click on this button and the setup will be completed. But I recommend not to do this, as the site may break. It's better to thoroughly understand the settings than to click on one button and lose access to the site.
Next settings tab is "Basic Settings", click "Configure Settings":  Here, be sure to put a tick in front of the inscription "Make changes to files" and save. For the plugin to function effectively, it needs access to the wp-config.php and .htaccess files. By checking the box, you grant the plugin this access:
  I recommend leaving the rest of the settings in this tab by default.
The next option is "Tracking 404 Error". What it is? Imagine a situation where a user on your site requests a large number of non-existent pages. If it is one or two pages, then there is nothing to worry about, but if this frequency is repeated, it means that the attacker is trying to find vulnerabilities in the site to hack it, because a simple visitor is looking for information on real pages. If iThemes Security detects this kind of activity, the user is blocked. To enable this option, click “Enable”. I recommend enabling this setting (after enabling all settings of this option, leave the default):  The next setting is Away Mode. If you are absent for a certain period, and you will not be able to enter the WordPress admin panel, you can enable this option by specifying in the settings the period of time that you will be absent. During this time, neither you nor anyone else will be able to enter the admin panel. I do not recommend enabling this setting, as you may need to go to the admin panel, but there will be no such opportunity for the time period specified in the settings:
  Blocked users. Here you can specify from which ip addresses you cannot enter your site. I recommend "Enable blacklist from the site HackRepair.com", here are collected the ip addresses from which hacker attacks were detected. Also, check the box next to the "Ban List", here you can manually enter the ip addresses that you want to deny access to the site:
  Local Brute Force Protection. This is protection against guessing passwords. Must be included. If the plugin notices that a visitor is trying to find a username and password a large number of times and he gets an error, it means that the site is being hacked. By default, there are 5 attempts to unsuccessfully enter a username or password, after which the ip address is blocked, I recommend not changing anything:
 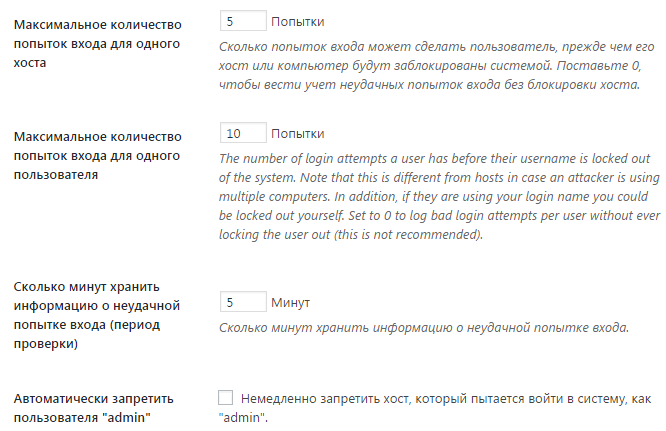 Database backups. Here you can set up automatic creation of a backup copy of the database with subsequent sending to your e-mail. I recommend enabling this option. You need to configure the creation of a database on a schedule, for this enable the option "Create a schedule for database backup" and set the backup frequency, 3 days, in my opinion, is enough. Leave the rest of the settings as default. After enabling this setting, a backup copy of the database will automatically be sent to your mail, which is very convenient:
  Detection of file changes. This option monitors changes in files for vulnerabilities. I do not recommend enabling this setting:
  File Permissions. This is file access. You don't need to configure anything here, the option just shows the degree of protection of certain files.
Network Brute Force Protection. We must include it. This option automatically denies access to the site for users who have attempted to hack the entrance to other sites:  SSL. The setting allows you to enable SSL encryption for all or part of your site. I do not recommend enabling this option.
Strong Password Enforcement. Forces registered users to use complex passwords. A useless option, in my opinion, I do not recommend enabling it.
System fine tuning and WordPress customization. These are advanced settings for advanced users. Activating them can lead to errors in the site, conflicts with themes or plugins. I strongly discourage enabling these settings. If you still decide to configure these functions, turn on each item separately and immediately check the site's performance.  WordPress Salts. Allows you to update WordPress security keys. Another useless feature, I don't recommend enabling it.
Change your WordPress admin login page. A very powerful way to protect your site is to change the default WordPress login page. By default, on all sites, you can log into WordPress using the link site.ru / wp-admin. With iThemes Security, you can hide the login page on the site.
To do this, in the settings, click "Advanced", on the "Hide the login page" tab, click "Configure Settings":  Then check the box next to "Hide login page":
  Then in the field opposite the inscription "Link to the login page" enter any word in Latin letters, for example vhodnasajt, and save the changes.
  ... Now only you know which link you can use to enter the site admin panel. Naturally, this increases the security of WordPress. Important! Write down this link, if you forget it, it will be very difficult to restore the entrance to the site. Whether or not this option is enabled is up to you. I don't use it.
iThemes Security Pro. Paid version of the plugin that has advanced security features. Allows you to enable two-factor authentication, scheduled malware scanning, Google Recaptcha integration, you can contact the plugin's technical support. If you have a large, popular site, it might be worth considering buying the pro version. In my opinion, the standard plugin settings are quite enough to ensure the security of the site.  If you are looking for plugins that can keep WordPress secure, iThemes Security is the best solution. Thanks to flexible settings and wide functionality, your site will be maximally protected from hacking and bot attacks.
✓
WordPress is a popular CMS that is easy to use. This is why many newbies choose WordPress for building dynamic websites. But they face the difficulty of choosing a security system. Because WordPress is chock full of all sorts of solutions to provide it.

Knowing modern and current security systems can help people save their websites from being hacked, but not all newbies want to dig deeper into code. Yes, we mean enthusiasts and newbies who want to secure their website without using code.
In this article, we will try to help you secure your website regardless of your knowledge of WordPress code.
So let's talk about WordPress security for newbies.
WordPress security for newbies
If you want to harden the security of your WordPress site without using code, or if you want someone to take care of the security for you, then this article is for you. Here you will find free and premium tools for this.
As it turns out, there are tons of apps out there for WordPress security. You will find over 1000 options if you just search for WordPress plugins with the word "security". But there is a problem of choice. Which plugin can you rely on? We have been using several plugins for over 5 years now and will tell you about some of them.
The plugins we are listing are among the most popular WordPress plugins today. You won't regret choosing one of them.
1.iThemes Security

We'll start our list with iThemes Security because it is used by over 700,000 websites.
Chris Wigman created this plugin, which was later bought by iThemes. We say this for two reasons:- Chris is an amazing developer and we trust his work
- iThemes is one of the strongest WordPress companies, all of its plugins are updated quite frequently and have excellent technical support.
This is the best security plugin so far. He tops the list with 700,000 active installations. It offers over 30 ways to protect your WordPress website.
Once installed, just let the plugin do its job. It performs the functions of search, removal and further protection from malware. This plugin can be easily customized for both beginners and experienced users.
iThemes Security protects against most threats. It blocks malicious accounts, checks for changes in base files, saves strong passwords, hides the login and admin page, and much more.
The premium version has several additional options and starts at $ 80 for a year of protection for two sites.2. Sucuri

Sucuri has a reputation as a prestigious plugin in the premium WordPress plugin market. The developers have done an excellent job following the latest security trends to secure thousands of WordPress websites.
For WordPress, Sucuri has free plugin for auditing, malware scanner and improving the security of your site. But the premium version is worth every penny. Prices start at $ 16.66 per month. If you are a professional looking to find the best plugin to keep your site secure, then definitely check out Sucuri.
Sucuri provides a full cycle to track and prevent attacks and hacking of your website. It includes WAF firewall, antivirus and malware removal service. For any questions, you can always contact the support service.
In addition to detecting malware and protecting your site, Sucuri also works with hacks. Let's say your site has been hacked. The plugin will remove malicious software within 12 hours and will also send you a notification of any malicious activity.
Sucuri also offers features such as regular backups, real-time protection and scans, SSL certificates, DDoS protection, DNS authentication and WHOIS changes, and more.
3. VaultPress

Regular backups are also one of the measures to ensure the security of the site. For a reasonable price, VaultPress provides its customers with backups and security systems. The set of functions also includes regular site scanning, automatic backups, technical support.
We started using this plugin as soon as it came out. The support team helped us track down and fix several security issues with some third-party plugins. We can definitely recommend this plugin for creating backups and scanning the system.
If the site has been hacked, then VaultPress very quickly takes back control of the website to you.
4. Wordfence Security

Wordfence Security is another security configuration plugin that is available in both paid and free versions. It is used by over a million websites. Its powerful Web Application Firewall with Threat Defense Feed will protect your website from hacking. Both of these features block threats like fake Google Bots, Botnets, and so on.
The plugin has a robust scanning engine that notifies you of any suspicious activity. It monitors not only malicious software, but also any changes in files, code injection, login attempts, and more.
Wordfence Security offers a unique Live Traffic View feature that shows your website statistics in real time. This means that you will have time to take timely measures when trying to hack your site.
The plugin contains Falcon Engine which provides a fast caching process. Also, along with the cache management functions, there are 2 caching modes, and this is the ability to clear the cache and monitor the cache usage.
To get an extended list of features, you need to install the premium version.
5. All In One WP Security & Firewall

All In One WP Security & Firewall is a unique plugin that users really love. It's easy to set up, and then just enjoy the security of your site. It currently has over 400,000 installations on sites, which puts it on a par with iThemes Security.
With an intuitive feature set, you can take your site's security to the next level. An interesting feature is the security rating system, which ranges from 0 to 470. This will help you understand which web component needs additional protection. All information is displayed in the console.
To avoid site breakdown, All In One WP Security & Firewall works in 3 modes: basic, medium and advanced. First, you can choose the basic mode, and then move on to the next.
The feature set of this plugin also includes blocking direct image links, attack protection, database prefix management, firewall protection, IP blocking and much more.
Outcomes
You should always take care of the security of your website. This puts you in a better position than those who choose to ignore this issue. There are a few other decent plugins out there besides the ones we've already named. But we pass this verdict:
- Best Free Plugin -iThemes Security
- Best Premium Plugin -Sucuri
What security plugins do you use? Let us know in the comments!
Hello everyone! Safety and safety again! If you have previously read the article "" on my blog, you are probably interested in additional security for your site. Anyway, any adequate webmaster should love and protect his offspring. In this article, I will walk you through all the options for the All In One WP Security plugin and show you how to configure them correctly.
Important
On my blog there is a series of tutorials "". And if you configured the site security taking into account the recommendations of these lessons, then keep in mind that the All In One WP Security plugin duplicates the functions of other protection plugins. For example, the functions:
- blocking an IP address after incorrect authorization attempts
- captcha in comments
- changing the login page to the admin panel, etc.
Therefore, leave everything as it is and do not install the plugin, or as you configure the All In One WP Security plugin, carefully analyze the protection functions so that they do not duplicate the functions of already installed plugins. And if you saw a take, then disable the duplicate plugin so that all All In One WP Security settings work correctly.
You might ask me why, in the DIY blog creation course, I recommended setting up WordPress security through code integration, separate plugins, and more? It's about the alternative. And by the way, according to my measurements of the download speed and the overall operation of the site, I did not notice the difference between all the recommendations involved from the three parts of the 13th lesson, from the All In One WP Security plugin. There are individuals among you who will not take my word for it and will continue to integrate the code into the engine, bypassing the "heavyweight plugins", do as you know.
Installing the plugin
So let's get started. First, install the All In One WP Security plugin and activate it:

After that, the plugin menu will appear in the administrative panel of the site:

When you hover the mouse cursor over it, a context menu pops up:

Control Panel
I think at first it is better to get acquainted with the control panel, to go to which you need to click on the plugin menu item in the admin panel, or move the mouse cursor over "WP Security" and click on "Control Panel". Next, you will see five tabs:
Control Panel Tab
Initially, we are in the "Control Panel" tab. You can see the blocks here:
- Active sessions
- Service mode
- Last 5 authorizations
- Blocked IP addresses
Security Level Meter
This block displays the current security level based on all plugin settings:

It is measured in balls, which are added after activating a particular setting. The higher the current safety score, the better. But I never managed to increase the security level to a maximum value of 505 points (the version of the plugin at the time of this writing is Version 4.3.2). This is due to unnecessary features for my blog that I did not include.
Your site's security diagram
This diagram displays all the current changes to the settings:

This is a kind of statistics that allows you to quickly navigate the state of settings.
Block "Active sessions"
This block displays information about current sessions in the administrative panel of the site:

As a rule, the block displays a notification: "There are currently no active users but you." Of course, if there are no other accounts with permission to work in the site's admin panel, but in fact you see an unknown account in this block, then this is a hacker.
Service mode
A very handy feature:

I do not dispute that the maintenance mode can be enabled by redirecting to a previously created page through .htaccess, but the plugin already has this option, and this makes life much easier during, for example, site maintenance. In addition, you can customize the service page to your liking. To configure and enable the service mode, click on the "on / off" button. Then you are taken to the service mode settings page. To enable the mode, check the box "Enable maintenance mode" and save the settings. Additionally, you can customize the displayed text, insert a picture, and more. And this can be changed in the "Enter your message" block.
This block contains information about the date and the last five IP-addresses from which you entered the administrator's zone of the site:

This information is useful not only for security purposes, but also for tracking sessions of other accounts.
Blocked IP addresses
This block displays IP addresses that were blocked by the All In One WP Security plugin or by you manually:

There are no entries on the screenshot, but if IP addresses are blocked, the entry will appear.
Current status of the most important functions
In this block, you can see the status of critical security measures:

As you can see, all sliders are initially in the "OFF" position. I specially created conditions with a banal login "admin" to tell and show how the minimum recommendations are being followed to ensure the protection of your site.
Administrators
The "Administrators" item of settings is responsible for controlling the accounts of site administrators. Here you will see the following tabs:
WP custom name
The first tab “WP Custom Name” displays a list of admins. Also here you can see a warning about logins that can be compromised:
As you can see, the plugin considers the "admin" login unsafe and suggests to rename it. Let's do it. To change the username in the empty field "New username for administrator" enter a new name, for example, another triviality - "wpadmin". After that click on "Change username". Further, the system will automatically log out of your account in order for you to log in with a new administrator name. After that, you will be back in the "WP Custom Name" tab.
Now, pay attention to the block "Change the username of the Administrator", namely the points:

Congratulations, you've got 15 points out of 15 for completing one basic WordPress security guideline.
Experienced webmasters know perfectly well that the standard functionality cannot change the administrator's name, but with the All In One WP Security plugin, you can. Whoever read the first part of the lesson "Setting up WordPress security" knows what difficulties you can face when creating an administrator account with a new name and linking mail from the old account to it.
Password
Now let's look inside the "Password" tab. In the "Password Strength Check" block, you can enter your current password and get the following information:

As you can see, a password picker bot launched from a regular computer will brute-force such a password for a very, very long time, even if the plug-in's protection is bypassed.
Display name
You are probably wondering why I missed the Display Name tab. I left it for a snack. The usefulness of this point is intended for brand new WordPress users. Here you can see the number of points, as in each settings menu. And if the nickname coincides with the administrator's login, you will see a warning:
You can change the nickname by clicking on the admin login, or by hovering the mouse over "Users", in the admin panel menu, by clicking on the "Your profile" item. If you have not taken my course on creating a blog, then first enter in the "Nickname (required)" field a visible name as the author of articles, which does not match the admin login. Next, in the "Display as" drop-down list, select the previously entered nickname. After that, save. Now, when you visit the "Administrators" settings menu of the All In One WP Security plugin, the following message will be displayed in the "Display Name" tab:

Settings
General settings
By default, you are in the General Settings tab. The following useful functions are available to you here:
- creating a database backup
- backing up the .htaccess file
- making a backup copy of the wp-config.php file
There are also options to enable and disable the security function and all the functions of the All In One WP Security firewall. I always advise you to read the explanations for the options before changing the plugin settings, for example:
.htaccess and wp-config.php
Pay attention to the ".htaccess File" and "wp-config.php File" tabs. In the settings of these tabs, you can create and restore a backup of, you guessed it, .htacces and wp-config.php. It is very convenient and does not require an FTP client.
WP Version Info
For me, the more interesting tab is the next one - "WP Version Info". Who does not know, I will explain. WordPress generates a meta tag with a content attribute, which, in turn, is set to the current version of the site's engine. This is unsafe, extremely unsafe! Therefore, in the "Deleting WP Generator meta data" block, check the box next to "Check this if you want to remove the version and meta info produced by WP from all pages" and click "Save settings".
Import Export
The Import / Export tab is responsible for creating, so to speak, a preset. By setting up the All In One WP Security plugin on one of your projects, you can transfer the settings to other sites. This is very convenient even if you have configured the plugin, made export of settings, but suddenly there was a need to restore the site backup.
Advanced Settings
The last tab "Advanced Settings" is responsible for the method of obtaining data about the IP address of each of the visitors. If you are not familiar with PHP at a fairly good level, and the $ _SERVER superglobal array increases the pupils of your eyes, then I ask you not to approach this tab.
Authorization
In this section of the All In One WP Security plugin settings, we see the following tabs:
Blocking authorizations
In the description for this tab, you have probably already read the instructions of the developers about Brute-force attacks. Next, you need to check the boxes next to the boxes:
- Enable options to block authorization attempts
- Allow unlock requests (in case you've locked yourself out)
- Display authorization error messages (increases the chances of not blocking yourself)
- Notify by Email (always be aware of unsuccessful login attempts, which allows you to immediately respond to possible hacking attempts)
We go down to the global block "Range of temporarily blocked IP addresses". Here you can go to the statistics of blocked addresses by clicking on "Locked IP Addresses".
In the "Login Lockdown IP Whitelist Settings" block, you can configure a list of white IP addresses, for example, the address of your computer, to which the blocking settings will not be applied. To do this, in the "Enable Login Lockdown IP Whitelist" block, check the box for activating the settings, and in the "Enter IP addresses for the whitelist" block, enter your IP address. Do not forget to save, just below. But I don't recommend setting up a whitelist. Attackers can spoof your IP address.
Erroneous login attempts
Moving on. In the "Erroneous authorization attempts" tab, you will see a list of unsuccessful authorization attempts. This information is very useful for analyzing login attempts. Who cares about these statistics can export them to a CSV file:

Automatic logout of users
The "Automatic user logging out" tab is no less important than the rest of the settings. Here you can enable logging out of admin users after a specified time of inactivity, for example, 60 minutes:

Account activity log
Next, go to the "Account Activity Log". Here you can see the time of entry and exit from the admin panel of a particular user. Only 50 entries are saved for all accounts. This information is useful for analyzing activity:

You can also export this data to a CSV file.
Active sessions
The last tab "Active sessions" displays real-time accounts under which you log into the administrator's part of the site:
User registration
In 99% of cases, the "User Registration" setting for a blog, in the All In One WP Security plugin, is overlooked. But I will still tell you about the options for the following tabs:
Manual confirmation
If your site provides registration, and the amount of spam left by users leaves much to be desired, then you should enable manual approval of a new user in the "Manual confirmation" tab. This will close access to authorization until you manually confirm the user registration by yourself. What does it give in principle. As practice shows, on one of my projects, there are individuals who initially register mails by the type: [email protected], [email protected], [email protected] etc. Such mails are used during the new registration, after I banned the first account of a certain person. And if I see that I recently came across a similar mail of a spammer, then I ban the registration. As a result, the spammer cannot log in and use the same mail again for registration, although he did not have time to leave spam.
Therefore, if there is a need for additional user moderation immediately after registration, you need to check the box "Activate manual approval of new registrations" and save the settings.
CAPTCHA on registration
The next tab "CAPTCHA on registration" adds a captcha to the user registration page. Captcha can be activated by checking the box "Activate CAPTCHA on the registration page". I find this feature necessary and useful. Of course, if you provide for registration of new users.
Registration Honeypot
The Registration Honeypot tab is a very useful feature for blocking fancy registration bots. I advise you to enable this option in the "Enable Honeypot On Registration Page" block. We are saved.
Database Protection
The "Database Protection" settings group consists of two tabs:
Be extremely careful with the settings in the first tab "Database table prefix". You must immediately make a backup copy of the database in the "Database backup" tab.
Database backup
Consider the Database Backup tab. To create a backup copy of the database, click on the "Create a backup of the database now" button. After successfully creating a backup, you will see the following information:
The screenshot shows the location of my database. You will have your own address.
And also in this tab you can configure the regular creation of a database copy. To do this, check the box "Enable automatic backups". Additionally, you can configure how often copies are created, how many copies to keep on the server and how many copies are sent by mail. Don't forget to save.
DB table prefix
We return to the "Database table prefix" tab. If you have not changed the database prefix, then it has the value "wp_". This is exactly what you will see the warning about:
To assign a different prefix to all tables in the database, you need to set it in the "Generate a new database table prefix" block field. After that click on "Change table prefix". If you don't know much about what prefix should be, then I advise you to check the box next to "Check that the plugin itself generates a prefix of 6 random characters long", and the field "Enter your own version of the prefix using Latin letters, numbers and the underscore character" leave blank.
File System Protection
Now let's examine the set of "File System Protection" settings of the All In One WP Security plugin. This setting item consists of four tabs:
File access
By default, we are in the "File Access" tab. If you are in doubt about which CHMOD (access rights) to install on a particular folder on the server, then the All In One WP Security plugin will decide everything for you. Pay attention to the table in this tab. If the plugin has a comment regarding the current access rights, you will see the inscription “Set recommended permissions” in the column “Recommended action”:
If there are no comments, then the inscription "No action required". To apply the recommended CHMOD settings, click on "Set Recommended Permissions".
Editing PHP files
This tab sets the prohibition on editing PHP files from the administrative environment. I advise you to check the box "Disable the ability to edit PHP files".
Accessing WP Files
Usually, right after installing WordPress, I delete the files: readme.html, wp-config-sample.php, etc. But there are times when a sample of the same configuration file saves newbies. Therefore, I recommend that you check the box "Deny access to information files created by default when installing WordPress".
System logs
This tab is designed for experienced webmasters. Otherwise, looking in the error log of the site, you will not be able to understand the essence of the problem.
Whois search
In my humble opinion, this is a great tool for getting at least some information, for example, about a blocked user. Naturally, you can use the WHOIS site, but why bother if there is a WHOIS search in the All In One WP Security plugin.
Black list
The All In One WP Security plugin allows you to block not only by IP address, but also user agents. Various spiders / bots of search engines, various analytics services, etc., which create an excessive load on the server, can be considered user agents. This setting will be useful even if you do not want, for example, a Google bot to crawl your site. All settings specified in the "Blacklist" item will be added to .htaccess.
Firewall
The Firewall setting consists of seven tabs:
So let's start in order.
Be sure to back up your .htaccess before you start making settings in your .htaccess file via the All In One WP Security plugin.
Basic firewall rules
If you do not use, for example, auto-posting plugins on social networks, then you can safely install jackdaws everywhere and save the settings of this tab. But I advise you to include only the following items:
- Activate basic firewall functions
- Disable Pingback Functionality From XMLRPC
- Block Access to debug.log File
I think everything is clear with the first setting, but the next two options are mandatory. "Disable Pingback Functionality From XMLRPC" will disallow pingbacks from, for example, statistics services, but will leave service requests allowed. The "Block Access to debug.log File" option will block access to the debug file, which may contain vulnerable service information.
Additional firewall rules
In this tab, I advise you to enable all settings except: "Disable the ability to view directories." The point is that the prohibition on viewing directories is set by the "AllowOverride" directive in the httpd.conf configuration file on the server. You can make such settings only if you have a VPS, VDS, rented or your own server. Otherwise, leave this setting unchecked.
You can find out why each setting is needed by clicking on "+ More":
![]()
Basically, almost all of the firewall settings provided in the All In One WP Security plugin are required to ensure WordPress security.
6G Blacklist Firewall Rules
The 6G firewall has nothing to do with mobile communications. This firewall provides protection against many malicious URL requests, bad bots, spam referrers and other attacks. Enabling the sixth generation firewall rules will significantly reduce the load on the server, of course, if there are such requests. I recommend enabling 6G and 5G protection.
Internet bots
The "Internet bots" tab blocks malicious bots that disguise themselves as googlebot. I recommend enabling the "Block fake Googlebots" option. Other crawlers will not be blocked.
Prevent hotlinks
The "Prevent Hotlinks" tab option is required for activation. Enable the option and save. This will reduce the load on the server if your links to your images are placed outside of your site. This does not affect auto-posting to social networks and other places in any way.
Detecting 404
The penultimate 404 detection tab is also required for activation. Check the "Enable 404 IP Detection and Lockout" option. This setting is responsible for blocking IP addresses from which many requests to non-existent pages are made in a short period of time. In most cases, this indicates a hacker attack in the search for a vulnerable page. You can also additionally change the time at which the attacker's IP address will be banned. As a rule, the address of the main site mirror is automatically registered in the block "URL to redirect on 404 error". I recommend not to change this address. And the 404 error logs table displays data about visits to non-existent pages. The log can be uploaded to a CSV file.
Custom Rules
The last tab “Custom Rules” is used to add your personal rules to the .htaccess file. I advise you not to add anything of your own without understanding how the .htaccess settings work. Otherwise, the site may stop working.
Protection against brute force attacks
Brute-force attacks are attacks aimed at brute force password and login until the correct option is found. There are five tabs in this group of settings, let's start with the first one:
Rename login page
The "Rename login page" tab contains two parameters, of which in the first "Enable the option to rename the login page" you need to set a checkbox, and in the second "Address (URL) of the login page" register the login address to the admin panel. The login page address must be different from the standard wp-admin, for example, thisismysite. Do not forget to save and remember the login address to the admin panel. In my example, it will be mysite.ru/thisismysite, where mysite.ru is the address of your site.
Protection against brute force attacks using cookies
Go to the "Protection against brute-force attacks using cookies" tab. You can enable the option "My site has posts or pages that are protected by the built-in WordPress content password protection" option if you have password protected pages. I have such pages. Regarding the option "This site has a theme or plugin that uses AJAX", most modern themes and plugins use AJAX technology. Therefore, I advise you to enable this option as well. I recommend not activating the "Activate protection against brute force attacks" setting in order to avoid blocking your IP address by the All In One WP Security plugin. The point is that you can forget and clear the plugin's cookies with a passkey. And in order not to solve problems that could have been avoided, I recommend not to check the box next to this option, especially since the plugin itself warns and only on the second attempt makes it possible to activate these settings.
Login CAPTCHA
Login CAPTCHA tab contains useful functions for additional protection of the login page and password recovery. I recommend installing jackdaws opposite:
- Enable CAPTCHA on Login Page
- Activate the CAPTCHA form on the modified login page
- Activate CAPTCHA on the "lost password" page
In the "Woocommerce Forms Captcha Settings" block, checkboxes are set only when using the plugin for the "Woocommerce" online store.
Login whitelist
Let's move on and go to the "Login whitelist" tab. This parameter acts as an additional line of defense, blocking access to the login page for all IP addresses that are not in the white list. If you wish, you can configure this option. But, but again! If you have a dynamic IP address or there is an urgent need to enter the admin panel, for example, from a mobile number, and the provider will allocate a different IP address to you, then trouble will happen.
Honeypot
The last tab "A barrel of honey (Honeypot)" from the group of settings "Protection against brute force attacks" is responsible for blocking robots that try to fill in the authorization fields. As a rule, robots automatically fill in all fields, and the "Barrel of honey" option slips the bot into a field invisible to the user's eyes, which the bot automatically fills in. If this happens, the All In One WP Security plugin will automatically block the bot. I recommend enabling the "Activate honey pot on login page" option.
SPAM protection
Let's move on to the next group of settings "Protection against SPAM". Now we will stop considering four tabs:
Spam in comments
- Activate CAPTCHA in comment forms
- Block spambots from commenting
Tracking IP Addresses for Comment Spam
Another tab for statistics is "Tracking IP addresses for spam in comments." Undoubtedly, the options in this tab contribute goodness. I recommend that you check the box next to the "Enable automatic block of IP-addresses Comment on spam". Save.
Further, in the field "Minimum number of comments regarded as SPAM" set the value 5. Pay attention to the block "List of IP-addresses of spammers", which is responsible for filtering comments. If you need to find IP addresses that have been caught in spam at least once, set the value to "1" and click on "Find IP Addresses". And if, for example, 3 times, then the value "3", etc. I think you get the point. The results will be displayed in the Spammer IP Address List table.
BuddyPress and BBPress
In the BuddyPress and BBPress tabs, you can enable captcha in the registration form. BuddyPress and BBPress are plugins. BuddyPress helps you create a social network based on the WordPress engine, and the BBPress plugin is a forum. If you do not use these modifications, then the options in the corresponding tabs will be absent.
Scanner
The penultimate group of settings "Scanner" is responsible for regular scanning of the site for the presence of malicious code and files. You can see only two tabs here:
Tracking file changes
In the first tab "Tracking changes in files" you can scan the site immediately by clicking on "Scan now".
Understand one simple thing - no plugin can protect your site from guru hackers! Therefore, in case of trouble, the All In One WP Security plugin, after scanning, will inform us about the presence of traces of hacking. I recommend that you enable the "Activate automatic scanning of file changes" option, and set the scan frequency at least every two days. The crawl frequency depends on the current load on your site. And if the site load time at peak traffic increases, then think about changing your tariff plan or switching to a dedicated server so that the All In One WP Security plugin scanner does not create an excessive load on the server.
The fields "Ignore files of the following types" and "Ignore certain files and folders" are filled in individually, as you wish. I also advise you to activate the option "Send Email when a change is found" in order to always be aware of any changes in the files. Multiple email addresses can be specified. Save after the settings.
Malware Scanning
The second tab "Anti-malware scanning" is intended for registration on the plug-in developers' site, in order to regularly scan the site on a paid basis. This will significantly reduce the load on the server during scanning. Who wants to pay money, please, it's your right. But I don't see much point in contracting such a service for a blog.
Miscellaneous
The last group of settings "Miscellaneous" contains three tabs:
Copy protection
In the first tab "Copy protection" you can lock the following functions:
- Right button
- Marking text
- Copy
Restrictions will apply on all pages that are available to users. If you have a useful blog on which people can learn a lot from their store of knowledge, then I do not recommend enabling this feature. Personally, I am uncomfortable when I cannot copy a piece of text with information that is important to me.
Frames
The Frames tab is responsible for blocking the display of your site's content between the frame and iframe tags. Which have been recognized as unsafe for some year and are often hacked. For example, 1C Bitrix, by default, blocks these tags.
Users Enumeration
The last tab and final setting of the All In One WP Security plugin that we will look at is "Users Enumeration". I recommend enabling the "Disable enumeration of users" option to close the ability for bots to hiccup information about users who can be seen, for example, as commentators. This in some way creates a protective barrier for site users, thereby protecting the administrator account.
This concludes the debriefing with the All In One WP Security plugin. You just read a huge article that can be compared to ten regular articles. I hope I explained it in an accessible language. Questions will appear charmingly ask them in the comments. Thank you for the attention.
Hi guys! When your site gets a little promoted, regular readers appear, you get great pleasure. Everything seems to be cool. The flow of money also grows, and you get a response from the audience, recognition increases. But there is also a downside to the coin. These are envious people, this is attention from ill-wishers.
To give you an idea of what this is about, my blog has been hacked 2 times in the last week alone. The regulars thought they noticed. Guys, I strongly recommend that you familiarize yourself with this lesson, spend time implementing the tips I am talking about in order to more secure your site and save time, money and nerves.
All In One WP Security is the most essential plugin for increasing WordPress security. It should be installed by everyone who owns a site on WordPress. Everyone, without exception.
If my favorite is the SEO harvester for WordPress, the WP Security plugin is the security counterpart. That is, if thanks to Yoast SEO I stopped needing several SEO plugins, then here it is exactly the same, thanks to All In One WP Security, you can get rid of other plugins that only partially fulfill the functions of this one. For example, like:
- Login Lockdown;
- WordPress Database Backup;
- Anti-XSS attack;
- and others like that.
Huge Pros of the All In One WP Security Plugin:
- free;
- it is very easy to set up;
- almost everything has been translated into Russian, so it is clear what this is about.
Configuring the All In One WP Security Plugin
Be sure to make a backup (backup) before starting (just in case) the following files:
- database;
- wp-config file;
- htaccess file.
By the way, these three files can be backed up right in this plugin, just go to WP Security - Settings in the admin panel:

Control Panel
There is a very cool informer that shows the level of security of your site:

This indicator will help you keep your finger on the pulse and understand what else needs to be done to improve safety. I do not recommend doing everything for the sake of achieving maximum scores. There can be bad consequences, your site can crash, malfunction.
The current status of the most important functions. In this block, you can activate the most necessary functionality for the security of your site (you can not touch them for now, during the settings for the lesson, these parameters are activated so):

The rest of the parameters in the Control Panel are of little interest, you can familiarize yourself with them for the sake of curiosity (System Information, Blocked IP Addresses, AIOWPS.
Settings
General settings. Here you can create backup copies of the files I mentioned above. Also disable security and firewall features if something stops working.
WP meta information. Click on the checkbox next to "Deleting WP Generator Metadata" in order not to display the WordPress version:

Import / Export tab. Here you can export your settings, so that later on another site you do not waste time on settings and import all the necessary "checkmarks" in 2 clicks.
Administrators
Custom WP name. Be sure (!) To change the administrator's name, if you have it "admin". You have no idea how many and often passwords with the admin login are selected. If the password is also very light, your site can easily be hacked.

Display name. If you have accounts on your site that have the same username and display name, then it is recommended to change the display name (nickname).
Password. A very interesting tab. Here you can find out how long it takes to automatically guess your password. Enter your password and be surprised how quickly it can be hacked. Prerequisites for enhancing security:
- your password must contain both upper and lower case letters;
- the presence of at least the 1st digit is required, but the password should not consist only of numbers;
- it is also desirable to have some special character;
- password length must be more than 10 characters.
As a result, you should have the maximum degree of security for your password, something like this (the password below would be cracked by a home computer in 57,337 years (!)):

Authorization
Be sure to enable this feature. If the password is entered incorrectly 3 times within 5 minutes (by default), then the IP is blocked for 60 minutes (also by default). I do not recommend blocking for more time, otherwise you may face the fact that the administrators themselves enter the login 3 times incorrectly, put the block for 10 years and do not know what to do. We leave the default 60 minutes and do not bother.
I also recommend checking the box next to "Block invalid usernames immediately." For example, you changed your login from admin to krutysh, then when you enter the admin login in the authorization field, the IP address is immediately blocked. "Notify by email" - here as needed. I don’t like unnecessary spam, so I don’t tick this box.
The final settings for this tab look like this:

If you are curious, you can take a look at the list of blocked IPs, a link to the section is given in the same tab below.
Erroneous login attempts. Here you can see the logins that are being selected. Most often, my admin, root, font logins are flashing. The time of "attempts" is also visible. Pay attention to how often they try to enter the admin panel:

Automatic logging out of users. I recommend enabling this checkbox too. Allows after a certain number of minutes to end the session and log out the user. I put 600 minutes:

The "Account Activity Log" and "Active Sessions" tabs are for informational purposes only.
User registration
Check the box next to "Activate manual approval of new registrations":

And you can check the CAPTCHA box when registering:

Of course, if other people cannot register on your site, the top 2 points are simply useless, they will neither get better nor worse. But, if in doubt, it is better to check these boxes.
Database protection
Here, be careful in the "Database Tables Prefix" tab. Before ticking the box, be sure to make a backup copy of your database (there you will also see a link to create a backup of your database). If you are afraid, in doubt, it is better to leave it unchecked:

Database backup. Here we already put a tick, select the frequency of creating backups and their number. I have. for example, these numbers:

File system protection
Access to files. Here on the right side you will have buttons, you will need to change the file permissions by clicking on these buttons. As a result, all your lines should turn green:

Editing PHP files. If you do not edit your PHP files through the admin panel, check the box. I do not recommend editing files through the admin panel, if only because you cannot press CTRL + Z in which case and you cannot return the file to its original position:

Access to WP files. Check the box:

System logs. Leave it as default.
Whois search
You can enter an IP address or a domain to get the WHOIS of a domain. And so in fact there is nothing to touch.
Black list
If you have no ill-wishers, you can skip this item. If some IP address is constantly sparkling in the comments, for example, you can enable the checkbox and add this IP to the black list.
Firewall
Basic firewall rules. If you haven't made a backup copy of htaccess up to this point, then be sure to do it. And put a checkmark in front of all the items:

Additional firewall rules. Here we also turn on all the checkboxes:

UPDATE: below in the "Additional character filtering" tab, I removed the check mark, because some comments did not go through, they gave a 403 error. Probably, after all, you too I would advise you to uncheck this box so that users do not have problems with commenting.

5G firewall settings. We also include:

Internet bots. Indexing problems may arise here, so I recommend not including this item.

Prevent hotlinks. We also include.


Custom Rules. You can set additional rules in the htaccess file. We don't touch anything.
Protection against brute force attacks
Rename the login page. We include. Change the login address to your own:

Protection against brute force attacks using cookies. I do not enable this function so that there are no problems with logging in from different devices.

Login CAPTCHA. You can enable CAPTCHA when logging in, I don't include:

Login whitelist. Since I often visit the site from different places, my IP is different, so I do not enable this option:

A barrel of honey. An additional field is created that only robots can see. Therefore, when filling out this field, the robot will be redirected to its address. We include:

SPAM protection
CAPTCHA in the form of comments. I do not enable it, because I don’t like to complicate commenting, but I recommend enabling the "Blocking spam bot from commenting" function:

Tracking IP addresses for comment spam. Here you can look at the "frequently blazing" spam IPs in the comments and add them to the black list.
BuddyPress. Adds a CAPTCHA to the BuddyPress registration form. I don't use it.
Tracking changes in files. I recommend enabling it, because often when sites are hacked, it is not entirely clear which file was changed, where to look for malicious code. And with the help of this function you can track changes in the files of your site and quickly find the file that has changed recently.

Scanning for malware. The function is paid, it costs from $ 7 per month.
Service mode
Allows you to "close" the site for a while to make some changes. That is, site visitors will be offered a "stub" that work is underway on the site. Useful when changing designs, checking plugins to work.
Miscellaneous
Text copy protection and more. Here I do not check the box anywhere in the three tabs. I also recommend not to bet.
Outcomes
After completing all these settings, you can go to the "Control Panel" and look at the security level indicator, you should get something like this:

Again, you don't need to do everything thoughtlessly to achieve the highest possible score. Do not do unnecessary harm to your site, its performance and convenience.
If you have any questions - write. Thank you very much for the retweets and reposts, for helping people convey this important message.
Sergey Arsentiev
2-Click WordPress Security with All In One WP Security
A lot of attention is paid to security in WordPress, and still there are cases of site hacks. However, you can use a special plugin and significantly increase the protection of your site, especially since this can be done literally in 2 clicks.
Why do you need to improve the security of WordPress at all?
Of course, to avoid hacks and unauthorized use of the site space.
But is it really that bad? Well, let them break it - I still have nothing to take!
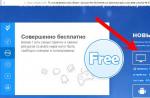
It's not about the hack itself, but about its consequences. Hackers break sites for a reason, they start sending spam on your behalf, placing links to other dubious sites, becoming breeding grounds for viruses and other infections. Search engines quickly recognize this and react with the help of notifications, warning visitors who go to the site in a form like this:

A rare daredevil will dare to go to an infectious site, so traffic from the search engines of hacked sites drops significantly. And along with the traffic, the income of the site owners is also rapidly declining.
Therefore, in spite of the fact that any site can be hacked, I recommend making this task as difficult as possible for cybercriminals: as a result, the desire to contact your site will probably disappear when there are many less secure and easy-to-hack sites around.
I have installed various plugins on sites to improve WordPress security (they are also often called firewalls), but I will recommend you the one that I personally think is the best for most parameters, this is - All In One WP Security.
Its main advantages:
- free
- convenient Russian-language interface
- many protection options
- frequent updates
- instant import and export of settings
It is installed like a regular WordPress plugin (if you don't know how to do this, read ""). So you shouldn't have any problems with the installation.
But then you still need to configure All In One WP Security, that is, select and activate protection options. There are many of them, but not all of them should be included, otherwise the site may simply turn out to be inoperable. So which parameters should be selected, and which should be neglected?
Below in the article I will give a link to the import file of my personal settings, which I use to improve security on most sites - you can import them and, thus, not deal with the program settings, of which there are a lot. Therefore, if all these descriptions of settings are not interesting to you, wind down to the social lock and get a link to ready file with settings... There will also be a brief instruction on how to add All In One WP Security to your plugin.
In the meantime, I will briefly describe the plugin settings.
All In One WP Security Basic Settings
There are quite a few plugin settings, they are all collected in the control panel, in the WP Security item:

Let's start in order.
Control Panel
The basic information on the system is conveniently collected here: the current level of protection, the main settings involved, the php server version, the logs of user visits to the admin panel, and so on. That is, there is nothing to change on this tab - it plays an informative role.
It is not worth striving to ensure that you have used the maximum defense points. Indeed, in this case, some other plugins may be blocked, and the site may not function properly. In general, it is important to eliminate the most vulnerable and obvious "holes" without compromising the convenience and functionality of the site.
Settings
Here you can create backups of the main WordPress files, in which the plugin changes security settings: .htaccess and wp-config. Unless, of course, you have already done this via FTP (read ""). Be sure to do this before making any changes to the plugin settings.
An important point is "WP meta information".
Check the box, this will remove the information from the site code that it was created on the basis of WordPress, this will increase the security against mass crawling of site versions by hacker robots.
And the last point is " Import and Export ".
This is where you can quickly export and import plugin settings from site to site.
Administrators
In this paragraph, we will talk about the accounts of registered administrators in the control panel.
It is common knowledge that you cannot use standard administrator names such as "admin" in WordPress or "administrator" in Joomla. This has an extremely negative effect on security, because when the login is known, the hacker can only guess the password.
So if you use the standard "admin" as the administrator name, then mentally swear at the developer and quickly change it to something more complex. To do this in WordPress, you need to create a new user account. Delete the old one, link all records to the new account.
It is also important that the username matches the login.
And check the complexity of the password. A bad password is like "serega", normal is "serega1212", and ideal is "dfw & uuhsU2%".
Authorization
What if someone entered the wrong password several times when trying to enter the admin panel? By default, the system does nothing. What if " Enable options to block authorization attempts", then the system will block such connections after a certain number of unsuccessful attempts for a certain time. The number of attempts, time and other parameters, you yourself set in the paragraphs below.
The rest of the tabs are mostly informational.
User registration
The captcha when registering is relevant only if you have the opportunity to register new users on your website or blog.
Database
Be sure to change the prefix of the tables in the database. By default, tables in a WordPress database start with "wp_", which is bad for security. Select " Generate new database table prefix"and check the box to have the plugin generate something like" hwy1e2_ ".
Although I changed the prefix on many WordPress sites - everything was ok, but you won't be superfluous: be sure to make a backup of the database, by the way, you can do it right on the next contribution.
File system
On the main tab " File access"all items should be marked in green. If this is not the case, just click on the corresponding item.
Check the boxes and on the following tab " Editing PHP files" and " WP file access". You do not have to leave the opportunity to make any program changes through the control panel - it is better to do this through FTP access, which is much more difficult to hack, because professional programmers of your hoster are engaged in security there. Plus, you should not" shine "important information files of the system.
Whois lookup
There are no settings here, but if someone breaks in to you or some inadequate user leaves stupid messages, then you can try to find out about his provider and complain about inadequacy, or just threaten him in a personal message.
Of course, if a hacker uses an IP anonymizer, you won't really know anything, but the function can still be useful, since in general you can quickly get information about the site owners and their contacts.
Black list
Let's say that you "punched" through whois that spam is actively spreading from the IP address of a private person on your blog in the comments. You can add him to the black list and he will not get access to the pages of the site.
You can also massively ban "leftist" robots that can scour the Internet in search of vulnerabilities.
Basically, this feature makes sense if someone is actively trying to hack you. In most cases, these fields will remain blank.
Firewall
Well, we got to the main function of the plugin - the firewall. These functions are scattered across several tabs.
In the " Basic rules"I recommend to enable both checkboxes:" Basic functions of the firewall" and " Protection against pingback vulnerabilities". For each item, there is a detailed description of all the functions that will be involved. These are basic rules - they, as a rule, do not affect the performance of the site.
V " Additional rules"I personally use:
- Viewing the contents of directories
- HTTP trace
Other items:
- Comments via Proxies
- Unwanted lines in queries
- Additional character filtering
on certain sites caused instability in work, so I cannot unambiguously recommend them for use.
If you want to use them, then make a backup htaccess, enable and thoroughly test the site for its previous performance. Try to leave a comment, download a file, register, search the site, send a feedback form, etc. If everything is ok, then ok, you're in luck
Further in the " 5G firewall"you can enable comprehensive protection against hacker attacks through the site URL. This is a useful feature, but on my blog it caused an error when users download files, so I disabled it and disable it on all other sites, since I prefer to use only those parameters that never cause complaints in the work.
In the " Internet robots"I did not check the box, because there are still fears of somehow preventing the main Google robot from doing its job. If someone can dispel my fears in the comments, I would be grateful.
"Prevent hotlinks"I also leave it disabled, since I myself download blog pictures from other sites. And I noted that many of my clients also do this, for example, upload pictures from their site to different message boards, forums, and so on. But if you are sure that nowhere do not use pictures from the site, then in order to reduce the unnecessary load on the hosting, of course, you can check the box.
"Detecting 404 errors"you need to use it only if you have a lot of suspicious errors of not found pages in your logs. Everything is ok on all my sites, so there is nothing to add to the list of IP addresses that need to be banned.
Protection against brute force attacks
What is brute force? This is a brute-force attack that simply brute-force all possible passwords on a website. That is, the robot enters the page with the entrance to the admin panel and starts trying one or the other password.
Name the login page at your discretion, for example, / lg-wp and the robot for brute-force passwords will no longer be able to get into your admin panel - it simply will not find it!
"Cookie protection"I do not use - because I often go online from different browsers, plus periodically clear cookies, and therefore the procedure for logging in with this parameter would be rather tedious. For the same reason I do not use" Login captcha". I already have enough of all sorts of captchas on the Internet, and therefore I try to keep them to a minimum on my website.
"Login whitelist"- this is almost 100% protection against brute-force robots, since the login and password can only be entered from a specific IP address. But my clients and I often visit our sites from different IP addresses, for example, from the office, from a mobile phone , from guests, etc. In this case, the protection will be excessive, since it will not allow the owner to enter the site.However, if you work on your site permanently with one IP-address, then you can use this function.
Spam protection
I did not include this protection, since the specialized Antispam Bee plugin works fine for me (read "").
Scanner
If suddenly some bastard nevertheless made his way through all your security systems and inserted his malicious code or left links in the files of the site, then the system will notify you of this. And you will be able to take a closer and closer look at these changes: what if you were really hacked?
I scan sites every 7 days, ignore pictures, personal files, backups, etc. All this is in the settings, which you can download at the end of the article.
The rest of the tabs are unlikely to be needed.
Service mode
It's just a utility, but quite useful. Allows you to temporarily disable the site for everyone except the admins, if any work is being done on it.
Miscellaneous
"Copy protection"I do not include it, because in the modern realities of checking the uniqueness of texts it is rather meaningless, and life makes it difficult for some users. But enable the checkbox." Activate frame protection"does not hurt, since it will not allow you to open your site in the frame of some other site.