When you click on the Facebook Like button on sites, a full-fledged page announcement appears in your profile (instead of the previous mark that you liked something) - link + quote + picture.
If you look at this from the side of a webmaster, you can see a great opportunity to get additional traffic. Let's take a look at how you can maximize the impact of this button. First, let's configure the parameters by hand (not all CMS have modules / plugins that automate the process).
You can find the Like Button Generator at: http://developers.facebook.com/docs/reference/plugins/like/
The first step is to create the button itself.
URL to Like - you can set your own URL, you can leave the field empty, then the address of the current page will be used as this parameter (if you select the XFBML format of the button - more on that below). It is worth noting that the FB button will prioritize the one specified in the canonical tag in the head of the page.
Layout Style - three design options for the button, we select the most appropriate for your design.
Show Faces - if you check the box, when you enter the site with the Like button, the avatars of your friends who have already "liked" this page will be shown under it.
Width - width. Considering that with Show Faces enabled, you need more space for the button, specify the allowed block width. Exclusively in pixels, percentages don't work.
Verb to display - select the label on the Like or Recommend buttons.
Font - you can choose a font similar to the one on your site.
Color Scheme - choice of light or dark color scheme.
Have you configured? Now press the button Get Code... The window that appears will have two options: iframe and XFBML. If you did not specify the URL to Like, then for the button to take the page where it is installed as this parameter, select XFBML. Personally, for aesthetic reasons, I also prefer XFBML, because when inactive it does not stretch the page and does not leave as much white space as an iframe.
The resulting code can be russified, for this in the address http://connect.facebook.net/en_US/ change en_US to ru_RU
Let's put this code on the site. As you can see, the announcement, title and picture are randomly selected by Facebook. Often not the way you would like it to be. For example, a counter image or a Feedburner button can be taken for an announcement in an ost without pictures. Of course, this does not contribute to the post's click-through rate. Therefore, we will continue with the configuration. A webmaster can set additional parameters for posting to Facebook using special meta tags. The same link will also help you configure them: http://developers.facebook.com/docs/reference/plugins/like/
Title- post title.
Type - here you can set the type of post (rather - the topic) - in theory it is used in the platform's search engines, possibly also by search engines cooperating with FB.
Url - you can set your own address, but the canonical tag will take precedence.
Image - the address of the picture that will be used for the announcement.
Site name - the name of your site.
Admin - Facebook ID, if you are on the button settings page being logged in to FB, then your ID should be substituted automatically. It will allow you to view statistics on the operation of the button, details are below.
Now we have meta tags that we put before the tagpages.
It is worth noting that you can create one attractive image for the site and use it for all the Like buttons of the resource. This will simplify the task, however, if you make your own picture for each page, it will be more interesting for the user ( wow, something new, I'll take a look!).
Let's move on to automation. Let's use the plugin for WordPress Facebook Like Button http://wordpress.org/extend/plugins/facebook-like-button/ - it will make things easier for blogs on this platform. This is one of the optimal solutions, which does not require editing the template, manually setting parameters, etc.
On the plugin settings page, you will find the following fields to fill out:
AppID for XFBML version - here they ask to enter the AppID of the application, if we use the XFBML button to get this AppID, we will need to bind a phone number to the account, with our operators this can become a problem (although at the moment with Beeline and Megafon in the Moscow region everything ok, although recently it did not work out yet). However, the plugin will work even without specifying the AppID.
Type: XFBML or iFrame - choose the format of the button, as noted above, XFBML is more convenient.
Show in Home: Show on home page.
Show in Pages: show on pages.
Show in Posts: show in posts.
Show in Categories: show in categories.
Show in Archive: show in archives.
Position: select the position of the button. Better to put it after the content.
Alignment: Aligns the button to the left or right.
Admin ID: if we need statistics on the operation of the button, indicate here our ID (I already wrote about this above).
Defualt image: here we write the address of the picture for the default announcement Check to enable: put a check mark to enable the use of the picture.
Language: select the language of the button.
Layout Style: Select a button type.
Show Faces: Whether to show friends' avatars.
Verb to display: word on the button.
Font: font.
Color Scheme: colors.
Width: width.
Height: height.
Container class: if the style sheet has elements for the design of this button, then specify the class name here.
If you specified your ID, then statistics will be available over time at http://www.facebook.com/insights/
An extremely convenient thing: you can find out the total number of Likes on the site, the number of clicks from Facebook, the demographics of those who like your notes (to identify the active core of the audience with which to interact) .. com 0.02% - there is something to work on.
As a postscript video with facts and Facebook:
Birthday is not just a date, but a real holiday that you want to celebrate every year. Naturally, the birthday man cannot invite all his friends, but this is no reason to leave him without his congratulations.
Using social networks to wish a friend, friend or colleague a happy life is much faster and cheaper than, say, sending a traditional letter or calling. You can even congratulate a friend from another country on your birthday without knowing either his address or his phone number. Moreover, this can be done in several ways.
Congratulations options
In general, using Facebook is very convenient to track birthdays. The system itself will remind you of the upcoming holidays of your friends. First, messages are displayed on the page in the notification section. Secondly, letters with reminders will be sent to the e-mail specified during registration in the social network. It is extremely difficult to miss the birthdays of Facebook friends with such a notification system, so the standard excuses that cover the lack of congratulations do not work.
If we talk about specific options for congratulatory messages, then they can be issued in the following ways:
- write in a personal;
- leave a message on the wall;
- send a virtual postcard;
- upload a video "Thank you".
With private messages, everything is clear. Just write to your friend or acquaintance any congratulations - a few lines with pleasant wishes, a congratulatory rhyme, a funny picture or even a video postcard. The beauty of this method is that it will only be addressed to the hero of the occasion, and no one else will see the message. This means that you can attach a compromising photo or something very personal to the congratulations.
The method is no less popular - a congratulation message on the birthday boy's wall. In fact, the same as the PM, only presented for review by all your friend's friends. By the way, if you click on the name of the birthday person in the notification, a new window will appear in which you can immediately enter the congratulatory words. And if there is a desire, you can also attach a pretty picture.

There is an even more interesting option - virtual postcards. Of course, they are immediately associated with Odnoklassniki, however, by turning on imagination and showing originality, you can please a friend with a cute message. To publish a postcard, you need to use one of the dozens of apps available on Facebook - Birthday Cards, Fun Cards, Happy Birthday Cards and many more. In addition, postcards can be downloaded on Facebook and then posted on the wall of a birthday friend.

Finally, you can congratulate your friend on his birthday using the Thank you service, which was launched on Facebook. In general, it was invented in order to thank friends for the pleasant moments of communication on the social network, but this method is also quite suitable for birthday greetings. To run it, you need to go to https://www.facebook.com/thanks.

Here you have to choose a birthday friend and the materials that will be included in the videos. These can be your posts on the wall and photos (they can be selected from albums or downloaded from a computer). The result is a nice video with music and the simplest video sequence that looks pretty decent as a virtual birthday present.
And, of course, if possible, pay attention to your friend and congratulate him on his birthday personally. Well, or at least call. Surely he will be very, very pleased.
Facebook is popular with 1.49 billion registered people worldwide. This number includes more than 15 million Russian-speaking users.
What you can do on Facebook
I'll try to briefly list what you can do on the Facebook social network:
I want to introduce you to some of the concepts that are an integral part of Facebook.
Facebook wall
Your wall is a space on your profile page where you and your friends can post, post and exchange news.
Friend, subscriber, friend, fan, fan - a friend of your personal profile, whom you both, by mutual agreement, added as friends: you added him as a friend, and he added you as his friend.
Profile, public, community, group - different types of pages on social networks, each of which has its own functionality.
Before creating a profile, community or group, you need to decide what you need them for and then create them. Let's try to figure it out now.
Facebook personal profile
Personal profile (Private page) - you need to understand that it is forbidden (!) To use a personal profile for business on Facebook, otherwise you can lose access to your profile and its content.
Personal profile limit - 5.000 friends. The profile owner must be a real person.
You will not be able to create a page or a group for the same name that your personal profile will have, they must have a different name.
From Facebook rules:
Please be aware that submitting anything or anyone other than yourself in a personal account is a violation of Facebook's Terms of Service
Question: "Which is better: a group or a Facebook page?" not entirely correct, because the group and the page have different purposes and different capabilities. This will be discussed below.
Facebook Pages
Pages are designed to represent different types of businesses, products, brands, organizations, music groups, public figures, cities, and other topics on Facebook.
There are statistics on Facebook pages.
Page (Page) contributes to the formation of a community in a particular topic, is a place for people to communicate.
You can install various applications for the page.
It is possible to come up with and use a beautiful short page address.
Pages are indexed by search engines.
Unlike a personal profile, there are no restrictions on the number of fans (friends) on the pages. Also, unlike a profile, you can run ads on Facebook pages.
Facebook Groups
Group (Group) can be:
- open,
- closed,
- secret.
Groups on Facebook are for those who want to chat with a group of friends about something or who want to express their opinion.
Unlike pages, you cannot add applications or tabs to groups. The functionality is limited.
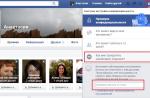
Below in Fig. 1 shows an example of a profile, as well as topics of business pages and groups for someone who is engaged in a network business. The main idea is that there can be one personal profile on Facebook, but there can be many pages and groups.
 Figure: 1. Personal profile, business pages and groups on Facebook for someone who is in business
 Facebook Like Button: Like
Until January 2013, the thumb-up button was called "Like."
If you click the "Like" button on any page, it means that you liked the page. Simultaneously with this click, you will become a subscriber of this page and in the future you will receive notifications from it about adding posts, photos and other news.
Facebook news feed
You see the news feed as soon as you go to your Facebook account (after entering your e-mail and password).
It contains all the news of your friends, to whose pages you are subscribed, all the information that your friends published, etc.
Facebook post
A post is any post on Facebook: a photo, a link to something, text, video, audio, etc.
Facebook Help
Many questions can be answered in the Facebook Help Center
Let's start!
More ...
What is a pixel on Facebook
1. Tracking conversions
Conversion is the actions of visitors on your website:
- visiting a site or a specific page
- registration or application
- adding an item to the cart
- sale, etc.
By installing a pixel on the site, you can track the action you want.
How does this help you? Let's consider an example:
3. Create custom audiences
Individual audiences are groups of people that you can distinguish according to some criteria:
- visited pages
- time spent on the site
- site visit frequency
- the device from which the visit was made
- amount of money spent, etc.
4. Create similar audiences
Similar audiences are groups of people that are similar in certain ways to the audiences you selected.
For example, you can find people on FB who are similar to:
- your website visitors
- people who spend the most time on your site
- people who registered for the webinar
- people who made a purchase / sent an application, etc.
How you can use this:
Now do you understand what opportunities are offered by the conversion pixel?
Then let's create it.
How to create a pixel on Facebook in 3 steps
Step # 2... Click the Create Pixel button

Step # 3... Write the name of the pixel (for example, your site), check the box in the terms of its use and click "Create Pixel".

Everything! The pixel is ready.
Now let's install it on your website or landing page.
3 ways to add the Facebook pixel to your website
Installing a pixel means adding its code to your site's code. This is done in just a couple of minutes. You need to go to your site settings and paste the pixel code at the top of the site before the tag.
This can be done in different ways, and below I will consider the most popular.
But before that, you must copy the code.
Click on the "adjust pixel" button, select the "manual code setting" option and click on the "code" in point 2.

By clicking, you will automatically copy the code.
Method # 1. Installing a pixel on the site in the theme settings
If you are using one of the popular site engines (WordPress, Bitrix, Joomla, etc.), you need to go to the theme settings, find the section where scripts (codes) are inserted and paste the code into before the tag.
For example, in my theme it looks like this (I'm using the paid Focus Blog theme on WordPress):


What if you are using WordPress but you don't have such a section?
If your theme does not provide fields for inserting code (this may be), then download the plugin "Insert Headers and Footers".


After installing it, a header field will appear in your theme, where you can paste the code.
Method # 2. Installing a pixel via a WordPress plugin
With the help of plugins, you can not only install the pixel, but also get the ability to customize it right through the WordPress admin area!
In addition, some plugins contain additional functionality for creating audiences and tracking conversions on the site, which are not in the Facebook interface.
Most popular plugins:
- Pixel Caffeine is completely free
- PixelYourSite Pro is free, but full functionality is paid
I have used both plugins and will say that Pixel Caffeine will suit 99.9% of users. In terms of functionality, it is not inferior to the second plugin.
How do I add a pixel via Pixel Caffeine?
Step 1... Download and install the plugin
![]()
![]()
Step # 2... Go to the plugin settings in the "General Settings" tab, click on the Facebook connect button and connect to your FB account.

![]()
Pixel added to your site! That being said, you don't need to add anything to the code.
Method # 3. Pixel installation via Google Tag Manager
In GMT, you need to create a new tag that will contain the Facebook pixel code and the All Pages trigger.
Step 1... Go to GTM and click on "New Tag".


Step # 2... Click on "Tag Configuration", select "Custom HTML" and paste in the pixel code.


Step # 4... Publish the created tag.
How to set a pixel on a landing page
When using landing page frameworks, you can also install pixel code on them.
As with websites, you must place the pixel code at the very top of the page, before the tag.
Let's see how to do this on the most popular landing page services.
How to set pixel conversion on Platformalp
Step 1... Go to the "Settings" item of the landing page where you want to install the pixel.

Step # 2... In the left menu, select the "Metrics and scripts" section, paste the code into the "Other head scripts" field and click "Save".

How to install facebook pixel on Tilda
Step 1... Go to the settings of your site, in the left menu select the "More" section and on the right in the item "HTML-code for embedding inside Head" click on the link "Edit code".


Step # 2... Paste the Facebook pixel code and click "Save".
In the picture below, Tilda shows that there are errors in the code (red crosses). Pay no attention to this. The pixel code is fine.

How to install Facebook pixel on LPgenerator
Step 1... Go to page editing and in the top menu click on the "Scripts" item


Step # 2... In the window that appears, do the following:
- Click the Add Script button
- Write the name "Pixel Facebook"
- Insert script
- Select the position "Inside the tag
- Click "Save"


How to install the facebook pixel on Wix
On sites created on the WiX platform, the pixel is installed in a different way.
There is also a condition - you must have your own domain connected.
Step 1... Go to the "pixels" section on facebook and copy the number (ID) of your pixel.

Step # 2... Now go to WIX in the site settings (manage sites), select the "Domain" section in the left menu, click on the "Remarketing" tab and in the "Facebook Pixel" field, insert your pixel number.


Now we need to make sure that it works.
How to check if a pixel is working correctly
- Using the "Send test traffic" function.
- Using the Pixel Helper plugin
1. How to send test traffic
Step 1... Go to the pixel page and click on the "adjust pixel" button.


Step # 2... In the window that appears, select "Install manually", at the very bottom of the page, enter the URL of your site in the "Send test traffic to your pixel" item and click the "Send traffic" button.

Immediately after that, FB will send several bots to your site.
If all is well, then on the pixel page in FB you will see conversions to your site.

2. How to Check Facebook Pixel with Pixel Helper
Step 1... Download the official plugin for Chrome browser -.
This icon will appear in the upper right corner of the browser after installing the plugin.
Step # 2.Go to your website and click on the icon.
A window will appear where it will be written:
- How many FB pixels found
- Events that triggered
![]()
![]()
If you have this information displayed, and all the checkmarks are green, then you have correctly set the pixel!
The pixel is installed and it works. It's time to set it up.
3 ways to customize your pixel for event and conversion tracking
In order for the FB pixel to start performing its functions, it must be configured, and this can be done in 3 ways:
- Standard events
- Individual events
- Customized conversions
#one. Standard events
1. Basic code monitors simple events on the site and helps to measure them:
- Visit the site
- Visiting a specific page
- Number of visits, etc.
This is exactly the code you added to the site in the tag in the paragraph above.

Regardless of the conversion tracking method, this basic code should be installed on all pages on your site.
2. Event code keeps track of standard actionssuch as purchase or registration.
There are 9 standard events in total:
- - View materials
- Search- Search
- AddToCart- Add to cart
- AddToWishlist- Add to wishlist
- InitiateCheckout- Start of ordering
- AddPaymentInfo- Adding billing information
- Purchase- Making a purchase
- Lead- Lead
- CompleteRegistration- Completed registration
That is, you can track when users search on your site, when they add an item to their cart, etc.
The pixel code that Facebook gives (you copied it above), by default, track 1 standard event - PageView.

That is, at the moment Facebook tracks all visits to your site, but does not track other actions.
There are 2 options for how to track them.
Option 1. With a change to the base code
This is where it comes to our aid event code.
You need to add the code of the required event to the base code and place it on the page you need.
Let's see how to do this with an example.
We have a landing page and a thank you page that people go to after submitting an application:
- site.ru/landing-page - landing page
- site.ru/thank-you-page - thanks page
They already have the base code installed.
We look at the codes of standard events.
Actions on the site | Standard event code |
|---|---|
View materials | fbq ("track", "ViewContent"); |
fbq ("track", "Search"); |
|
Add to cart | fbq ("track", "AddToCart"); |
Add to Wish List | fbq ("track", "AddToWishlist"); |
Start of ordering | fbq ("track", "InitiateCheckout"); |
Adding billing information | fbq ("track", "AddPaymentInfo"); |
Making a purchase | fbq ("track", "Purchase", (value: 0.00, currency: "USD")); |
fbq ("track", "Lead"); |
|
Completed registration | fbq ("track", "CompleteRegistration"); |
We want information to be transmitted to Facebook when a person submits an application. Accordingly, the lead event is suitable for us, to which the code corresponds - "fbq (" track "," Lead ");"
We take it and insert it into the base code. As a result, we get the following code:

Since we had the base code installed on both pages, we must remove it from the thank you page and replace it with this new code.
As a result, we get:
- site.ru/landing-page - landing page - base code
- site.ru/thank-you-page - thanks page - new code
And here you can ask me:
"Alexey, I have a large website. And when I insert the basic code into the tag, then it is added to all pages of the site. I cannot remove it from a single page and replace it with another code. How to be in this case?"
And here we move on to an easier way.
Option # 2. Without changing the base code
In fact, you don't have to replace the base code with code containing a standard event to track conversions.
It is enough to add the code of the standard event after the basic one.
On the site it looks like this:

Exclamation-circle
Important: using this option you have to insert the event code between tags.
- Adding an item to the cart
- Payment
To do this, we need to add the following codes to the site.
Home page

1. Basic code

1. Basic code
2. Add to cart code
Thank You Page

1. Basic code
2. Purchase code
If tracking a purchase, then the "shopping" event: