If you have purchased a new TV, changed your cable TV operator or broadcast type, then the first procedure you will have to face is setting up TV channels on your TV.
Depending on the method of signal reception, there are three main types of broadcasting:
- ethereal- broadcast from the TV tower is transmitted to a conventional antenna;
- cable- channel packages from the operator's distribution center are transmitted to subscribers' apartments by wire method;
- satellite- the signal from the satellite is transmitted to a parabolic antenna (dish) and converted by the receiver.
In turn, terrestrial and cable television can be analog and digital. The second one has a higher quality of image and sound, but to view it, you may need additional equipment in the form of a digital set-top box (tuner), especially when it comes to the old TV model.
In the framework of this article, the automatic and manual tuning of analog channels on the TV is considered (for cable channels, everything will be identical).
Preparing the TV
Before proceeding with direct channel tuning, you must connect the TV to the broadcast source. With an analog signal, the cable of the antenna or cable TV operator is connected directly to the antenna input of the TV (marked in the photo):
In this case, it is worthwhile to separately consider the situation in which more than one TV is used in the apartment. In this case, a special antenna splitter is used for connection, which in most cases has two or three outputs:

How to tune channels from a conventional antenna to multiple TVs?
Often people complain that in one room the channels on the TV are tuned worse than in another. Some of them are missing, while the rest have interference. This is due to the wrong connection. It is important that both TVs are equidistant from the main cable. Otherwise, the one that is located closer will take over most of the signal. Also, to connect two or more TVs, you should use a high quality cable that is better protected from interference. Therefore, the standard cheap cable, which is usually offered by many cable TV operators, will not work here.
How to automatically tune channels on your TV
This is the easiest way to set up and requires a minimum of effort and knowledge. The TV itself finds all available channels and stores them.
To enter the automatic tuning mode, enter the TV menu by pressing the MENU button on the remote control. Depending on your TV model, this button may also be denoted by the words HOME, INPUT, OPTION, SETTINGS or special symbols in the form of three longitudinal stripes, a house, an arrow in a square, and others. More detailed information on this matter contains the instruction manual for the operation and tuning of TV channels. Some options for the designation of the menu button are shown in the photo:

After entering the menu, use the navigation buttons to select the "Channel setup" - "Automatic setup" item. After that, indicate what type of television you are going to tune (terrestrial or cable) and start the search process by pressing the ENTER / OK button. On different TV models, the names of the described menu items may slightly differ, so in case of difficulty, refer to the instructions. The approximate menu screen might look like this:

In some cases, before tuning channels on a conventional antenna, you must additionally select the region of your location. To do this, in the setup menu, find the COUNTRY or REGION item and select the corresponding entry in the list.
Note. If all items in the TV menu are displayed in English, find the word LANGUAGE in the settings and select RUSSIAN.
After the auto tuning of channels is complete, a sort menu may appear on the TV, with the help of which you can arrange the found channels in a convenient order for viewing.
It is worth noting that when changing or adding transmitted channels by the cable TV operator, the settings must be done again.
How to manually tune channels on your TV
For all its apparent simplicity of automatic tuning, it has several significant drawbacks. Some channels may be repetitive, distorted picture or sound. In this case, you should correct the situation manually. Here is a step-by-step guide on how to manually tune TV channels:
- In the Channel Setup menu, use the Navigation buttons to select Manual Tuning and press ENTER / OK.
- Select the "Program" item and assign a serial number to the channel by pressing the numeric buttons on the remote control.
- Select the color system of your area of residence: PAL, SECAM, NTSC, or AUTO.
- Select a sound system: 2.0 (stereo), 5.1, etc.
- Search for the channel and, if successful, add it to the TV's memory by pressing the “Save” button.
- Repeat the same procedure for all required channels.
The manual channel setup menu might look like this:

It should be remembered that all actions in the proposed instruction are confirmed by pressing the ENTER / OK button.
Analogue Frequently Asked Questions
Sometimes in the process of tuning channels certain questions may arise, some of which are discussed below.
How to tune channels on a TV without a remote control?
The process of automatic and manual setup in this case occurs in the same way, but to access the TV menu, the buttons located directly on its body are used.
Buyers do not always dream of buying an expensive, high-tech TV for home with a full range of functions. They often want a simple and inexpensive model that will show a couple of their favorite channels. These are the buyers who turn their attention to the Mystery technique. She will be discussed in the article.
A little about the company
The Mystery technique belongs to the budget segment of the domestic market. The cheapest microwave ovens, multicooker, televisions and other household appliances (except for large ones) are produced under this brand. The most widespread products of the company received in Russia and Ukraine, but sometimes they can be found in other countries of the near abroad.
A distinctive feature of the company is a wide range of goods. The products of this brand are found in almost all market shares, and the model range also pleases with a variety. In addition, the brand's production lines do not stand still, and its catalog is constantly updated with new items.
The equipment is assembled in China and Russia, like all similar products of the lower price segment.
Consider several popular models of this brand, their characteristics and reviews.
Mystery MTV 1918LW TV
Mystery MTV 1918LW TV is 19 inches. The frame refresh rate is 50 Hz. The resolution is 1366x768.

The viewing angle is 170 degrees. The device comes with two built-in 6W speakers. There are holes on the back for wall mounting.
Mystery MTV 1918LW reviews
As already clear from the description, this is a TV with a small diagonal. Such, as a rule, are taken to small apartments, put in the kitchen or purchased for summer cottages. Mystery MTV 1918LV TV is quite popular among buyers. Owner reviews indicate that the underlying reason for its purchase was the low price of this model. At the same time, there is no need to talk about the quality of the image, you can no longer watch movies in Full HD on it. Some owners complain about the modest viewing angle - if the family is large, then people sitting at the edges of the room may see the film with distortion.

As for the reliability of the equipment, there are no special complaints about the Mystery MTV 1918LW TV. The experts' comments indicate that the equipment conscientiously fulfills its entire warranty period. Breakdowns such as broken speakers are detected almost in the first days after purchase. Describing this model, the owners say that this is a reliable, convenient option for unassuming people who will not focus on either sound quality or image quality, and who need a regular model to just watch their favorite movies and TV shows.
Mystery 2429LTA2 TV
This is another popular model of this company. Mystery 24292LTA2 is a 24-inch LCD TV with Smart TV function, as well as the ability to connect the device to a wireless Wi-Fi network. The model comes with 1080p Full HD resolution. Two speakers (10 W each) create a surround sound effect. Refresh rate index - 50 Hz, maximum viewing angle - 170 degrees.
Opinions about Mystery 2429LTA2

Much more popular (compared to the previous model) is the MysteryMTV 2429LTA2 TV. Consumer reviews indicate that due to the larger diagonal, it is much more often bought for daily use in the apartment. Since its cost is low, Mystery 2429LTA2 is often purchased by legal entities in order to place the screen in public places: reception rooms, living rooms, hotel rooms.
The Smart TV function allows you to watch YouTube videos, series and cartoons on TV directly over the Internet. This option is especially convenient for parents of toddlers. Thus, you can find any desired cartoon for the entertainment of the child. In this case, the requirements for the quality of the picture, of course, the child has few.
However, the owners note that often all applications crash and do not work properly. Also, many complain about the quality of the image: it diffuses when viewed from afar, the declared brightness is not maintained, the colors are far from natural. With the declared viewing angle of 170 degrees, the picture is greatly distorted when you look at the screen from the side. As for the reliability of the model itself, there are no special complaints about this parameter. This is an ordinary TV - this is how you can summarize the reviews for this model.
Mystery MTV-3230LT2 TV
Model with a diagonal of 32 inches, a viewing angle of 160 degrees, stereo sound, which is provided by 2 built-in speakers of 8 W each and support for digital broadcasting standards. Screen resolution - 1366x768 pixels, frame refresh rate - 50 Hz.
Opinions about Mystery MTV-3230LT2
This is another popular model related to Mystery LED TVs. Reviews about her are generally positive. Most buyers agree that for that kind of money, this is a decent model that is needed only to simply watch your favorite channels. Compared to well-known brands, this model is inferior in picture quality due to the small resolution and small hertzovka. Dynamic scenes and close-ups appear slightly washed out.

Small viewing angles are another problem that plagues many Mystery TVs. Consumer reviews indicate that this problem has not bypassed this model either. One has only to deviate from the perpendicular, as the picture begins to distort. Color rendition also leaves much to be desired. Skin tone, nature colors often look unnatural. The result of the review of this model is a simple option for undemanding buyers, suitable for a garden or summer cottage.
Mystery MTV-4330LT2 TV
Mystery MTV-4330LT2 is a 43-inch TV with pixels, LED backlighting and stereo sound, which is provided by two speakers with a total power of 16 watts. Viewing angle - 178 degrees, frame refresh rate - 50 Hz.
You can set up the TV to receive channels according to our instructions. Use the Settings Wizard that opens when you turn on the TV for the first time.
Process in automatic and manual mode.
The setup procedure can be complicated with satellite or cable TV.
In most cases, automatic search copes with its tasks, and after the procedure, the user can only remove unnecessary channels from the list.
But sometimes the equipment does not correctly take into account the scanning range, signal source, etc. Then the procedure can be carried out manually or with the selection of new parameters. Of course, if we are talking only about new generations of TVs. In older owners, only manual mode is usually available.
There are no particular advantages in choosing one or another method of searching for channels. The first, automatic, saves time, provides high accuracy, is suitable even for inexperienced users, but occasionally it can make mistakes. The second, manual, requires more time and knowledge, but allows you to configure channels in more detail, including with poor reception quality.
If none of the methods succeeded, you can use the services of a telemaster. The cost of the call will depend on the region of residence, the distance from the workshop and its pricing policy. Alternatively, you can consider contacting volunteer organizations that can help with the transition to the new TV format for free.
On the old TV, the TV channels are tuned with special buttons and knobs. On most models, they are located under the switches or near the antenna connector on the back of the panel. Channel frequency controllers should be looked for under special covers or in drawers.
Setting up an older TV is always done manually. Very often, when you turn it on again, it becomes necessary for additional adjustment, due to the lack of memory systems. If desired, digital channels can be obtained by connecting the DVA-T2 set-top box.
How to set up a new TV
To connect a new TV to a conventional antenna, you must definitely switch to your native language. To do this, the tunable receiver is connected to the antenna cable, then by long pressing "OK", they call up the menu, look for the item "Country", the word LANGUAGE and select RUSSIAN. Now the entire menu will be in Russian.
Automatically tune channels on your TV
How do I tune my TV automatically? Almost cable TV, as well as analog, are set up in the same way. It is performed after the conclusion of a service contract with the provider.
The receiver is turned on, the message “channels are not tuned” will appear on the monitor. Using the remote control, they call up the "Menu", move the cursor one by one to the lines "Tuning channels", "Automatic tuning" and indicate the type of broadcast that needs to be tuned. Now it remains to press ENTER / OK. The TV set begins to tune to the channels, scanning the entire frequency range. It takes several minutes of time and depends on their number, at the end of the TV it will show all the saved TV channels. If it didn't work out, open it and study the instructions that come with the device. It contains a detailed description of how to set up for this TV.

When the TV operator adds new channels, the tuning is done again; for this, the edit line is used. But even after restarting automatic tuning, all previously recorded channels are retained, and new ones are simply added to free numbers.
If the old receiver needs to be configured in a new way, in the menu program they find the entry "Delete", confirm the action by pressing "OK" and restart the automatic configuration.
Manual Channel Tuning
Manual tuning for television channels is definitely necessary, because automatic tuning records some unsatisfactory. For example, doubles often appear, a poor-quality image, and there may be no sound. They are removed. But if the channel needs to be saved, you will have to act manually. This is done like this:
- look for "Channel setup", "Manual tuning" in the menu and press ENTER / OK;
- select "Program" and assign numbers to the channels;
- select the color system: PAL or SECAM, sound: 2.0 (stereo), 5.1, etc .;
- conduct a "Search" channel, if it works, click "Save".
If necessary, these steps are repeated for each of the TV channels. They must be confirmed by pressing ENTER / OK.
Setting up satellite channels
How to tune satellite channels if a dish is installed. The cable connects the receiver and the TV, putting it into monitor mode. The desired satellite is marked with the remote control from the tuner. In the menu of the receiver, select its scan. The easiest way is to entrust this to an automatic search, which immediately does everything on its own, without requiring you to enter the transponder settings manually. Before that, it is advisable to study the instructions that come with the device. It explains in detail how to set up digital channels on your new TV.
There are a lot of such channels, so you need to choose those digital channels that you like more and will be watched at least sometimes. Do not forget, when the image deteriorates, the reason may be strong wind and rain, so sometimes the position of the dish is corrected.
Setting up digital channels
High Definition Television (HDTV) is a modern standard for the transmission of compressed video signals. This technology provides the highest picture quality. On all modern TVs with a DVB-C tuner, it is now possible to tune digital channels. But such a TV should also have the ability to view HD. This new technology is becoming more and more accessible to a wide range of users. Various offices appear offering digital channel tuning. But you can deal with this problem yourself and for free.

With general knowledge and manufacturer's instructions, it is easy to set up any TV. First, the lines are marked:
- "Options", "Automatic tuning", mark the source and press "Start";
- put the cursor on "Digital" and press "Start";
- "Search Mode" and "Full" option;
- enter the following data into the fields: frequency (kHz) - 314,000 (314 MHz), modulation - 256 QAM, speed - 6875 kS / s.
Modern TVs are equipped with a network search, you just need to turn it on and wait. All parameters will be entered automatically. To add new digital TV channels, do a rescanning. Then they appear in the list.
TV setup without antenna
Having high-quality cable Internet, you can watch TV without an antenna. To do this, connect the cable to the TV set-top box. There is one more plus, channels of the former CIS countries with excellent quality will become available. Now the vagaries of the weather will not affect the broadcast. There is one more positive point, it is that the missed film can be watched later at any convenient time. can be found in the corresponding section of our website.
Setting up Smart TV makes it possible to watch TV programs directly from the Internet, but for this you need to have a stable network with a speed of at least 20 Mbps.
Let's consider how to set up a Smart TV. You can connect it in the following ways: connect a router (router) and a computer with a cable, or use the Wi-Fi service. To ensure simultaneous access of a computer and TV via a 3G modem, a TP-Link TL-MR3420 router is used, it is also suitable for a cable network. Modern Smart TVs are equipped with a special output for connecting to a loyal network, it is connected with a cable to the router. In this case, the router gives the TV an IP address and all other necessary settings. Nothing else needs to be done, the TV is ready to go.

Some TVs have built-in Wi-Fi or the ability to connect a Wi-Fi adapter, purchased separately. Which adapter to choose is indicated in the TV manual. One more condition, the router must also have Wi-Fi. This technical capability does not require pulling the cable from the router to the TV.
Connecting via wi-fi, go to the "Network Connection", and select the desired network, indicate the password for access to wi-fi. Then automatically the device.
Image Adjustment
Setting up the TV image is done as follows: in the "Service menu" find the line "Image". The options you want appear: Contrast, Brightness, Sharpness, and Color. Use the cursor arrows to change them, choosing the most suitable for the eye.
Once having set up a TV on their own, each user will be able to apply this knowledge again, one cannot do without them, because very often new television channels appear on the network or the signal source changes. You have to wait for the wizard for hours, at a time when the entire TV setup takes several minutes, and most importantly, you don't have to miss your favorite show.
(Visited 5 201 times, 11 visits today)
Installing and setting up car TVs is noticeably different from this process in conventional devices. When changing the parameters, it is important to take into account the characteristics of the manufacturer and the specific TV model.
You will need
- User's Manual.
Instructions
After you have got hold of everything you need (, TV), it's time to move on to the most important part - setting up digital television... How to set up digital TV with your own hands? Read on for more details.
I will show using the example of a receiver Mystery MMP-71DT2 and like me, his software is exactly the same as Rolson's. If you have a different set-top box, the principle will be the same, but you may have to look at the instructions.
How to connect everything
First, we connect antenna to the receiver, and the receiver to the TV... Preferably through an HDMI cable, so the image quality will be as clear as possible. If there is none, then through the usual "tulips", they come complete with a prefix, as a rule. We look at the connectors in the instructions, you get something like that. If the antenna is with an amplifier, first turn it off, then you can always turn it on.
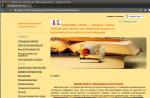
We launch all this economy, set-top box, antenna, TV. We select the required video input. If everything is done correctly, then you will see a start menu, of this type:
How to set up digital TV via "autosearch"
By default, the set-top box is not configured for anything, and you yourself will need to catch the channels that are transmitted in your region. The easiest way is to run autosearch.
After launching autosearch, the set-top box will think for a long time, and must find something in the end. Important: since everyone is transmitted on one frequency, then you will catch channels not one by one, but immediately in batches of ten. So be patient. If in analog TV channels are caught one by one, then it may take several minutes, and the set-top box will search. But then all 10-20 channels will pop up at once.
After the search is over, the set-top box will offer you to add the found channels. If you find all 20 pieces - congratulations, the process is complete!
List of tuned channels, "TV Guide" function
How to check the signal quality when setting up digital TV
Check that the signal is strong enough and everything is set up well.
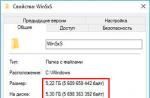
It's very easy to do. You should have an INFO button on the set-top box, a triple press displays data on the quality and intensity of the signal. Look in the instructions, it may have a different name, but it will do the same:
The higher the signal, the better. Optimally - from 60% onwards
If both indicators are high, above 60%, everything is fine.
Check it out on both multiplexes, say, on Channel One and on TNT.
Since different multiplexes are transmitted, you can catch the first one well, and the second one bad, or vice versa. Your task is to turn the antenna so that both are well caught.
But in practice it happens a little differently. For example, you can catch takes. When the same channels will occupy several places at once. It seems not critical, but annoying. How to treat me.
What to do if you caught takes, or nothing was caught
The second option is when not everything was caught, or nothing was caught. Fine tuning and manual mode will help us here. We read about it