The need to disconnect one of the hard disks on the computer, if there are several of them, can be for various reasons. Naturally, this does not mean the hard drive on which Windows is installed, but an additional one used as a file storage. If we are talking about the safety of some important files stored on one of the hard drives, as an alternative, you can simply make the partitions of such a drive invisible, in order, for example, to restrict access to important information to children or employees at work. In this case, using the functionality of the standard disk management utility or third-party programs, the letters of the necessary disk partitions are removed so that such partitions are no longer displayed in Windows Explorer or file managers. Of course, this is not as reliable data protection as encryption, but it is an easier method that will not add a headache in case of losing the disk lock password. But there are also situations when the hard drive must be turned off not because of the safety of data, but, for example, because of the appearance of annoying clicks and squeaks during operation. Or another example - if the HDD is overheating. In such cases, when there is a possibility that further work could harm the hard disk, it must be turned off until a verdict by a service center specialist is issued on it.
How do I disconnect the hard drive? There are several ways to disable a problem HDD: at the Windows level, at the BIOS level, and in hardware.
1. Disconnecting HDD inside Windows
To disable the HDD, in a running Windows, you need to start the Device Manager. In its window, open the "Disk devices" branch, right-click on the problem HDD and select the "Disable" menu item.
If the hard drive disconnected in this way will need to be turned on again in the future, we do the reverse operation. In the Windows device manager on a disconnected HDD, call the context menu and click the "Enable" item.

2. Disable HDD in BIOS
The way to disable the HDD in the BIOS of computer devices is different, respectively, due to different BIOS versions. Properties of hard drives with the ability to disable them can be found in the sections "Standard", "Advanced" or others dedicated to configuring components. In the properties of the problem HDD, you must set the active option to disable it - "Disable", "None", "Not present", "Not installed", etc.
3. Hardware Disable HDD
If the BIOS does not have the ability to turn off a separate HDD without turning off its controller, this disk can be turned off by hardware. Hardware disconnection of hard drives is carried out in the off state of the computer. To disconnect the problem hard drive, just disconnect its power cable.
If the hard drive overheats, clicks, squeaks and similar problems appear, it is recommended to immediately back up important data. If the HDD fails, in the service center it will be possible to discuss only the issue of a possible disk recovery, but not data recovery. Firstly, this procedure is paid additionally. Secondly, full data recovery is not always possible, even if experienced specialists are involved.
Have a great day!
How to disconnect the hard drive of the computer for a while? This action may be required, for example, when installing a second EFI- Windows systems. If the second media of a computer running in BIOS UEFI, install Windows, it will not have its own bootable EFI-section. And it will be bootloader dependent on the first media. But if the first disk with system partitions is disconnected, the second Windows during its installation will create itself all the partitions necessary for offline startup.
And it can start without problems if the bootloader of the first system is damaged. And, perhaps, the hard disk needs to be made temporarily invisible only in the environment of the current operating system, so that no one unnecessarily has access to it.
Let us consider below how these and similar issues are resolved.
To temporarily hide the user data media in the operating system environment, you can disable it in the system device manager. We select it in the section "Disk devices", in the context menu, indicate the shutdown.

Everything is now operated SSD or HDD will no longer appear in Windows Explorer or third-party programs with data access. The system can be turned off, rebooted - a disconnected media will not turn on itself without our direct participation.
You can enable it in the opposite way.

2. Disk management
In the Windows environment, there is another place where you can deactivate information devices so that they are not displayed in the operating system environment and cannot be accessed using programs.
This is the disk management console.
In her window on the right SSD or HDD call the context menu, click "Offline".

To enable, do the reverse procedure - click.

How do I disconnect a hard drive outside of the operating system environment? So that, as mentioned above, when installing the second Windows, it has its own bootloader on, respectively, the second media. And, perhaps, we are talking about experiments with the installation Mac OS or Chrome OS when it is better to remove unnecessary information devices with valuable data, so as not to mistakenly format them or delete their markup along with the content. In this case, a disconnection will be required either in BIOS, or hardware.
3. BIOS
The ability to turn off any of the computer's information devices can be implemented in BIOS... Or it may not be implemented. Here you need to understand in each individual case. If such an opportunity in BIOS is present, it is usually found in the peripheral settings sections - SATA- or IDE-devices. It is necessary to select the desired medium among the connected devices and set its value to the position "Disabled".
4. Hardware disconnect
100% -but working, it is also a universal method of deactivation SSD or HDD- disconnection SATA- loop or power cable (optional) inside the system unit PC or laptop case.
In Windows XP, Vista, Linux and Mac OS X operating systems, you can disable optical drives, virtual and local disks, and volumes. This article will show you how to do this.
Your actions
Method 1 of 4: Disconnect a disk through disk management in Windows XP, Vista, Windows 7
Open the Computer Management window. Click Start.
In Windows XP, click "Run" and in the window that opens, enter the command compmgmt. msc.
On Windows Vista or Windows 7, type a command in the search box and press Enter, then click compmgmt in the search results. Alternatively, enter a command and press Enter.
In the "Computer Management" window that opens, click "Disk Management" (in the left pane of the window).
Select a drive. Right click on the drive you want to unmount.
In the menu that opens, select "Change drive letter or drive path".
Disconnect the drive. Select the drive and click Remove.
Click OK (to confirm disable / delete).
Close the Computer Management window.
Method 2 of 4: Unmount a volume (attached to a folder) via command line in Windows
Note: this method works with any volumes (even missing ones).
Open a command prompt. Click Start.
In Windows XP, click "Run" and in the window that opens, enter the command cmd.
On Windows Vista or Windows 7, type cmd in the search box and press Ctrl + Shift + Enter (to run Command Prompt with administrative rights).
Unmount the volume. Enter the mountvol Path / d command, where Path is the path to the folder (to which the volume is attached).
Method 3 of 4: unmount a disk in Linux
- Open your console. To do this, in the Linux GUI press Ctrl + Alt + F1.
- Alternatively, you can open Terminal (Console) from System Tools.
- Disconnect the drive. Enter the command umount / dev / partitionID, where PartitionID is the identifier of the disk to be disconnected.
Method 4 of 4: Unmount a disk in Mac OS X
- Disconnect the drive. Right click on the drive and select “Eject” from the menu that appears.
- Or drag the icon of the disk you want to disconnect to the trash can.
- If Linux fails when trying to unmount a disk, identify the process that is using the disk. To do this, open a terminal and enter the following command: lsof + D / mnt / windows. Complete this process and disconnect the drive.
- Muting a volume does not delete the corresponding folder (or its contents).
- The umount disable command (on Linux) disables flash drives and CD / DWD drives. However, the command syntax is slightly different. For example, to unmount the CD, in a terminal enter the command umount / media / cdrom.
Caveats
- Pay attention to the correct spelling of the command on Linux: UMOUNT, not UNMOUNT.
- Before removing the flash drive, be sure to unplug it. This will ensure that you do not lose data when you remove the flash drive. In Linux, unplug the flash drive using the above command. In Windows, right-click on the icon (on the taskbar) "Safely Remove Hardware and Disks" and select "Eject".
Greetings, dear curious readers! Today we will find out how to disable the message "Windows has encountered a problem with the hard drive." Usually, such a curse really indicates a problem with your hard drive. In my case, it appeared after installing Windows on a hard disk with a certain number of bad blocks and an unacceptably high value of attribute 5 (Reallocated Sectors Count) in SMART. We will analyze separately how to check the hard disk for errors, but now we will simply turn off this window so that it does not interfere with the work with its sudden appearances. Nevertheless, as soon as the opportunity arises, I recommend replacing the hard drive with a new one.
Let's go to the Group Policy Editor. To do this, press Win + R and write: gpedit.msc.

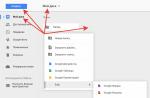
The Local Group Policy Editor will open. Go to the address: Computer configuration -> Administrative Templates -> System-> Diagnostics -> Disk diagnostics.

There we will find two parameters, which we will deal with. Double click on the first parameter and in the next window set the value to Disable. Click OK.

Let's do the same with the second parameter. As a result, both parameters will have the Disabled state.

Reboot at the end. This window shouldn't bother you anymore. But I still recommend replacing the hard drive as soon as possible, saving all your data beforehand.
Windows 10 has such a function - if you do not use your computer for a while, the system not only turns off the monitor, but also turns off the disks over time. I have never used this even on previous versions of Windows.
I do not know which is more of this - benefit or harm, but on the Internet, I realized that it’s better that the system doesn’t turn off the disks. You may have noticed this - when you return to your computer, the hard disk makes a strange sound, this is the sound of "startup", so to speak.
In general, I dare not say, but it seems that without this "disconnect" hard drives will last longer.
A hard disk is the only mechanical device in a computer (unless of course you count the fans) and it is harmed by frequent shutdowns, turning on, it must either work or not. And transitions from one state to another are best minimized.
It's easy to do, you need to open the control panel:

And at the very bottom of the page (at least so for me) there will be an item Power supply, select it:

Now you will have the power scheme you have chosen here, on the contrary, press it Customization:

And here, by the way, I advise you to immediately configure (if necessary) the time to turn off the screen and the time after which the computer will go into sleep mode when the computer is idle (that is, when no one is using it). Click on additional settings:

And now a window will open where you need to indicate that the hard drive does not turn off by itself - for this, set the time to zero and click the button OK:

After that, save the changes:

That's all, I hope the problem is solved, and if not, then write in the comments!