Read what is battery calibration on Android. How to calibrate the battery on Android and in what cases it will be useful.
Users of smartphones running Android OS often complain that battery power is quickly depleted. The problem may be a weak battery or a need to tune it.
When do you need to calibrate the battery on Android?
Every modern smartphone has a service that monitors the battery charge. Most often it is called Battery Stats Checker. Unfortunately. This service often fails, which is manifested by the discrepancy between the displayed battery charge and the actual one. Failure symptoms are:
- switching off the device before the moment when its displayed value reaches 0%;
- quick replenishment of the battery charge, and when used, a sharp drop in its level by 10-20%;
- for a long time when using the phone, the charge level is displayed at the same level.
- after replacing the battery;
- after installing custom firmware;
- replacing the modified software with the factory one;
- after a long period of inactivity of the smartphone in a disconnected state.
During a firmware upgrade, the batterystats. That is why after installing a new software shell, it is recommended
It is important that the battery has gone through at least 55-60 charge cycles since the last calibration. You should not do it often, ideally with the previous setting to withstand more than 3 months. If the previous setup did not help, do not try to use other methods of carrying out this procedure, contact the service center, as the problem may be in the battery itself.
During calibration, you must strictly adhere to the recommendations so as not to disrupt the process. For example, if according to the instructions you need to completely discharge the battery, suppress the desire to put it on recharge at 10-20%.
How do I prepare for calibration?
Before calibration, the following measures must be taken:
- Check the appearance of the battery if possible. A swollen battery should not be calibrated; it needs to be replaced as soon as possible. They also do with various defects in the battery. If you have the skills to repair modern smartphones, you can remove the cover with a special suction cup and look at the state of the non-removable battery, such models are more likely to swell. After deformation, they do not keep the charge at the same level.
- Check for system updates and let the phone download new firmware from the network if necessary. Often, during upgrades, manufacturers install files on smartphones related to the operation of the energy saving control service.
- Check the integrity of the USB port through which charging takes place. Often, the incorrect behavior of the device is associated with moisture ingress into the USB port or its deformation. In this case, the cable will not connect well to the port.
If you want to carry out a deep calibration, then you must first obtain the rights of the superuser (Root). In most cases, you will need to charge the phone fully (100%) before starting the calibration. Charging must be done from the mains, not using a PC or portable batteries.
The safest way to calibrate your battery
- Reach 100% battery power. To do this, you need to recharge it from the network for at least 8-10 hours.
- Remove the cable and unplug your phone.
- Put it back on charging until the screen shows a full battery. It is best to leave it on for 1 hour.
- Turn on the device for a couple of minutes, then turn it off again and put it on charge for an hour.
- Remove the charger and turn on the device.
- Fully discharge the battery using your smartphone normally.
- Let it charge from the mains overnight.
This procedure will help if the Battery Stats Checker service fails. She is able to restore the battery. It is recommended that these runs be done every few months to maintain battery performance. This is the safest method recommended by smartphone manufacturers.
Calibration in the absence of Root-rights
Methods that do not require intervention in the Android operating system can also be classified as relatively safe. In this case, you will not interfere with the system files of your device and will not be able to harm it. Battery calibration on Android without root is carried out in two ways.
Grown in all Android smartphones there is an opportunity to make a Hard Reset, which in translation means - a hard reboot. First, you need to read the instructions for your phone to find out which keys open the system menu. Usually you need to hold down the volume and power buttons at the same time.
The battery can be adjusted in the following way:
- Charge the battery fully 5 times. It is important that the battery must also be completely discharged.
- Calibration must be started immediately after the last charge. To do this, disconnect the device from the network, wait 30 seconds.
- Press and hold the desired buttons (power and volume). If everything is done correctly, then the engineering menu will open in front of you.
- Select the Hard reset item in it. To navigate the menu, you need to use the volume control button. For some smartphone models, the screen remains active, in this case the desired item is selected using the sensor.
- Wait for the device to reboot.
Typically, a hard reboot repairs corrupted system files to get the Battery Stats Checker service up and running. In addition, this procedure will help you get rid of other errors in the smartphone. A regular reboot of the device does not help in this case, you only need to act through the engineering menu.
CurrentWidget Utility
For the next procedure, you will need to download special software to your device. Experienced users recommend using CurrentWidget: Battery Monitor. This application does not require you to have Root rights, you just need to download it first. The Android battery can be calibrated immediately after the installation is complete. The application does not overload the system and is intended only for setting the battery, it is not able to interfere with system processes. Despite the fact that the utility is not Russified, it is not difficult to use it.
- First, look at the battery capacity. It can be indicated on the energy carrier itself or in the documentation that comes with the smartphone. If you have lost documents from your phone, you can enter its model in the search line of any browser and find an overview. In the technical characteristics column, the battery capacity is always written.
- Install and run the application. It will show the charge level of your device in real time.
- Put your smartphone to charge from the mains, watch the battery charge level. When it reaches the declared one, disconnect the device from the power supply.
- Reboot your smartphone.
These steps will help your phone remember what the actual battery capacity limit is. It is permissible to repeat these steps 5 times in a row in order to carry out an accurate calibration.
Calibration with Root Rights
If the procedures described above did not help or you are the owner of a modified firmware, then you can use the superuser rights to calibrate the battery. To do this, you need to interact with the system files, the engineering menu, or download a special utility. Let's analyze each option in more detail.
Battery Calibration Utility
Battery Calibration is the most popular program for Android battery calibration among users. It will allow you to quickly configure the display of the battery charge. You can download the utility in the Play Market, it is distributed free of charge, but you need Root rights to use it. This is due to the fact that you will interfere with the operation of the operating system of the gadget. The advantage of the program is that it is completely Russified. A sound signal will notify you of the completion of the charging process (you yourself can choose its voice).
The application allows not only to calibrate the battery, but also to obtain complete information about its condition:
- type;
- temperature;
- limiting capacity;
- quality;
- charge level.
You need to work with the application according to the instructions:
- Run the program and give it Root rights. You will then see your battery information on the screen.
- Connect the device to the network and wait until the application displays an inscription about the full charge of the battery. You can find out about this with a sound signal.
- Then click on the "Calibrate" button.
- Disconnect your smartphone from the charger.
- Use your phone until it turns off due to low battery.
- Charge the device for 8-10 hours.
Most often, one calibration cycle is sufficient. It is maximum permissible to repeat this procedure three times.
Working with recovery mode
The Battery Calibration app is also useful for other methods of restoring the true battery capacity. For example, it is used in the second stage after restoring the system files of the smartphone. Let's take a closer look at this procedure.
- Hold down the volume and screen power button to go to engineering settings.
- Select Advanced and Debugging Menu from the list of available commands. You will enter the advanced settings mode.
- Among them, you need to choose Wipe battery stats. Translated, this means: erase battery statistics. This command allows not only to calibrate the battery, but also to erase the information about the previously made settings.
- Turn on the phone and use it until the battery is completely depleted. Then charge the device for 8-10 hours without interrupting the cycle. This will allow you to achieve an accurate system calibration setting.
- Do not disconnect the device from the power supply. You can improve the accuracy of your changes using the Battery Calibration app. Run it and grant Root access.
- In the center of the screen there will be a button "Start Calibration", click on it to launch the utility.
- After a while, you will hear a beep and find that a pop-up has appeared on the screen. You just have to click on the "Ok" button.
After the performed procedures, you will need to disconnect the device from the charger. You can enjoy the precise operation of your smartphone. It will now display the battery level correctly.
Recovering a service file manually
Most smartphones do not allow users to view system files, as this can lead to the deletion of necessary services and documents. In order to get access to private data, you need to download one of the special utilities. Root Explorer received the largest number of positive ratings from users. Install and run it using your superuser rights. After starting, do the following:
- Open the / data / system folder.
- Find batterystats.bin in the list of files.
- Delete it.
- Restart your device.
- Discharge your smartphone completely.
- Connect it to the charger. Do not interrupt the process of replenishing the battery charge until the screen displays the message that the battery is fully charged.
- Then, without disconnecting the charger, go to the "Battery Calibration" application. Click on the center button, confirm your actions, referring to the presence of root rights.
- After the message appears that the calibration was successful, click on the "OK" button, close the application and disconnect the memory.
After restarting, the service will be reinstalled, the phone will begin to display the battery charge level correctly. Most of the methods based on using Root rights are based on uninstalling this file. It is not necessary to restart the mobile device after deleting the necessary data; even connecting it to a charger will help to record the result.
To extend the life of your device's battery, try to charge it only from an AC outlet. Now you know how to calibrate the battery of an Android smartphone. Share the information received with your friends, leave comments. Ask questions about the topic of the article.
Modern smartphones without a battery cease to be mobile, being "tied" to an outlet. The reliable operation of the gadget depends on the state of the battery. But there are ways to help rock and extend battery life on your Android phone or tablet. How to find out the energy capacity of a drive on Android and calibrate it, which determines the service life, you will find out later.
The essence of the problem with the battery in the gadget
An ideal mobile device, while being turned on, should consume little energy - a maximum of a few milliamperes of current per hour. The capacity of a modern battery is measured in thousands of milliampere-hours. This is how the simplest mobile phones work, in which, apart from calls, SMS and the system clock, there is nothing - such, for example, the simplest children's phone "Beeline A100" or the ancient mobile phone Nokia 3310. A full-fledged gadget with the Android system, of course, cannot be compared with these mobile phones.
The essence of the gadget's power consumption problem is in the self-starting processes and services of Android. In second place in terms of battery power consumption are numerous programs independently installed by the user. The Android version that is not brought to mind can also affect the battery consumption.
How to turn off unused features in Android
Be that as it may, the following hardware and software tools are the consumers of battery energy:
- too frequent calls, long conversation on the gadget;
- active movement of the subscriber across the network coverage area, switching between 2G / 3G / 4G networks;
- SMS / MMS sent in “packs” per day;
- backlight brightness;
Backlight levels help keep your device from wasting energy - frequent calls of third-party applications to GPS in the background;
 GPS services are opened by command: Settings - Location
 - auto-brightness of the screen (the light sensor is used);
 Give the command: Settings - Screen and check if the auto-rotate image is enabled
 - auto-rotate the image on the screen (the motion sensor is used);
 The setting is also opened by the command: Settings - Screen
 - compass;
- vibration feedback of the on-screen keyboard;
 Go to Settings - Language & input - Keyboard settings
 - distribution of the Internet via Wi-Fi to other devices;
 Give the command: Settings - More - Modem mode - Access point
 - connecting other gadgets and accessories via Bluetooth;
 Give the command: Settings - Bluetooth and check if the module is off
 - connection of computer equipment and accessories via an OTG / microUSB adapter.
All these consumers additionally load the processor and RAM, use peripherals (controllers and wired and wireless communication modules of a mobile device).
How to check the power consumption of a device
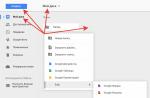
Give the command "Settings - Battery".
 A gap in the usage graph means that the gadget is turned off when charging.
 In the off state, the device does not keep track of the battery power consumption - this is possible only when the gadget is active.
Video: how to check and turn off power-consuming functions in Android
Practical Battery Overclocking Steps
Mobile device batteries can be swung or recalibrated.
Battery Calibration on Android Smartphone
Calibration of the battery controller is needed to access the gadget to 100% of the battery capacity. Before calibrating the battery, you do not need to do any additional actions (turn off Android animations, put the device in airplane mode, etc.). The "swing" of the battery is as follows.
- Discharge the battery to 0% so that the smartphone or tablet turns off by itself.
- Wait up to 5 minutes after discharging. This will allow the battery to settle.
- Charge the battery with a standard charger to 100%. Do not turn on the gadget until it is charged.
- Wait again up to 5 minutes after charging. It is allowed to disconnect the battery for this time (if it is removable). Turn off the charger before removing the battery from the gadget.
- Repeat the above steps until the battery is calibrated. Most often, already 2–3 complete discharge-charge cycles help.
Manufacturers also recommend holding the first charge for up to 12 hours, without resorting to downtime between discharge and charge. But this recommendation is not entirely correct - this is a deliberate violation of the calibration technology so that people change batteries more often.
After calibrating the battery, you can use your mobile device normally.
Video: Calibrating a Non-Removable Battery in an Android Tablet
How to "swing" the battery
The buildup of the battery is done in order for it to reach its maximum resource - and work as long as possible. In modern devices, lithium-ion (Li-Ion) or lithium-polymer (Li-Polymer) batteries are used, which, although they are devoid of the "memory effect" (unlike previously used nickel-based batteries), can be "swung" again ...
Before connecting the charger to your smartphone or tablet, it is helpful to make several attempts to fully discharge the battery. Often in Android devices, when you try to turn on a discharged gadget by holding the power button, a vibration signal is briefly triggered up to twice a second. Hold the power button (or hold it down with something) until the vibration signal in the gadget starts to work less and less often - and soon it will freeze for a long time. From this, the voltage on the controller will drop to the minimum threshold perceived by the device.
Old, "shabby" batteries last more than one year and more, if they are not loaded with unnecessary Android programs and functions.
Please do the following.
- After disabling, try to enable the gadget again.
- Try turning it on several times until the display on the device stops responding.
- Take the battery out of the device for a couple of minutes and let it pick up the voltage a little (without recharging!).
- Insert the battery back and hold down the power button again until the vibration signal emitted when the gadget is turned on finally “silenced”.
- After making several such attempts to completely discharge the battery, connect the charger to the gadget and let it charge. The device itself must be turned off.
The buildup is achieved by reducing the crystals of metallic lithium in the working layer of the battery under the influence of fluctuations in the battery voltage in the maximum permissible range of values (from 2.5 to 4.2 volts). Do not overdo it - too deep discharge of lithium-ion batteries (up to 0-2.5 volts) and leaving them without recharging in this state will lead to an irreparable loss of their capacity.
If necessary, recalibrate the battery controller according to the instructions above.
Video: how to recover a Li-Ion battery from a camcorder or smartphone
Battery Difficulties
Some manufacturers go for extra tricks in the interests of their own commerce.
First, it is the fastest possible battery wear. Especially little-known Chinese firms or completely clandestine manufacturers save on materials.
The "disposable" controller in the battery itself behaves as follows. After 3-4 years (or up to 1000 discharge-charge cycles), it can turn off once and for all, generating, for example, a "breakdown" impulse and thereby self-destructing (if the controller itself is some kind of special), but without causing harm to the device itself. It will require reworking the battery and, possibly, the gadget itself. Fortunately, this measure is one of the extreme.
"Landing" the battery on glue, from which it is difficult or impossible to remove it, is sometimes used in the most expensive smartphones and tablets with Android. This is similar to gluing the battery in the iPhone 5x / 6 (s).
Additional locks, loops and other "tricky" devices make it much more difficult to dismantle / replace the battery.
The life of a battery element without a controller (this requires reworking an outdated gadget using a soldering iron) can stretch for 10 or more years until the battery resembles a capacitor that can hold only a very small charge - 1–2% of its original capacity. Such elements will be useful only in all sorts of homemade products that are unlikely to have anything to do with cellular communications and mobile data transmission. They require a slow discharge-charge according to a special algorithm unattainable in conventional chargers that have not undergone any alterations, and regular monitoring of the condition of such batteries.
Completely "dead" cells that do not respond to attempts to recharge them (this is due to the steady aging of the electrochemical material of the battery), persistently showing 0 volts on the multimeter, are disposed of in accordance with local laws and environmental requirements.
How to extend battery life on your Android phone or tablet
The ways to save battery power are purely software. They do not apply to tampering with the "stuffing" of the gadget (for example, pulling out some of the display backlight LEDs, removing the vibration motor, etc.). Most of these settings are found in the main Android settings menu and were discussed above.
Optimizing power saving in Android
Don't keep apps you don't use in the device's memory.
Close unused programs at the moment - this will clear up the RAM.
 Excess applications are closed by swiping to the right
 Turn off unused functions (unnecessary applications, Android processes and services, "extra" wireless connection, bright backlighting at night, built-in sensors, etc.). Root access will also help to permanently block unnecessary applications.
 Root will help disable unnecessary programs and services
 Avoid places where mobile phones do not catch or constantly lose their network (long hauls between settlements, basements and underground garages, shielded rooms of secret laboratories and departments of radiation diagnostics / therapy in hospitals, restricted areas, etc.). Try to use one communication standard, for example, 3G.
 Give the command: Settings - More - Mobile networks
 In case of incorrect display of the charger on the screen or premature shutdown of the device due to battery wear, re-calibrate the battery using the above method.
Battery and device maintenance
Arrange the battery with serial "runs" with a full discharge-charge - at least once every six months in order to "swing" the battery capacity and calibrate its controller.
The internal battery controller must be matched to the charging voltage. If the cell itself is charged at a voltage greater than 4.2 volts, it regularly recharges and gradually swells. This is noticeable after one to two years of intensive battery use. Over time, such a battery will no longer fit in the gadget, it will protrude the back cover (it will stop closing, its latches will fly off). With a significant discrepancy between the output voltage of the controller and the element itself, the battery simply explodes. In the 2000s, when the Chinese smartphone market was just beginning to develop rapidly, a swollen battery was a frequent occurrence. Over the years, Chinese manufacturers began to more accurately "fit" controllers for Li-Ion cells - but from time to time, defective batteries are produced. Change the battery as quickly as you can.
Dirt on the contacts of the battery and on the terminals of the device, although they are gold-plated (gold does not oxidize), is an additional electrical resistance, from which the charge can be displayed incorrectly by the gadget. Clean such contamination with rubbing alcohol.
Try not to jerk the battery unnecessarily even if the SIM and / or memory card slot is located underneath it.
The use of chargers with a lower capacity is allowed - but not vice versa. Too powerful "charging" will cause significant heating of the battery and the gadget itself. Do not expose the battery to prolonged heat above human body temperature (36.6). At 40 degrees or more, modern controllers turn off the charge current until the battery cools down again to an adequate temperature - an increased temperature accelerates battery wear.
If the microUSB connector is dirty, battery charging may be “drip”, intermittent, or the charging current may not flow into the battery at all. Most often this happens if the gadget has been used carelessly for several years and in polluted air. Clean the microUSB socket with a toothpick, a sharpened match, or blow with a vacuum cleaner turned on at maximum power.
Video: how to shake, calibrate the battery
Timely maintenance of the battery will prolong its life. But if no recovery helps the battery, replace it.
Problems with your smartphone's battery are probably one of the most common occurrences and therefore we are looking for new ideas and suggestions on how best to deal with this problem. Battery consumption may not be uniform and you need to understand where the problem is. You can also try calibrating your Android's battery, which can significantly increase performance, if that's possible with your phone.
In this article, we'll take a closer look at how you can calibrate your phone's battery.
Our first suggestion for improving power consumption will be our article "Battery Saving on Different Smartphones". Even after these tips, the problem still persists and then it's time to calibrate the battery. The biggest battery problem is when it runs out very quickly or the phone just won't turn on.
Try to calibrate the battery before replacing it. This may be the only way that is used in most cases!
Every Android phone has a battery app that displays all the battery statistics you need for your phone. The app is very informative as it shows the battery percentage, battery life and consumption from various applications using your battery life.
In some cases, when your battery is not calibrated, this application can give errors in statistics. Calibrating the battery can correct this problem and hopefully improve performance.
Calibrating Your Android Battery - On Non-Rooted Phones
First, be sure to check the battery capacity. If you're unsure, check your phone's battery specifications online. You can find detailed specifications for your phone model on your phone manufacturer's website.
After that, look for an app called "Battery Monitor". You can find the app to download on the Google Play store.
A unique feature of this app is that it will show you the charging parameter in milliamperes (MA). Of course, this is a big help when you need to charge the battery to a certain level indicated by the battery capacity. When you reach the required level, just turn off your phone, turn it off and turn it on again. If everything is done in the same way, your phone battery will be charged to 100%
A selection of powerful PowerBanks in online stores:
Alternative way to calibrate your Android battery:
fully charge your battery and once that's done, just turn off your phone.
After shutting down, plug it back into the charger and charge your phone to 100 percent again. You will know that your phone is 100 percent charged when you see a green light on your phone.
Now turn the phone back on. Go to the display settings tab and select the option - do not turn off the screen backlight. Now connect your phone to charging and charge to 100% full again.
Finally after that, unplug the phone and let the battery drain to 0% and the phone will shut off by itself. This is a long process, but it must be done this way for the calibration process to work properly.
What can drain your phone battery
It should be noted that modern phone firmwares are full-fledged mobile operating systems. This means that while the phone is running, “background” processes are required, such as: SMS messaging service, Text input service, Antiviruses, etc.
Accordingly, for the background processes to work, it is also necessary to spend on them both the power of the central processor, RAM and, of course, the battery charge.
When using the phone “actively” (for example, launching various programs: Internet Explorer, Games, Programs for accessing bank accounts, Mail programs, etc.), we recommend that you restart your mobile phone. To do this, press and hold the "Power" button of your phone and select "Restart".
If all else fails
After a long service life of your phone, the battery eventually deteriorates. But even this situation has a way out, for example:
- Battery for charging the phone(PowerBank) solar powered
Pros: Low cost and solar and car charger. The disadvantages are obvious - it will increase the weight of your bag by about 200 grams. There are many Chinese versions of such devices on the market, but we settled on this one:.
Video review of POWER BANK 20000 mAh
The vast majority of owners of smartphones and tablets running the Android operating system are faced with the problem of rapid battery discharge. If the device has been in operation for a long time, then the reason for its low autonomy is in and the solution to this problem is only to replace the battery. But it also happens that the gadget turns off even with a high residual charge (for example, 30-50%). This behavior indicates that the battery is out of calibration for one reason or another, i.e. the android has memorized the power consumption mode incorrectly and therefore the battery is being mistakenly managed. The so-called Android battery calibration will help to cope with this problem.
What is calibration?
Calibration is the process of adjusting something, when, as a result of the adjustment, the parameters are brought to the optimal state. In our case, this is the battery of a smartphone or tablet, which must be brought into adequate mode. The main reason for battery malfunctioning is incomplete charging, so always charge your gadget to 100%.
How to know to calibrate a battery
Before starting the process, you need to make sure that the calibration is really necessary. What are the signs of the need to calibrate the battery of a smartphone or tablet?
- A noticeable decrease in battery life. Your new smartphone or tablet kept the battery for 2-3 days in the first month, and after a couple of months it did not even last for 1 day.
- Switching off the device when the residual charge is normal, i.e. when the device turns off with an incomplete discharge.
If the gadget behaves in this way, then calibration is required.
Calibrating the Battery Manually
With manual calibration, you do not need to install special utilities, you only need a device and its native charger. We calibrate the battery in 2 steps:
- Fully charge your smartphone / tablet, disconnect the charger from the mains and turn off the device itself. Put your smartphone or tablet on charge again, but this time in the off state. Charge until the message about 100% charge appears on the screen. Let's move on to stage 2.
- Go to the device's settings and set the screen always on at full brightness. Recharge your smartphone / tablet to 100%, turn off charging and discharge the device before turning it off. Always-on screen and maximum brightness contribute to accelerated discharge. To quickly discharge your smartphone / tablet, you can turn on WI-FI and watch videos in HD quality on YouTube. The goal is to simply discharge the smartphone completely, after which we charge it again to 100% and adjust the screen blanking mode as you like.
Calibrating the battery manually is often sufficient to ensure proper energy use.
Android Battery Calibration Apps
Calibration using applications is convenient in that you do not need to perform a large number of actions, as with manual optimization - the program will do everything itself with your minimum participation. The Google Play app store has a large number of apps for optimal battery performance. Let's consider the most popular ones.
Application and open it, put the device on charge. The program will notify you of the end of charging with a sound signal, after which the smartphone / tablet does not disconnect from the charger, but remains for another 1 hour. 
After an hour's exposure, press the " Calibrate"And wait for the program to finish. Disconnect your smartphone / tablet from the network, restart it. After calibration, the memory of the battery controller will be normalized and the battery will perform at optimum performance.
Before calibrating the battery using this app, find out its capacity, which is measured in mAh. This can be done by opening the back cover of the smartphone or by reading on the packaging of the device. If the back cover is non-removable and the packaging has not been preserved, then information on the capacity of your battery can be found on the Internet by the name of the device.
Once you know the battery capacity, you can start calibrating it using the app. The principle of the program is to inform in real time about the amount of battery charge, expressed in mAh. The goal is to bring the charge level to the one corresponding to your battery, or at least as close as possible, taking into account the aging of the battery, if the device is with experience. The charge level will be displayed on a widget. 
Start charging your smartphone or tablet by controlling the current using the application widget. When the charge in mAh is maximum (ideally equal to the capacity of your battery) and stops growing, then disconnect the device from charging and restart it. Android will remember the real battery readings and will not let it drain prematurely. It is advisable to carry out 5 discharge / charge cycles to consolidate the result.
But if the above instructions did not lead to a positive result, then you will have to go to the store for a new battery.
Phones and tablets running on the Android operating system have long earned themselves the fame of "all-consuming" energy devices. Many people are probably familiar with the situation when the gadget starts to turn off itself, when the battery charge has not yet been completely used up, for example, there is still 50 or 70% of the charge left.
The first thought in such a situation is to buy a new battery. But my advice to you - do not rush, just your OS did not remember the power consumption mode correctly and starts to manage the battery not quite correctly, you just need to calibrate the battery and if it does not help, then you can safely go to the store for a new battery.
How do I calibrate my Android battery?
There are several ways to set up energy saving. Some require root access, others don't. We will describe each method so that you can choose an acceptable one.
How do I know if my tablet has a battery problem?
Before you start to deal with a problem, you need to identify it and admit that it exists. After all, maybe the tablet works fine for you and the battery holds a charge well, and you are already trying to calibrate it.
1. We described the first sign above - if the device on Android for no reason or no reason starts to turn off before the battery is completely discharged. These are the cases when the battery charge is still displayed on the screen and maybe even 95%, but the tablet or smartphone, nevertheless, turns off.
2. The second symptom is a rapid decrease in the battery life of the device. For example, if after buying your tablet it was kept for 5 days, and after a month it became 4 days, after another month of use - 3 days. This is a sure sign that the battery is incorrectly set up and requires calibration.
What does calibration mean?
If you look in the dictionary, it means - setting or bringing to the optimal state of the device / device. It is often used in electricians when it is necessary to adjust any device to certain standards.
In our case, this is the adjustment (calibration) of the battery in order to improve the power consumption so that it is in optimal shape and, therefore, keeps the battery charge as long as possible.
Calibrating Android Battery Without Rooting
Method 1
First, you need to know the capacity of the test battery in milliampere-hours (mAh). You can find information on the Internet, in some review of your tablet model, or just look under the battery, most often the characteristics are written on it.
Ampere is a unit of current measurement, in mAh the capacity of the battery is measured. It means how many milliamps the battery is capable of giving for one hour of time. If consumption increases, then the capacity indicator also drops.
The next step is to install the CurrentWidget: Battery Monitor program from the Play Market. This app will display the battery charge in milliamperes (mA). Now, by tracking the charge level, you need to charge the battery to the capacity specified by the manufacturer.
When the required number of milliamperes is reached, turn off the tablet and start. By rebooting the device, you will let it know what the real battery level is.
If it does not help, then try another modification of this method of battery calibration - do 5 full charge / discharge cycles of the phone so that when fully charged, the battery capacity reaches the required maximum in mAh. After the last fifth full charge, we take out the charger, wait 10-20 seconds and do a hard reset of the tablet.
After these manipulations, the device must remember the required charge level and take it as 100%.
Hard Reset - full reset of all settings, rollback to factory settings. To do this, dial * # * # 7780 # * # * and press the call button. This USSD request does not work on all Android devices!
Method 2
The second method is a kind of the first, the only difference is that you do not need to install special programs, only work with charging.
- To calibrate the battery, charge the battery to a full state so that the screen shows 100%, then disconnect the charger and turn off the tablet (phone). Then connect the charging cable to the disconnected device and continue charging the battery until the LED indicator (LED) turns green, indicating that the battery is fully charged.
- Turn the device back on and turn off the option to automatically turn off the screen (usually on Android: display settings -> sleep mode). Now that your tablet has stopped going into sleep mode, we start charging the battery again to 100%.
- It is necessary to turn off the sleep mode so that the device will run down faster. Therefore, after fully charging, we leave the tablet with the display on and wait for a complete discharge.
- We recharge our device and that's it, now Android should properly use the battery and observe a full discharge cycle. Do not forget to turn on "Hibernation" back!
Calibrating Root Android Tablet Battery
There are several ways to calibrate with root access. If one of them did not work, then there is a high probability that the second will give results.
Method 1 - Battery Calibration
Install Battery Calibration software from Play Market. Then connect the charger and charge the battery to 100%. Then open the Battery Calibration application and look at the battery level value in the program, as most likely it will be different from what is shown on the display.
Continue charging the tablet until it is 100% Battery Calibration. When the charge level reaches the maximum, press the "battery calibration" button, and then reboot. That's it, we calibrated our Android tablet.
As in the case of battery calibration without root, we are trying to tell Android "reference points" so that he can see when the battery is fully charged and when it is discharged.
Method 2 - Recovery mode
1. Go to Recovery mode on Android and go to the Advanced section where you will find the "wipe battery stats" option. This will delete any previously made calibrations by you or by the system itself.
Recovery mode is Android's recovery mode. On different types of devices, the boot method in Recovery mode is different, but often the actions are something like this: on the turned off device, the volume up button is pressed, then the Home button is pressed, after which you must press the power button. All three buttons must be pressed at the same time, not in turn!
Video example of loading in Recovery mode:
2. After resetting all previous Android calibrations, discharge the battery completely before turning off the device. After that, put the disconnected device on charging, and without turning it on, charge it to full.
3. Turn on your tablet / smartphone without disconnecting the power cable and calibrate in the Battery Calibration app. With this step, we will further strengthen the settings and make Android understand what we need.
- If the batteries are already 5-10 years old, then here you need to think not about calibration, but about buying a new one. And don't be surprised if the above methods won't work on your devices;
- On new devices, always do several full discharge cycles - charge the battery, calibration can also be done;
- If all else fails, check your charging cable, it may be a problem;
- Do not constantly charge from USB. Use this method only in extreme cases, when there is no normal outlet;
- It is not recommended to use non-original chargers - they can quickly drain your battery and it will no longer be able to give the number of milliamperes hours for which it is designed;
- If the device has been dropped, flown, or floated, these methods may not help. In this case, contact the service centers, let them clean, repair. Because miracles happen only in fairy tales!
- If you constantly fly on an airplane or go to the mountains, then do not be surprised at the speed of battery discharge, this is not about Android and calibration, but physics.