3
Introduction
Relevance of the project
It's no secret that all adults and children love watching cartoons. We can’t even count the number of cartoons we’ve watched. We thought we knew everything about them. But one day, after watching another cartoon, we thought: How are they created? Who's working on this? We asked our classmates, but they also found it difficult to answer.
It became very interesting for us to try ourselves as animators.
We have set ourselves target: create a plasticine cartoon.
To achieve this goal we need to solve the following tasks:
Study the literature, collect information on this topic;
Summarize and analyze the information received;
Draw up a work plan for the project;
Master the technology of modeling from plasticine.
Learn special computer programs.
Present the result of your work.
Survey results
We conducted a survey among classmates. For this purpose, we compiled a questionnaire (Appendix 1). 26 people were interviewed: 8 boys and 18 girls.
After analyzing the survey, we found that:
Do you like watching cartoons?
Boys Girls
Almost all the children in our class love to watch cartoons.

4
Favorite cartoons
Boys Girls
Most of all, the guys love to watch foreign cartoons.


Boys Girls
Dedicate from 30 minutes to 4 hours to this activity every day.

Boys Girls
The guys don’t know what kinds of cartoons there are and how they are created.


The guys in our class believe that cartoons teach us kindness, respect, responsiveness, the ability to be friends, not to deceive, to be strong and courageous.

 5
5
ABOUT CARTOONS
From the encyclopedic dictionary we learned that a cartoon, an animated film, an animation are all the same thing, this is what animation is called in our cinema, translated from Latin it means “soul”, “animation” or “revival”.
Cartoon , cartoon(from the merger of Lat. mult iplicatio - multiplication and Englishfilm - film) - this , made using frame-by-frame rendering tools and intended for display in a cinema, broadcast on television, viewing on a computer screen and other electronic devices.
We looked for information about cartoons from various sources: books, the Internet, educational television programs.
IN  where we learned about the history of animation. In 1892, a man named Charles-Emile Renault showed the first “luminous pantomime” in the optical theater he invented, in which pictures, replacing each other, made a smooth movement. Reno’s work was continued by Emile Kohl (Fig. 1), an artist and student of the most famous caricaturist of the 19th century, Andre Gilles.
In 1908, the premiere of the first fully animated film in history took place - the two-minute Phantasmagoria, which looked like a come-to-life chalk drawing on the asphalt. This year is considered the year of birth of animation.The animation genre developed along with cinema. So, first sound came into him, and then color.
Rice. 1
One of the most famous foreign cartoon studios is the Walt Disney Studio. Z and Walt Disney made 111 cartoons throughout his life. Everyone knows such cartoons as: “Tom and Jerry”, “Mickey Mouse”. (Fig. 2,3)
Rice. 2 Fig. 3

 6
6
The largest in the former studio is Soyuzmultfilm, founded in The most famous cartoons are “Well, Just Wait,” “Winnie the Pooh,” “Crocodile Gena.” (Fig. 4, 5, 6)

TYPES OF CARTOONS
Cartoons can be divided into several categories:
by method of creation: drawn, doll, plasticine, computer;
Pabout the duration: can be divided into full-length cartoons, usually lasting more than 70 minutes, and short films - about 10 minutes;
by goals and objectives: there are educational cartoons, and there are entertaining ones;
according to age criteria and interests: for children and adults.
D To create our cartoon in a school setting, we chose the plasticine version. Modeling from plasticine is the most accessible way for creativity.
7
ABOUT PLASTICINE
Have you ever wondered what plasticine is made from? And we thought... It seemed to us that plasticine consisted of some complex substances. However, after rummaging on the Internet, we learned that the composition of plasticine is not at all complicated.
Plasticine- it's the same , with which people have been familiar for several millennia. It is only technologically improved and more suitable for the manufacture of products. In addition to fine purified clay powder, the composition of modern plasticine also includes dyes, wax, animal fat, ozokerite of petroleum origin and ceresin, as well as petroleum jelly and other substances that prevent the plasticine from drying out and hardening.
Previously, only clay was used for modeling. The first plasticine was gray. But after a few years it became so popular that they began to produce it at the factory and even add dye to it.  burning pigments - at first, however, only four colors. We have access to plasticine of all colors of the rainbow and even more (Fig. 7).
TYPES OF PLASTICINE
Fig.7
Now different types of plasticine are known. For example: sculptural plasticine - for professional sculptors, and ornamental plasticine - for children; it is produced in multi-colored sets in boxes. Sculpting clay typically comes in black or dark olive color and is sold in large bricks. In terms of their properties, all these plasticines differ little from each other.
8
HOW OUR PLASTICINE CARTOON WAS CREATED
Stages of working on a cartoon
1. Find the script.
It is important to think through the scenario clearly. What will the characters do in the cartoon? It is necessary to develop a clear storyline. Think about the beginning, climax and ending. Because This is our first time doing this kind of work, so we decided to go with a ready-made plot. For the cartoon we chose the Russian folk tale “Kolobok”.
2. Distribute roles.
In a large team, it is important to clearly distribute responsibilities in order to achieve productive and coordinated work. We had no difficulties with this, because... We were all interested in the positive outcome of our project, and there was a lot of work to be done, there was enough for everyone.
3. Sculpt the characters and background.
You need to decide what the characters will look like, where the cartoon will take place, and create the appropriate scenery.
4. Make a cartoon.
You can “revive” the hero using time-lapse photography. We move the hero according to the script. After each phase of movement we take one frame.
5. Voice the characters.
Add a soundtrack and titles.
6. Present the result of the project.
9
TECHNOLOGICAL SEQUENCE OF CREATION OF A CARTOON
Type of work
Photo
Tools and accessories
Making a screensaver
1.Make letters from plasticine.
2. Lay them out on cardboard.

Cardboard, plasticine.
Creation of the main characters
1.Make figures of a grandmother, grandfather, bun, hare, wolf, bear, fox from plasticine.


Plasticine, plastic knife
Selecting and making a background
1. Select a suitable picture on the Internet; 2.Print on a color printer.
3.Make decorations from plasticine: trees, bushes, flowers, mushrooms.
![]()


Paper, color printer, plasticine.
U 
installation of equipment and background
1..Install the camera on a tripod, secure it in one position;
Lock the background.
Put up the decorations.
Camera, tripod, cartoon background.
WITH 
creating photographs for a cartoon screensaver
1.Lay out plasticine letters.
2. Take a photo.
Camera, letters, screensaver.
Creating photographs for a cartoon
1.Take photographs of every movement of the cartoon characters.


Camera, plasticine heroes.
Cartoon dubbing
1. Record the text of a fairy tale in the GarageBand sound editor program.
2. Select a music file in MP3 format;
3. “Overlay” the selected file and text file onto the audio track in the iMovie video editor program.


Computer, GarageBand audio editor, video editor, iMovie, MP3 file
Cartoon montage
1. Edit the frames so that the movements of the characters are created under the already “superimposed” text;
2.Set the display speed of each frame.

Creating titles
1.Write the required text in the video editor program in the titles tab.
2.Place it at the end of the video feed.

Computer, iMovie video editor program.
12
CONCLUSION
By completing this project we have achieved our goals: Create your own plasticine cartoon! Your own cartoon means positive emotions, good mood and an interesting experience.
The “birth” of a cartoon is a long and complex process. Our first experimental film was 4 minutes 16 seconds long. For an outside observer, this is very little, although the work that took us 8 months was done colossally. We tried to learn the basics, understand the principles of shooting, lighting, etc. This is how the secrets of animation mastery are gradually learned.
We tried ourselves in different roles. We were screenwriters, directors, animators, sound engineers and photographers.
During the creation of the cartoon, we learned to work in groups, learned to listen to the opinions of others. And the main thing is not to be lazy and work together, because the result is worth it.
After finishing this project we did conclusion: that making cartoons is a very difficult, painstaking, but incredibly exciting and interesting job. This is talent and creativity.
13
Annex 1
CLASSMATE SURVEY QUESTIONNAIRE
Questions and answers
Boys (persons)
Girls (persons)
Do you like cartoons?
Yes
No
Favorite cartoons
Domestic
Foreign
No favorites
How much time a day do you watch cartoons?
Up to 30 minutes
Up to 1 hour
Up to 2 hours
Up to 3 hours
Up to 4 hours
Over 4 hours
What types of cartoons do you know?
Drawn
Plasticine
Computer
Difficult to answer
14
LIST OF REFERENCES AND INTERNET RESOURCES
http://nsportal.ru/
Cartoon pictureshppts://yandex.ru/images
Wikipediahttps://ru.wikipedia.org
TSBhttp://www.rubricon.com
Collection of Russian folk tales
MP3 file "Visiting a fairy tale" (minus)
If you are interested in a program for creating cartoons, then you have come to the right place.
Applications and programs that work with animation and video are constantly evolving.
Their number is increasing every day, as are their capabilities.
Previously, it was difficult to imagine that a cartoon could be made at home. Now it is possible.
Among the masses of those suitable for this role, we have selected the top 5 most popular, multifunctional and at the same time easy to use utilities.
iClone Pro
One of the leading utilities that covers the full range of work with animation. Using iClone tools, you can not only create characters, but also work out landscapes and textures of different sizes.
Its functions allow you to create a full-fledged cartoon even without any skills or prior knowledge in this environment. Along with it, a wide library of details is offered, which contains various blanks that will simplify the work at the initial stage.
Please note: iClone supports the Kinect option developed by Microsoft. It allows you to transform the actions of living people directly into an animation project. All you have to do is capture the necessary movements on camera.
Among the advantages are:
- the ability to adjust the transparency of created parts;
- the presence of the FaceTrix option, which allows you to convert a regular photo into a 3D model;
- elaboration of textures down to the most minimal details.
As for the minuses, there is only one, but quite serious. It is free only for the first month of use, then it requires payment for both subsequent months and for proposed updates.
Toon Boom Harmony
It is actively used by such film industry giants as Walt Disney and Warner Bros. They set it apart from the rest due to the presence of a network mode. It allows a group of people to work on one project or even a scene at once, which greatly speeds up the process of creating a video and makes it better and more thoughtful.
In addition, Toon Boom Harmony supports working with layers, allows you to create smooth transitions between different scenes, has an image capture function with a camera, and many others. The interface is simple, but requires at least minimal knowledge of English, because it has not yet been translated into Russian. The cash payment after the trial period is an order of magnitude lower than that of the previous application.
The utility is leading and forces developers to rely on its functionality, but at the same time it has a minus. A huge number of possibilities greatly affects the computer. If it is not equipped with the latest specifications, you may experience problems with overheating of the graphics card and processor.
Anime Studio Pro
Unlike others presented in the review, Anime Studio is not replete with its capabilities in working with 3D objects. However, this completely compensates for its functionality, which allows you to do vector animation at a high level.
It is the best option when creating cartoons in the anime genre, which is what it is aimed at. Libraries with ready-made characters and basic textures are connected to it, and in addition there are a lot of scripts.
One of the key advantages of the program is pairing with other software. Using Anime Studio, you can easily import and export PSD format blanks and even exchange created textures or finished scenes with those who worked in a completely different development environment.
Please note: when you add an audio track to a scene, characters are automatically enabled to move their lips.
Among the shortcomings is the fact that it has not yet been translated into Russian. There are a lot of crackers on the Internet, but they are usually superficial and only change some menu items. On the other hand, there are many video tutorials on this software on YouTube, and if you wish, you can easily master it.
ZBrush
The application is appreciated both among professionals and among beginners. Its interface is very clear and flexible, and the list of options is built logically, which simplifies the work on creating animation. The ability to draw any object down to the smallest detail is why it is so loved and popular.
A well-known fact connects the utility with the full-length film “Pirates of the Caribbean”. At one time, it was used to create tentacles on the face of Davy Jones, which repeatedly made viewers shudder just by looking at them, they were so realistically created.
The positive aspects include:
- wide selection of brushes and paints;
- unique functions in building models that are not available in other options;
- imitation of the creation of 3D models;
- maximum detail;
- availability of additional modules;
- relative requirements for computer capabilities.
If we talk about the difficulties when working with it, then the user will take a lot of time to study all the options that ZBrush provides. But on the other hand, the software is so undemanding that it can easily be installed on 32-bit systems, for which it is very rare to find good options from among the latest ones.
Now I will tell you how to make a cartoon at home.
I don't do computer animation, that is. drawn on a computer (flush, three de and te pe), so I won’t touch it. These cartoons are made from photographs, that is, in essence, all of these are varieties of stop-motion technique. Equipment you need is a digital camera, a tripod (although there are ways to do without it, more on them below) and a computer (for editing).
Techniques you can try at home:
1) Translation
We cut out the characters from paper and move them on the plane.
It might look like this:
Or so
Or so
2) Plasticine animation.
We sculpt characters from plasticine, they can be either flat (then the technique is close to transferring) or three-dimensional (then the technique is close to puppet animation)
I work with plasticine very little, well, somehow it turned out that way.
But here there is a caterpillar.
And here is a dinosaur and a man
3) Subject animation.
Cubes, construction sets, cars, trains, animals and people are suitable here.
All sorts of self-built city houses, etc., turn out very cool.
4) Loose animation.
Not only sand, but also all sorts of cereals, beads, coffee, etc. and so on.
Among other things, fiddling with bulk substances is very calming and relieves stress well.
5) Pixilation.
The main actors here are you. You can ride the chair like a car, walk through walls, and even fly.
Creating a cartoon at home includes two main stages:
1. Shooting.
2. Installation.
SHOOTING
For shooting you will need a camera, a tripod, good lighting (lamp) and, in fact, what you are going to shoot and a background for it. And it can be almost anything.
Timing: usually I make 6 frames per second, sometimes 4 (this also depends on the program in which you will later edit your cartoon, but more on that below).
Accordingly, at a speed of 6 frames per second, for a minute of film you need to take 240 photographs (there, of course, there will be all sorts of pauses and credits).
The tripod needs to be secured. I stick it to the floor and table with paper tape. All the screws on the tripod must be screwed tightly to prevent any movement of the camera.
In principle, you can try without a tripod, then the camera is simply placed on the table or you can tape it, for example, to a stepladder (but this, frankly, is a complete nightmare). When I started, I didn't have any tripod.
The result looked like this:
There is also such a thing - a tripod-clamp, with the help of which you can screw your camera to a table or stool, it’s quite convenient I must say (but I don’t have it, but my friends used it very successfully for cartoons)
It’s better to immediately set a small photo size; I make 640 by 480 pixels at maximum resolution. If you forgot and took large photographs, then later, before editing, do not forget to reduce them.
Now you need to install the light. If you work with natural light (from a window), be prepared for it to change unexpectedly - for example, a cloud will cover the sun (especially if you set the shutter speed and aperture manually); if the mode is automatic, then the camera should adjust itself, but my camera in auto mode produces completely ugly colors.
It's easier to work with artificial light. He's the same all the time. I have a 40 W energy saving lamp, which gives 240 W light, it has a standard base, and it screws into a regular clothespin lamp. It is also convenient to work with adjustable (bending) table lamps and floor lamps.
Now we need to line up the frame. If you're shooting flat, you'll need a suitable sheet or fabric for the background. If your characters are three-dimensional, then you need either scenery or a suitable background. The background, as a rule, also needs to be secured, especially in relation to the tripod. This can be done using paper tape, pins, etc. That is, if you are shooting on a table, the tripod legs need to be attached directly to the table top. Make sure that there is no unnecessary stuff in the frame and mark the boundaries of the frame. I usually mark the borders directly on the background sheet.
Place the main character on the background (for example, you have a blue sheet with a boat on it), check all the camera settings: photo size, shooting mode, light, colors, frame borders, tripod immobility - once again tighten all the knobs on the tripod. Remove the main character.
You can start shooting.
First of all, take a couple of frames of an empty background. Then we should have characters.
For example, at the beginning the hedgehog comes. We place the hedgehog near the border of the frame, let the tip of the nose appear in the frame. We take pictures. We move the hedgehog forward about a centimeter and take a photo. Don't forget to remove your hands from the frame when taking photos! After shooting 10-15 frames, we scroll through the frames in preview mode at a fast pace, this is approximately how the movement will look in your cartoon. We draw conclusions - we like the way it moves, we don’t like it; errors are usually immediately noticeable. We continue: move, remove, move, remove.
Take at least 30 frames (5 seconds per output) for a single element episode (for example, a car arrived and left), otherwise it will be too short and indistinct for the viewer.
When you have shot everything you wanted (remember that for a minute at a speed of 6 frames per second we need 360 frames), you can think about the credits and title. Of course, you can make them later during editing, but it is much more interesting to make them in the style of a cartoon: for example, mold them from plasticine or write on paper directly under the camera. If you write, then put the sheet on the background and write one or half a letter at a time, and don’t forget to take pictures.
When everything is filmed, it’s time to move on to the second part of the process - editing.
INSTALLATION.
Let's agree right away, I haven't worked with sound at all yet, I just select music that suits my mood, so it's useless to ask me anything about voice acting.
A cartoon from photographs can be made in any editing program (program for working with video). Almost everyone has Windows Movie Maker (hereinafter referred to as Movie) on their computer, I will tell you about it and about Sony Vegas (hereinafter referred to as Vegas), which I currently use. All the rest, in general, work by analogy.
First of all, you download all the photos to your computer and put them in a separate folder. Then you open an editor for working with photos, which allows batch conversions, and take photos of the desired size (if you didn’t do it right away) and rename them so that all files have consecutive numbers (for Movie this is optional, for Vegas and others it is mandatory).
Then you open your editing program, put your sequence of photos on the video track, setting the desired speed, on the audio track - suitable music, save the file and proudly show it to everyone. Hooray!
And now in more detail and with nuances.
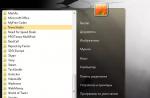
Let's start with Movie.
Open the program and import your photos.
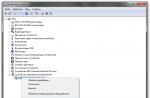
Set the frame rate, go to “service” then “Options”.
You need to select an image duration of 0.125 and a transition duration of 0.25
Then you select the necessary photos and drag them with the cursor onto the “Video” track
Then import the music you want and drag it to the “Sound or Music” track
Cutting the music to the desired length
Save, to do this, click “File”, then “publish movie”
Then follow the prompts.
Now about Vegas. In general, almost the same, some important points
Open the program, click "File" and "Properties"
Here you need to set the frame size (like your photos) and frequency (this is the number of frames per second)
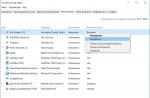
Next, to insert photos, click “File”, then “Import”, then “Data”, open the desired folder, select the first frame you need, select it, check the “Open sequence of still frames” box at the bottom, in the “Range” box "The first number is the number of the frame you selected, the second number (on a white background) is the number of the last frame in the sequence, by default - the last file in the folder, if you do not need all the files, enter the number of the last one you need instead.
Next, it’s similar to the Movie: Your sequence ends up on the video track (if it’s not there, you need to drag it there), import the desired music ("File", "Import", "Data", select the file), insert it onto the audio track, cut it to required length
Save the file: "File", "Create as"
Select the video tab, the parameters in the red square should be as in the picture
Next, click “Ok”, then “Save”, wait until the file is calculated, look at it and enjoy the result.
The technology for creating cartoons from plasticine is called Stop Motion animation. Stop Motion is video material obtained from sequences of frames captured in photographs or selected from videos.
Materials and programs for creating a cartoon from plasticine: plasticine, camera, computer, microphone, and programs (for example, Windows Live Film Studio, Windows Live Movie Maker, Nero, or programs for creating plasticine cartoons Claymation Studio, Moho, Anime Studio Pro). Using this technique you can also create drawn or puppet cartoons.
The principle of animation is to quickly reproduce pre-prepared drawings (pictures) on the screen. Since the optic nerves do not record information for a duration< 1/6 сек., то быстрая смена кадра (изображения на экране) не замечается человеком. С точки зрения технологии процесс выглядит так: на каждом следующем рисунке фигурка представлена в чуть иной фазе движения. Отдельные рисунки покадрово фотографируются, а затем проецируются на экран со скоростью 24 кадра в секунду в звуковой анимации или 16 кадров в секунду в немой.
According to the technological process, cartoons are:
- — drawn (the Walt Disney company worked in this technique);
- - computer;
- - puppet films (first appeared in Russia, famous cartoons: “Cheburashka”, “Mitten”);
- — plasticine (cartoon “Plasticine Crow”);
- — sand (use of any bulk materials).
Technology for creating an animated film
(from the work experience of Loboda N.V., teacher at the MADOU d/s No. 14 in Ishim)
If you, together with your pupils (children aged 5-7 years), decide to create your own animated film, you will need:
1. Digital camera
3. A computer with a program for editing video materials (Windows Live Movie Studio, Windows Live Movie Maker, Nero, or programs for creating plasticine cartoonsClaymation Studio, Moho, Anime Studio Pro and others).
4. A selection of musical works
5. Materials for creating characters and scenery (paper, paints, plasticine, natural materials, etc.)
Stage 1. Development of the plot of an animated film.
The plot can be a simple sketch, a few minutes long, invented by children, or a dramatization of a famous fairy tale, story, song, poem, but try to ensure that the cartoon carries some kind of complete idea or thought. It’s good if children initiate the creation of the plot. Think with them about what material is best to make an animated film from. For the first tests, it is better to use a few objects.
Stage 2. Creation of characters and scenery.
Discuss with your students the characters and scenery of the future animated film. Create your cartoon characters (for people or animals, you can first make a wire frame). Prepare the decorations, for this you can print the background on a sheet of paper, you can use plasticine, three-dimensional objects: houses, trees, bushes, interior items. When shooting from multiple angles, you can prepare several different backgrounds.
Stage 3. Preparation of the workplace.
Depending on what materials will be used to create animated films, you will need to equip your workplace.
If the action will take place on a horizontal plane of a table or floor, install a tripod with the camera lens down. Look into the camera lens; there should be nothing unnecessary in the frame (edges of a sheet, shadows from furniture or people...). Intense but uniform illumination of the working plane is suitable for such shooting. It is better to secure the main sheet (background).
If an animated film uses three-dimensional figures, then the workplace should be a stage with decorations. In such a shoot, it is important to set the light correctly.
Stage 4. Preparation of working materials.
All the necessary materials for creating a cartoon must be prepared immediately. Because after the first frame is taken, the children find themselves in a state of play. They begin to quickly change the situation in the frame, trying to achieve the final result.
Of course, new ideas arise during the filming process. Tools such as scissors, glue, colored paper, plasticine, and markers should be nearby.
Stage 5. Taking static pictures - photographs.
So, when everything is ready to shoot, imagine how you want your film to make the audience feel. Remember that this state will be largely determined by the first frames they see and the first sounds they hear.
For animated films of a narrative or educational nature, it is better to start from scratch. That is, the first frame is a blank sheet - the background. Afterwards the characters will appear on it, and only then the action will take place.
Set objects and characters to their original position, adjust focus, contrast and other shooting parameters. Take the first shot.
Change the hero's position a little. Take a second shot. One second of video should contain 5-24 frames; the accuracy and smoothness of the characters’ movements will depend on their number. The smaller the differences between frames, the smoother the movement of objects will be.
It is important that the camera does not move when taking pictures. So secure it to a tripod, place the tripod firmly so that children will not move it. For shooting or pressing a button, it is better to choose one “responsible” person.
Stage 6. Layout (installation).
Transfer the captured photos to your computer. Place pictures, music compositions, voice recordings in an editing program. adjust the speed of each frame individually or all at once. If necessary, you can copy, paste, delete them.
If the film needs to be dubbed, then it is better to do this when you have finished editing on the timeline. Then it is easier for the child to navigate the plot and comment on what is happening on the screen. But you can also record the sound in advance and make an animated film while listening to the audio recording. Convert the resulting work into video format and enjoy watching it.
It is important to immediately show the finished cartoon to children. Then the technological chain of making a film will be clearer to them. And when shooting a new animated film, they will approach the process more consciously. When children watch their own animated films, they enjoy the results and are proud of their participation in the creation of the film. They are happy to show it to their parents and talk about how they created it.
For kindergarten teachers, co-creating a cartoon with children is an additional opportunity to talk about something new, reinforce the material they have covered, and make a visual aid for classes or games.
Many people would probably be interested in using software such as a program for creating cartoons. For some, this can even become a full-fledged way to earn money.
In any case, programs for creating cartoons are something unusual and interesting, and therefore it would be useful for each of us to use one of them at least once.
We have collected 10 of the best programs for creating cartoons today. They are the easiest to use and have very wide functionality. It will be interesting!

1.
Toon Boom Harmony is rightfully considered by many experts to be the best program for creating cartoons.
Here you can create your own masterpieces in both 2D and 3D formats. The range of tools here is more than impressive, in particular there are many built-in special effects.
In addition, it is worth highlighting your own library, in which you can find a great variety of characters, as well as pictures, backgrounds and objects. In general, there is room to expand!
Here are some more features of Toon Boom Harmony:
- the ability to import 2D cartoons into 3D;
- very high quality of the final animation in cartoons;
- flash video support;
- Ample opportunities for importing, exporting and converting files.
The most important thing is that with the help of Toon Boom Harmony, in fact, you can implement absolutely all the ideas that come to your mind. You just need to understand the functionality.

Rice. No. 1. Toon Boom Harmony
The program is paid, but there is a trial period.
2.
This program is more suitable for creating 2D cartoons. Professionals do not recommend using Anime Studio Pro to work in 3D.
True, it can be upgraded on your own and combined with Unity 3D (this feature was built into the program initially), but not everyone can do this.
But its functionality is even wider than that of Toon Boom Harmony. The process of editing the background and individual details of the overall picture stands out especially.
You can change even the smallest elements that are present in the cartoon. Opportunities for import and export are also quite wide.
Other features of Anime Studio Pro are as follows:
- There are also a lot of special effects here;
- wide range of filters;
- built-in ability to make videos for Adobe Flash Player (special operating mode);
- there are blanks from which you can simply make something of your own;
- ability to work with images in PSD format.

Rice. No. 2. Anime Studio Pro
The trial period in this case is 30 days.
3.
In this case, you are, in fact, not creating a full-fledged cartoon, but only an animation, that is, a quick slide show of several almost identical pictures. But that doesn't stop animation developers from all over the world from using Easy GIF Animator to create their masterpieces.
You can apply a variety of effects, transitions, and the like to animations. All this allows you to create really high-quality cartoons!
What is important is that Easy GIF Animator is very undemanding of computer resources. It is also worth noting that the user can save cartoons in AVI format and then upload them to various resources online.
A few more features of Easy GIF Animator:
- You can take AVI video, ready-made GIF and Flash animations as sources;
- ample opportunities for editing transitions between images or source files;
- the ability to generate HTML code from a cartoon (!);
- the result can be viewed through a browser.

Rice. No. 3. Easy GIF Animator
Easy GIF Animator can be run 20 times for free. After that you will have to buy it.
This program has an analogue on Android (here is the link). Although the mobile version is very far from perfect.
If we talk about operating systems for smartphones and tablets, then it is better to look for another program.
4.
This is the only completely free program in our TOP today. True, its functionality is not as rich as that of the top three, but given the absence of fees for use, everything is very good.
Unfortunately, you won’t be able to download Express Animate for free in Russian either. Its interface will still be presented in English.
Here are the main features of this editor:
- You can edit a cartoon literally frame by frame;
- simple GIFs can be made very quickly and easily using Express Animate;
- the finished cartoon can be converted into a variety of formats;
- In addition to the image, you can also add background sounds - the range of functions for this is also very wide.

5.
iClone Pro is a professional package designed for editing and creating cartoons, films and other similar content.
The set of tools here is larger than in previous programs, but it will be difficult for a beginner to understand all this. That is why we placed iClone Pro in fifth place in our ranking.
But if you still manage to understand the interface of this program, more than a wide range of tools for working with relief and textures will appear before your clear eyes. You can make the background the way you want - from your head straight into a cartoon!
In addition, there is a large library of characters and other objects. You can take everything ready-made and make something of your own and unique out of it.
Here's what else you can note about iClone Pro:
- the ability to capture human movements and convert them into a cartoon, that is, assigning the actor’s movements to a cartoon character (Kinect technology and, accordingly, the iClone Pro program were used to create many of the cartoons you know);
- for 3D this program is simply ideal;
- there is convenient integration with 2D editors;
- The character's appearance can be taken from a photograph of a real person.

Rice. No. 5. iClone Pro
The trial period is valid for exactly 30 days.
6.
This tool was originally designed to work with three-dimensional figures, that is, in 3D. Accordingly, ready-made objects can be assigned some characteristics and made to move. This is how a cartoon is created.
If you need a 2D movie, ZBrush will be absolutely useless. But for working with 3D it is simply amazing!
There are a lot of different brushes, palettes and other editing elements.
Among other things, plugins are supported, which means that the already wide range of functions can be increased.
The main advantage of ZBrush over other programs is the ability to accurately draw individual, even the smallest, details.
Also worth noting in ZBrush is the following:
- the entire process of creating a character involves virtual modeling from plasticine;
- ZBrush is used as an auxiliary tool for drawing details or creating characters, but movement can also be imparted to them;
- large set of effects.

Rice. No. 6. ZBrush
ZBrush is free to use for 45 days.
7.
And again we have a completely professional set of a wide variety of tools for creating any characters and plots with them in 3D format.
Unfortunately, Autodesk Maya is not suitable for hand-drawn cartoons. But it is quite possible to create a unique character, again, from your head using this program.
Many of the world's leading animation studios use Autodesk Maya to create their new creations. This once again confirms the idea that we are talking about one of the most feature-rich editors. But, again, it will be very difficult for a beginner.
Here are some of the features of Autodesk Maya:
- as many as four modes of result visualization;
- the ability to use the same plugins to expand the already large functionality of the program;
- this set of tools is also more suitable for rendering characters and textures, so it works well with other programs;
- the program is very demanding on the computing power of the computer - it will not work everywhere.
Interesting: Autodesk Maya was used to develop several versions of the most popular football simulator FIFA. It was also used in the creation of a large number of famous games and films.

Rice. No. 7. Autodesk Maya
The trial period is exactly 20 days.
8.
Finally, we see a program that supports the Russian language at the official level.
In many of the past programs, it was possible to add plugins or patches that made the interface Russian. But Adobe Premiere can work in Russian even without any add-ons.
And this program has very rich functionality. If it were not for the advantages of many of the programs described above, Adobe Premiere could well claim first place in our TOP.
In this case, it is worth highlighting a very large set of built-in special effects, as well as tools for processing individual frames.
In addition to images, you can use videos as source material. If you combine all this, it will be possible to create a video in which cartoon characters will be present in ordinary life.
Other positive aspects of working with Adobe Premiere are:
- You can take almost any files as sources;
- a wide range of options for overlaying titles and plain text;
- ability to control sound and image color (you can change shades).

Rice. No. 8. Adobe Premiere
Adobe Premiere is free to use for 30 days - standard.
9.Modo
Again, you can create beautiful 3D effects as well as characters in Modo.
Here everything happens in the so-called elastic drawing mode. That is, you can stretch objects as much as you like, change their shape, and so on.
In addition, it is worth highlighting that with Modo you can draw both on a plane and in perspective. Rendering mode is also available. But the best thing here is the transformation of objects.
Other features of this product are:
- ample opportunities for modeling various surfaces;
- tools for UV processing;
- a large selection of built-in special effects, as well as the ability to create your own.

Rice. No. 9. Modo
You can try using Modo - there is a 30-day trial period. True, the activation procedure here is quite complicated and even incomprehensible.
In addition, the price of the full version is quite high. Some even decide not to use Modo because of these shortcomings. But you can and even should try.
10.
TVPaint Animation is great for 2D animation. This program simply does not imply the ability to work in volumetric space.
It seems that the developers decided to compensate for this shortcoming with a very large set of tools for creating 2D cartoons. There are a lot of brushes and paints, as well as all kinds of other tools.
Frame-by-frame and layer-by-layer processing is also supported. All this is also done very high quality.
TVPaint Animation features are:
- the background can be edited as you wish, including zooming out and zooming in;
- excellent engine for processing individual details of the overall image;
- The collection of effects is also very large.

Rice. No. 10. TVPaint Animation
Interestingly, this program is also free and does not have any trial period.
But instead, the developers decided to come up with something different. The fact is that when working with TVPaint Animation it is impossible to save. Yes, it simply does not have a save function.
In addition, depending on the set of tools, you will have to pay a certain amount (only the standard set is free). The minimum price for the paid version of TVPaint Animation is 500 euros. Very unusual.
Below you can see video instructions for using the best program in our TOP, Toon Boom Harmony.
Dedicated to his work, namely GSM technologies, new products and industry news, the author.