In some Microsoft Word documents you have to work with tables. Information in this form is better perceived and remembered. If it is small and takes up one sheet, then making a table in Word is easy. But what if it takes up several sheets?
When viewing material designed in this way, it is inconvenient to constantly return to the beginning to see what the data columns are called. In this article we will look at how to make a repeating table header in Word. That is, a row with column headings will appear on each page.
How to attach a header to each sheet
Let's transfer the names for the columns using this example.
To repeat them on each new sheet, highlight the corresponding line. Then go to the tab "Working with tables" .

After this, the column names will be repeated on each new sheet.

Making a second header line on each page
If your column names are indicated in several lines, for example, the main name of all columns and the name of each separately, or the name and their numbering, then you may need to transfer not the first line, but the second or third, to subsequent sheets.
In the example I will show how to transfer the second row. But if you need to duplicate the headers of the third or any other, then everything is done in exactly the same way.

Place the cursor in the last right cell on the first page and press “Ctrl+Enter” to divide the table into two parts.

On the “Home” tab, you can click on the button "Show all characters", and then at the end of the first sheet you will see the inscription "Page break".
If your last cell on the first page was large, 8-10 lines long, then after inserting a break, there will be a lot of free space on the first page. To prevent this from happening, you need to add one more line. I wrote how to do this in the article on how to write a continuation of a table in Word. Follow the link and read method 2.


Go to the second page and place your cursor in the top left cell. Then you need to paste what we copied earlier - press “Ctrl+V”.

The title will be added on the second sheet.

Now we need to duplicate it. Select the added row, open the “Layout” tab and in the “Data” group click "Repeat Header Rows".

This is how you can transfer headers, but not all, but only those that are needed.
Please note that if you want to change the header, then you need to do this with the one you duplicated. Duplicated ones, that is, those that are repeated, cannot be changed.

How to remove duplicate table headers
If you have a table in your document with the column names moved to the second page, and you need to remove them so that they appear once at the beginning, then do the following.
Select the first header that is duplicated, not the duplicated one (by the way, you won’t be able to select them). Then open the tab "Working with tables"– “Layout” and in the “Data” group click on the button "Repeat Header Rows".
After this, the titles on all other pages will be removed.

That's all. We looked at how to duplicate the header for table columns in Word. If you have any questions, write them in the comments.
Rate this article:And other additional elements are sometimes easier not to draw, but to add using the tab Layout. In order for this tab to appear, you need to place the cursor anywhere in the table. In the tab Layout there is a group of teams Rows and Columns . And in this group there are teams Insert top, bottom, left and right . This is how you can add rows and columns to any place in the table, including a header. And then merge and split cells using a group of commands Merge .
But all this, in principle, is quite obvious, and becomes clear once you carefully examine this tab. Let's now look at less obvious things.
Repeat table header on every page in Word 2007
 If your table is very large, or is located in such a place that it does not fit on one page, its rows go to the next page. It is convenient to make sure that the header is repeated all the time, no matter how many pages the table stretches over.
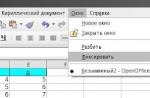
To do this, you just need to select the header, go to the tab Layout, and select the command there Data - Repeat Header Rows .
Inserting formulas into tables in Word 2007
In this case, you place the cursor in the cell where the amount will be, go to the tab Layout, and select a team Data - Formula .
A window will appear Formula, in which in the field Formula the expression will be written =SUM(ABOVE), that is, the sum of those numbers that are in the cell above. Click OK and the amount will be entered.
If you change any source data, the amount will not change automatically, unlike the formulas in P. To change the total value, you need to update it.
To update, place the cursor in the middle of the final number, press the right key, and select the item Update field .
Sometimes you need to calculate something other than the sum, such as the average. To do this, just go to the tab Layout - Data - Formula , clean the window Formula expression after the equal sign, in the field Insert function find the item AVERAGE, and click on it. In field Formula the following expression will appear: =AVERAGE(). Now you need to write in parentheses the average of which will be calculated. In parentheses you write ABOVE. You will get the following formula: =AVERAGE(ABOVE). After this, the average value of all numbers located above will appear in the cell.
You can also add various arithmetic operations of your own to the formulas. Let's say you want to not only calculate the amount, but also add the number 10000 to it, multiply all this by 2, and then raise it to the power of 1.05. This is all quite easy to do. First go to Layout - Data - Formula
and then into the field Formula you write: =((SUM(ABOVE)+10000)*2)^1.05
The result will appear in front of you. Just do not forget to write the formula correctly, in particular the parentheses, otherwise the formula will generate an error.
Numbering cells in a Word 2007 table
In many tables, the first column is reserved for numbering. In the header they usually write № , or No., and the numbers 1, 2, 3 and so on go down. Usually numbers are set manually. But imagine the situation - you insert a new row into the middle of the table. In this case, you will have to copy all the cells below in the column and paste them in a new place so that the numbering moves up. If you constantly adjust the table in this way, it will not be very convenient for you. It is better to put down automatic numbering.
Select all the cells in which you want to see automatic numbering. If these cells already have numbers, delete them.
 Then go to the tab Home — Paragraph
, and press the button Numbering. This button is also used to create a numbered list.
Then go to the tab Home — Paragraph
, and press the button Numbering. This button is also used to create a numbered list.
The numbering will be created and will be automatically adjusted as new lines are added.
If you don’t like the numbering format, and by default it is a number with a dot, place the cursor in any cell with numbering, go to the tab home, click on the drop-down list to the right of the button Numbering, and select another format option. If you don’t find what you need there, click on the item Define new number format , and you prescribe the format that suits you. For example, you can remove the period after the number. The format will then automatically change in all cells.
Sometimes the numbers are pressed to the right edge of the cells, which is not very nice. This means you need to change the indents. To do this, right-click on any number, and all numbers are highlighted in gray. Select the item from the drop-down menu Change list indentation , and in the field Number position change the value to a lower value. See the result. If you don’t like it, change the value again until the numbers are the way you need.
Sorting rows in a Word 2007 table
Sometimes you need to sort the rows in a table so that in some column the data is in alphabetical order. Naturally, the data in other columns should remain consistent. Sorting data is a fairly simple matter. First, select the data that needs to be sorted in the desired column. After that, go to the tab Layout, and select a team Data - Sorting . The data will be sorted.
Video about the necessary little things when working with a table in Word 2007
You can get more detailed information in the “All courses” and “Utilities” sections, which can be accessed through the top menu of the site. In these sections, articles are grouped by topic into blocks containing the most detailed (as far as possible) information on various topics.
You can also subscribe to the blog and learn about all new articles.
It does not take a lot of time. Just click on the link below:
In this lesson I will tell you how to attach a header to each Excel page. This may be necessary if you are working with large tables. Usually, when they are printed, documents with a large number of pages are produced, and in order to make it convenient to work with them, it is necessary to save the table header on each sheet.
Excel has a built-in feature to place a header on all pages of a document. Open the table and go to the “Page Layout” tab and click on the “Print Headings” icon.
The Page Setup window opens. Here, on the “Sheet” tab in the “Print on each page” settings block, we need to indicate which rows and/or columns need to be continuous.

Click on the special icon in the “End-to-end rows” field and select the range in the table. You can also select "End-to-end columns". After selecting the rows, press the Enter key to return to the sheet tab.


At the end, click the “Ok” button. Now, if you print the table, the specified header will be on all pages.
It is worth noting that if in the future you have to delete or add new rows in the table, then when printed, the header will be in the same place at the beginning of each sheet.
In this article I will tell you how remove duplicates in Excel. We will consider the simplest standard method, which has appeared since Excel 2007.
In this lesson I will tell you how to concatenate date and text in Excel. Let's say you have several cells, one of which is a date. It is necessary to obtain a cell in which the record “Agreement No. 150 dated December 28, 2015” will be stored, provided that the type of document, its number and date will be stored in different cells.
In today's lesson I will tell you how to insert a formula in Word. There are actually several ways to do this and I will try to cover them all if possible.
In this lesson I will tell you how to make a drop-down list in Excel. Basically, it is created for one purpose - to limit the possibility of entering data to a certain list. For example, when there is a special cell in the table in which you mark which department this or that employee belongs to. This list is always the same. It is much more convenient to select a department from the list than to enter it manually each time or copy it from other cells.
In previous lessons, we described how to pin areas for convenient viewing of large documents when scrolling vertically or horizontally. As a rule, table row and column headers are fixed. But the question involuntarily arises: “How can Excel fix the table header when printing?”
In the “page settings” you can configure the printing of the table header on each page. So that the table can be just as conveniently viewed on printed sheets of paper. After all, the lack of table headings on each sheet significantly complicates the readability of printed data.
Print a table header on every Excel page
After changing these settings, you can print a table header on each page. The result of these parameters can be seen when previewing the document or immediately after it is output to the printer.
Excel has more options for customizing document printing than Word.
We continue to study working with tables inWord. In this article we will look at how to make a repeating table header in Word.
Let us have a table in Word that lists the countries of the world by population. In the first line we make a table header, that is table title. We make a title in the Word table same font, same size, just make it bold and add a light gray fill. Now our table looks like this:
How to make a header in a Word table - Header in a Word table
Our table is very long and goes to the next page, so we need make a repeating table header in Word. Under no circumstances should you copy the title (header) of the table and paste it into the first line on each subsequent page. In order to move the table header, you just need to select the first hundredth of our table, go to the “Layout” tab and select “Repeat header rows”

How to make a header in a Word table - Repeat header rows in a table
Now the table header is automatically repeated on each page.

How to make a header in a Word table - Moving a table header
Well, now you know that there is nothing difficult to make a table header in Word.