Have you ever decided to install Minecraft, but don't know where to start? We offer a detailed guide, which includes both the basics and advanced settings.
First of all, you need to act depending on which operating system you have installed.

In this case, the main thing is to have, however, it is also needed just to work in .
In fact, you can download the game in the Windows Store itself, but, of course, not for free. TO
Alternatively, you can go to the official Minecraft website and download from there.
And again, this will cost you at least 24 euros, well, by no means small money.
There is an alternative way. To do this, you need to register on Mojang:
- At the bottom there should be a note that all Windows/Mac users get Minecraft: Windows 10 Edition Beta for free.
- Just click on the button below this alert - "claim your free copy".
- Next, you need to link your Microsoft account to Mojang.
- Then feel free to go to the Store and install the game.
Installing Minecraft on Windows 10
Installing Minecraft: All the ways and solutions to errors
Minecraft installation on Windows 7/XP

This is a somewhat more complicated question, although quite a few still use the Seven.
It's best to install the latest version first.
Otherwise, after installation, you may encounter such a problem as knocking out the game, and with a characteristic inscription: Соuld not find the main class: net.minecraft.MinecraftLauncher.Program will ехit.
The next step is to download the installation client from the internet.
The downloaded archive should contain a launcher, with the help of which the installation is carried out. Then an important step is to create a .minecraft folder at the following address:
- For Windows 7: C:/Users/User name/AppData/Roaming
- For Windows XP: C:/Documents and Settings/"User name"/Application Data/.
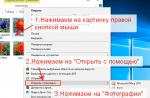
Sometimes users are lost, where is this . The problem is that it is often hidden.
To still get into it, you need to add the necessary line in the panel.

However, no further difficulties should arise.

For versions 1.5.2 and higher, there is a fairly quick and convenient way. Step by step it looks like this:
- Install TLauncher. This program is easy to install and helps to work with Forge.
- Decide on the mod you want to install.
- Then go to the launcher and select the version of Forge. Then click "install".
- Then choose "open". You will be given the entire folder with game files, but you need one.
- Find the "mods" folder (if you don't see it, try creating a folder with the same name in the game folder). Then copy the mod. For the game to work correctly, it must have the .jar or .zip extension. If the mod is archived in .rar, you need to unpack it.
- Then we go back to Forge. Installed mods should be displayed there. If you don't see them, it's most likely that something was installed incorrectly, and no extra features were added to the game.
If there are mods, then you can safely play.
If you have a lower version 1.6.2
The local IP address can be dynamic, but with a static one you would have less problems.
After entering the IP address of the server, the matter remains small: just click the "connect to the server" button.
The easiest way to install the server is through the P2PLauncher program.
It works on the basis of a peer-to-peer network. Throw it in the game directory and click a few times.
Then enter the name of the server, room. Click "start server".
Thus, he gets a server that other players can join.