In today's article, you can read the method on how to fix desktop slideshow not working on Windows 10 system. In case you are facing the same problem, then we recommend that you check this article. Desktop slideshow is one of the best features of Windows operating system which is also available in the latest Windows operating system i.e. Windows 10. When this feature is enabled, it automatically changes the desktop background or wallpaper at a given time interval. Windows 10 users can enable and customize this feature by going to Application Settings -> Personalization -> Background. Under the background heading, click on the drop-down list and select the slideshow option to enable the desktop slideshow feature.
Sometimes, the desktop slideshow stops and does not work automatically on Windows 10. This means that the system has stopped changing the desktop background or wallpaper at a certain time interval, even if the slideshow feature is enabled. Many users are already complaining about this error when the slideshow does not work on the desktop. In case the desktop slideshow feature is not working on your Windows 10 computer; you can try the following fixes:
Check that the desktop slideshow turns on (method one)
The desktop slideshow feature will only work if it is enabled. To confirm this thing whether the slideshow feature is enabled or not, follow these steps:
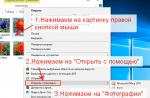
1. You need to right-click on an empty space on the desktop and click on Personalization in the context menu.
In addition, you can click on the icon WIN+I keys to launch the Settings -> Personalization application.
2. In personalization, select the background tab, which is selected by default when you launch personalization settings.
3. In the right panel, under the background, make sure the slideshow option is enabled. If not, then click on the drop-down menu and select one of the slideshow options and this will solve the problem.
In case the slideshow has already been selected and the desktop slideshow feature is still not working, follow the method described below in the article.
Allow slideshow when on battery power (method two)
By default, when the laptop is running on battery power, the slideshow feature does not work. This is to save battery power and increase the battery reserve of the laptop. In other words, this means that the slideshow feature will not work if it is using the laptop's battery.
This may be the reason why the slideshow feature is not working even if the feature is enabled. So if you don't care about battery life, then you can also enable the desktop slideshow feature when your laptop is running on battery. Here's what to do:
1. Right-click on an empty space on your desktop, and then click Personalize.
2. For personalization, select a background. In the right pane, find the option labeled Allow slideshows when the laptop is on battery power. Enable this option to enjoy the slideshow as your desktop background when running on battery power.

There is another way to enable this feature, here's what you need to do:
1. You need to enter change power plan in Windows 10 through the Start menu in the search bar. When you see the same option in the results, click the button to run it.
2. Here in this window you need to look for “change advanced power settings” and click on it.
3. In the power menu, additional window options will appear, you need to look at the additional desktop settings and expand it into a slide show -> on battery (if available). Here you can change the value of the function and enable it.

If it shows on battery (pause), then you need to press pause and make a selection from the drop-down menu.
Find out the selected folder for the slide show (method three)
As you know that when you enable the slideshow feature, the system will ask you to select a folder that has all the photos that you want to use for the desktop slideshow feature.
In case the folder you have selected for the slideshow contains only one photo, then the slideshow feature will not work because to use this feature from the selected folder, it must have at least two or more objects.
Uninstall recently installed desktop customization software (Method four)
If none of the above methods work, then it may be due to recently installed third-party software and its configuration.
In case you have recently installed any rainmeter desktop customization software or related software and then uninstalled it from your computer, reboot your PC and then check whether the desktop slideshow feature is working or not.
Restore Windows 10 to a previous date (method five)
In case the desktop slideshow feature is not working flawlessly until now; then you can fix this problem by up to an earlier date. All you have to do is restore your computer to a date when the desktop slideshow feature was working.
Here are some fixes and methods that you can use to fix the desktop slideshow feature not working on Windows 10 system. Why don't you give these methods a try and let us know which method works better for you?